Device Recovery
About
All device configurations are stored in flexiManage. As long as you haven’t deleted a device, you can easily retrieve and use its original settings.
This procedure is typically employed for software-related issues. However, it may also be used in cases where the hard drive fails. Replacing the hard drive while keeping the system UUID unchanged (which flexiManage and recovery rely on) allows for the use of this recovery process. Thus, it can be used in scenarios such as wiped hard drives, bad system updates, or hard drive failure. It’s important to note that in any other hardware-related cases, such as a motherboard failure, users should utilize the Restore feature instead of the Recovery feature.
While it’s normal for a device to occasionally disconnect from flexiManage due to internet problems, sometimes the device’s software prevents flexiWAN from running. In such cases, you’ll need to perform a recovery to bring back the device’s settings from flexiManage to the newly recovered device.
The guide covers these steps:
Identifying a problematic device.
Preparing the device for recovery.
Carrying out the recovery process.
Note
Device Recovery intended to restore flexiWAN configuration to an existing device. When replacing current device with a new one, please use Device Replacement process instead.
Recovery vs Replacement
The recovery functionality within FlexiWAN relies on the device UUID (Universally Unique Identifier) remaining consistent. This assumption is based on the understanding that the device hardware, with the exception of the hard drive replacement (which does not alter the board UUID), remains unchanged.
It is crucial to emphasize that if the device undergoes a complete hardware replacement, an entirely new set of hardware components, including the motherboard, is introduced. In such cases, it is highly recommended to utilize the Device Replacement feature instead of attempting the recovery process. This ensures a smooth and effective restoration of the device settings in alignment with the new hardware configuration.
Prerequisites
To start the recovery process for a device, provisioning the device is the initial step, which can be done through the flexiEdge UI or using the CLI. This is the initial configuration which is the same as deploying brand new flexiEdge device.
It is important to note that the device should have an active internet connection to establish contact with flexiManage, and prior to initiating the recovery, successful passage of the system checker is a prerequisite. It’s worth highlighting that if the device previously utilized PPPoE, the PPPoE connection must first be established via the flexiEdge UI before embarking on the recovery procedure.
Identifying the issue
In the context of this guide, we will focus on addressing situations where a device encounters a significant problem, specifically a failed hard drive that has left the device unable to boot. This recovery process is also applicable when the device faces any other software-related issues that render it non-bootable.
The problem device is no longer appearing as connected in flexiManage.
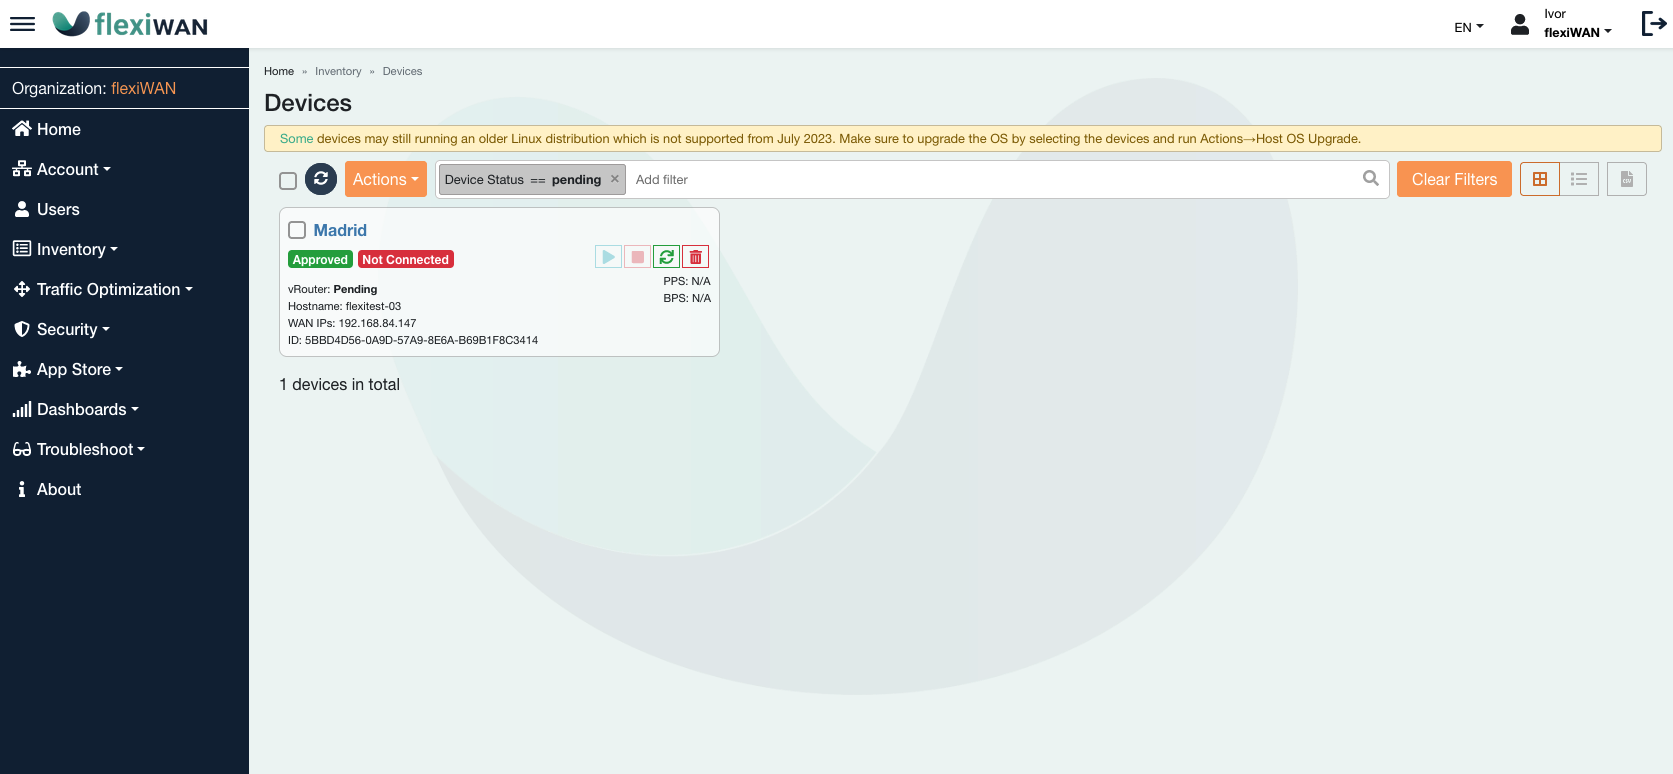
While it is perfectly normal for a device to sometimes disconnect to flexiManage due internet connectivity issues, device suffering issue such as hard drive failure will not be able reconnect without user intervention. In cases like such, best way to proceed is to reinstall flexiWAN on the device.
Preparing the device for recovery
Once the problematic device has been identified and the faulty hardware component has been repaired, the subsequent step involves reinstalling flexiWAN on the device. Installation guides for flexiWAN can be found in the documentation pages.
When you’re reinstalling flexiWAN on the device, it’s crucial to run the system checker first. Sometimes, the system checker may find an invalid UUID (a unique identifier) and fix it automatically. This is normal during a clean installation. However, it’s vital to understand that for the recovery process to work correctly, the device’s UUID must match the one from the device registered with flexiManage. So, make sure the device UUID matches the UUID registered in flexiManage.
In the case of UUID mismatch, agent.log will show the following error:
FwAgent: _mark_connection_failure: Handshake status 404 Not found
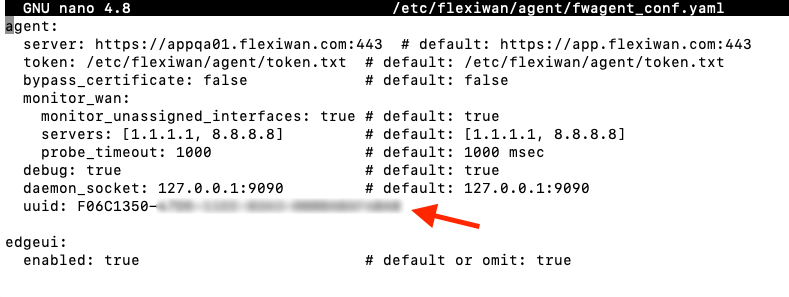
If this situation arises, go to the path /etc/flexiwan/agent/fwagent_conf.yaml and insert a line containing the UUID that corresponds to the UUID of the device registered in flexiManage. You can locate the UUID under the General tab within the device settings.
For the purposes of this guide, we assume that the user has successfully reinstalled flexiWAN and completed the initial configuration through the flexiEdge UI or console / ssh, thereby ensuring that the device has an internet connection.
Once the device is working and with active internet connection, connect to it using SSH or serial console.
Warning
Crucial note: Following the reinstallation of flexiWAN, it is imperative that you do not add the Token from flexiManage. Doing so can result in the device being registered as a different device or encountering connectivity issues with flexiManage.
Recovery process
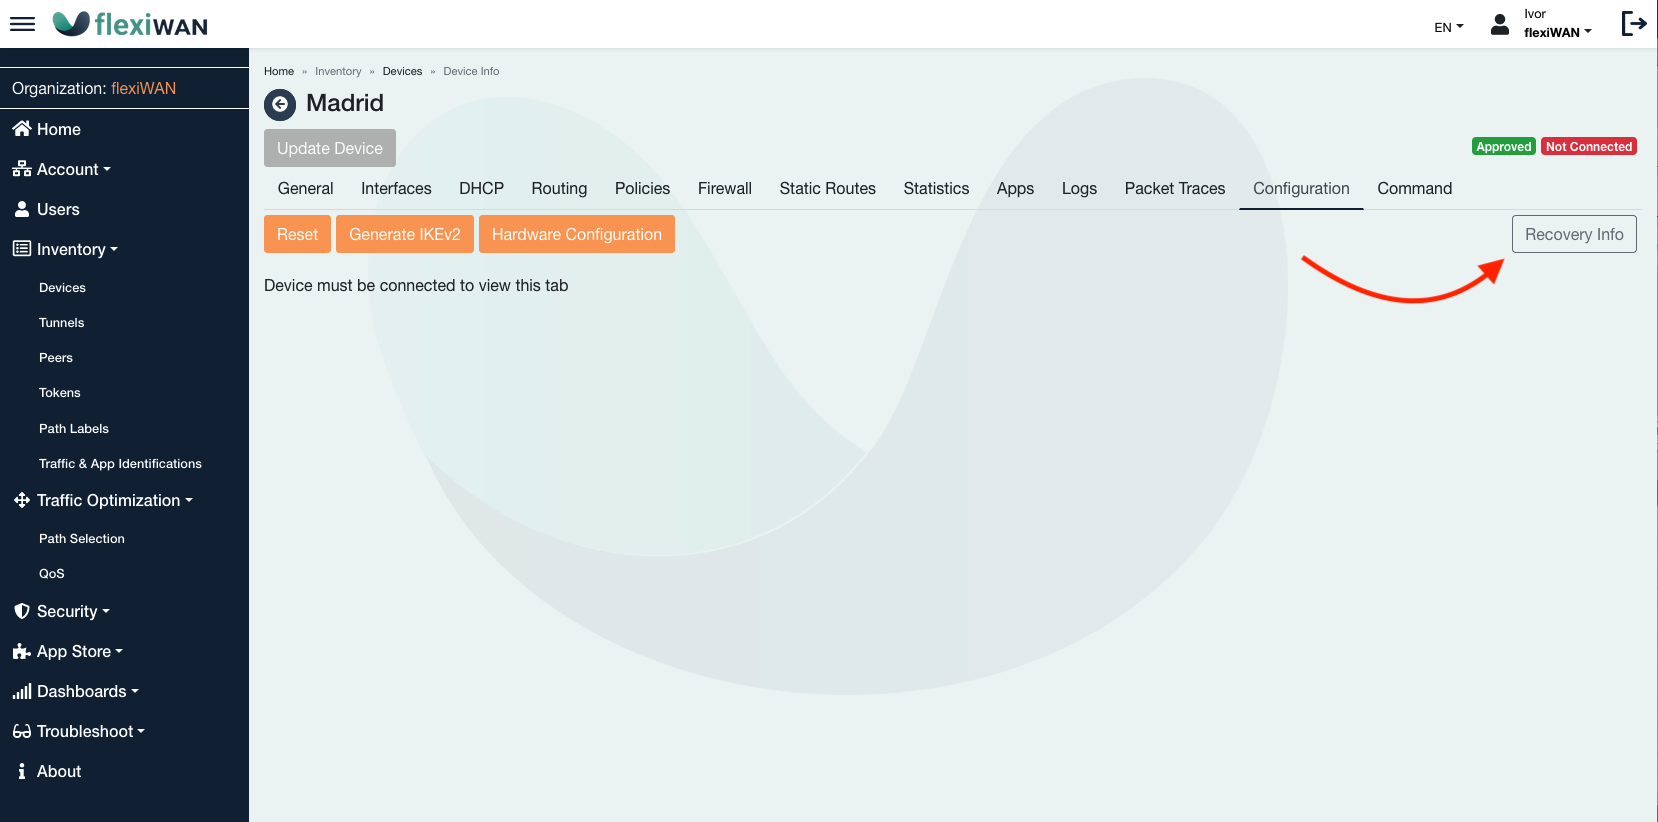
After repairing the device and successfully reinstalling flexiWAN, ensuring it has an active internet connection, proceed to flexiManage and access the device settings. Verify that the device is not currently linked to flexiManage, and then click on the Configuration tab within its settings.
Copy or save the information from the first step of the popup window.
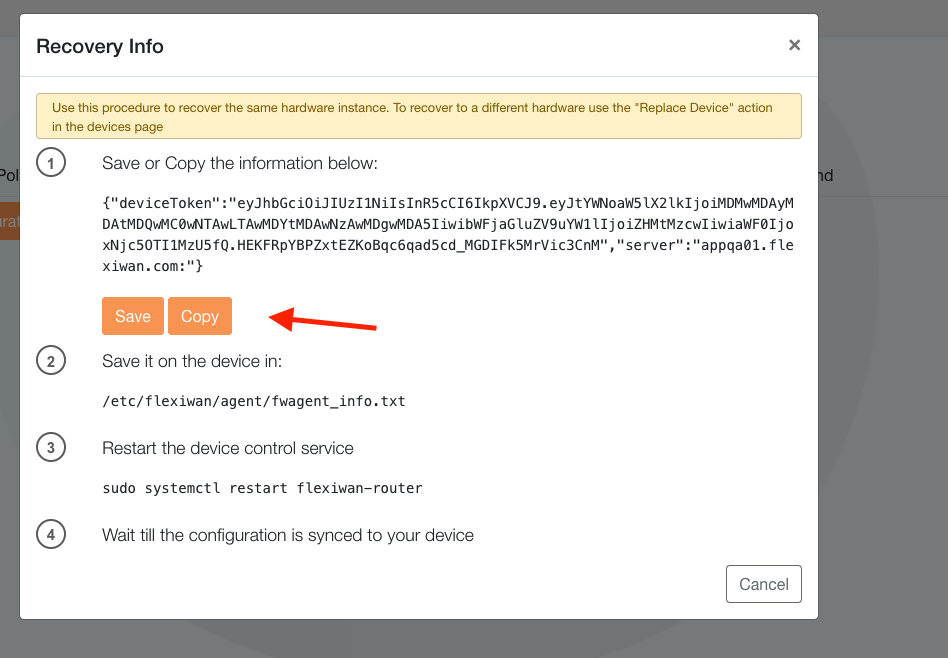
Next switch to the device serial console or ssh and open /etc/flexiwan/agent/fwagent_info.txt using vi or nano and paste the token copied from the previous section.
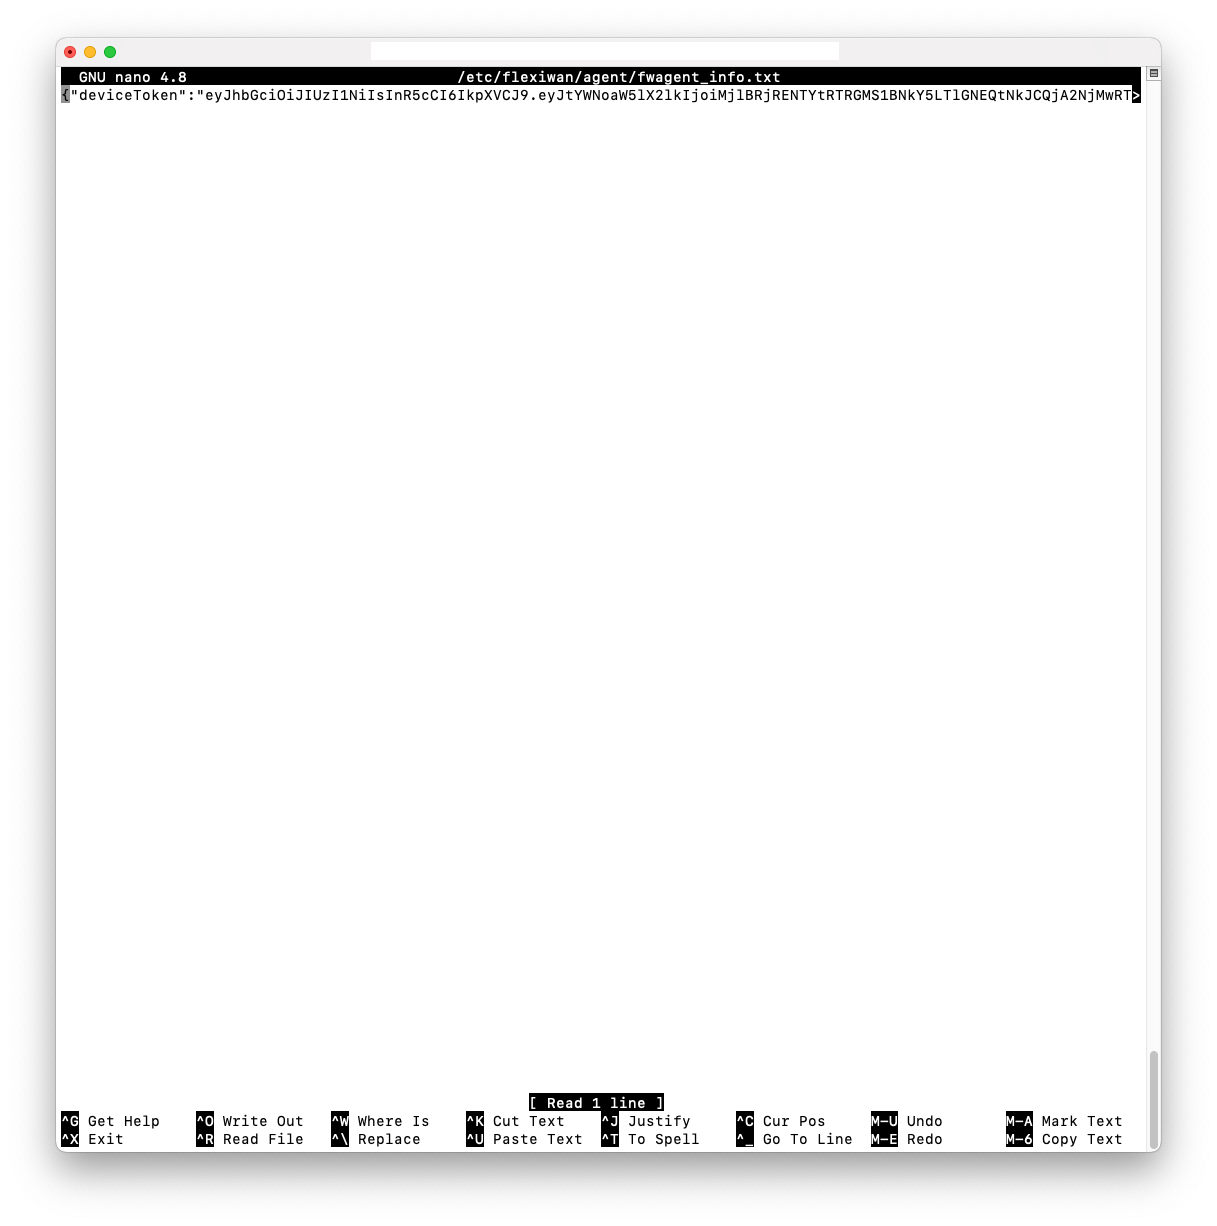
Make sure to save the token and then run the following command to restart the device control service.
sudo systemctl restart flexiwan-router
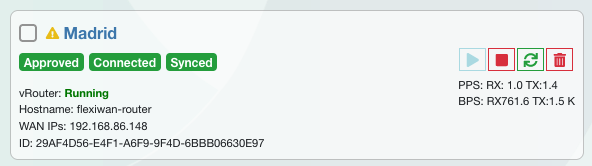
After a few moments the device should show up online and syncing in flexiManage.

Wait for the sync to complete and confirm green Synced status.
Finally run the device to complete the recovery process and start using it again.
That’s it, the device has now been recovered and ready to be used again.