flexiEdge UI
flexiWAN offers a local web interface for initial configuration and troubleshooting. flexiEdge UI is enabled by default on all interfaces and it can be accessed using device IP and port 8080. flexiEdge UI can only be accessed if the device has an active network interface.
Example: HTTP://192.168.100.10:8080/
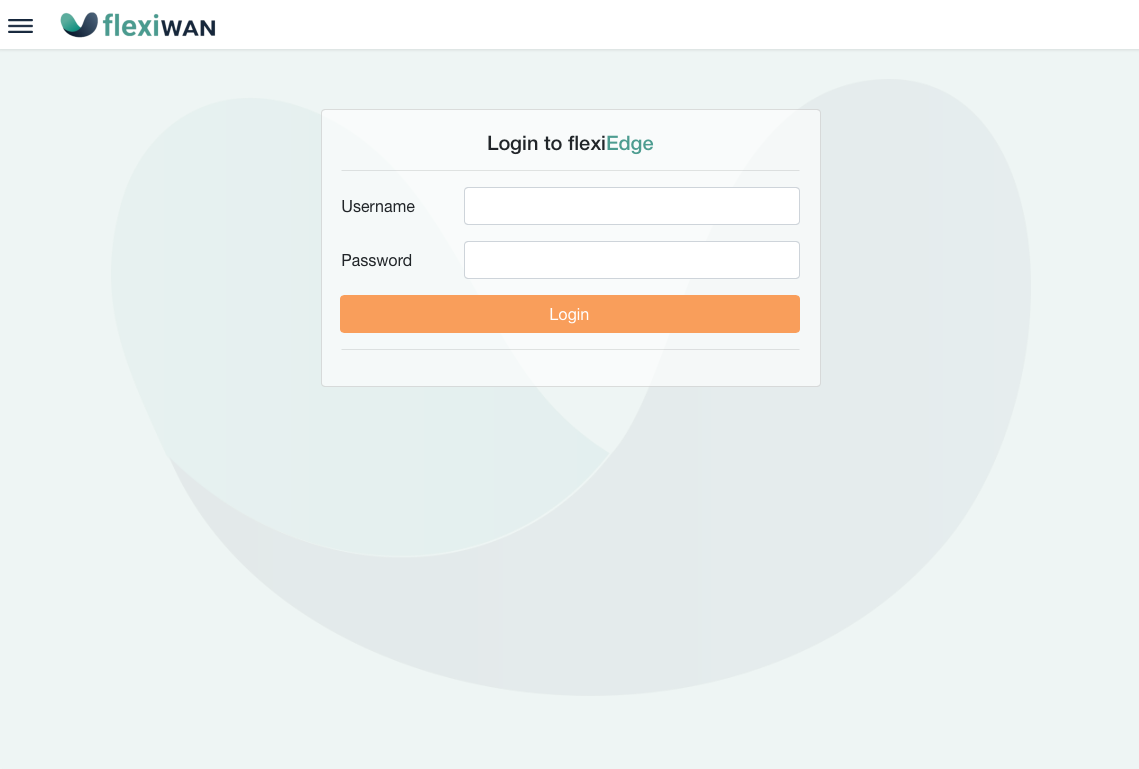
After opening the flexiEdge UI page, enter Linux username and password.
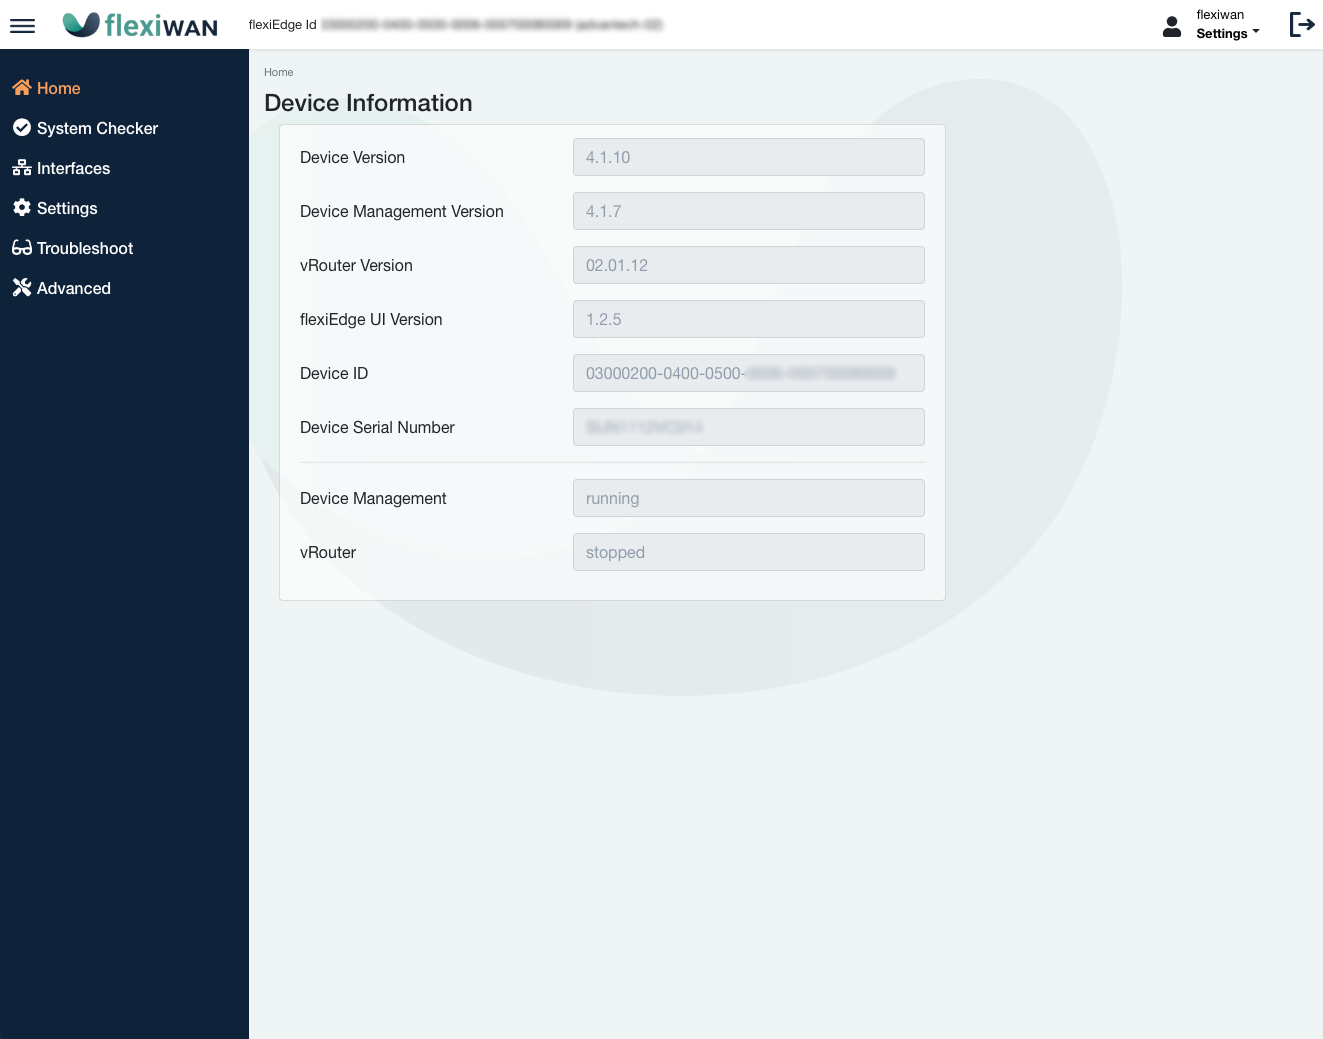
Upon logging in with credentials, Home page will display device information and status. From the sidebar additional options can be accessed.
After deploying flexiWAN, post-installation steps can be completed via flexiEdge UI. The sidebar follows post-installation configuration flow:
System Checker - running system checker verifies your device can run flexiWAN
Interfaces - Configuring network interfaces
Settings - inserting token to connect the device to your flexiManage account.
After completing all three steps the device will be connected to your flexiManage account and waiting for approval.
Running system checker
System checker is a post-installation tool which verifies system requirements and fixes software configuration errors.
Click on System Checker page and run it to check if the system meets the requirements.
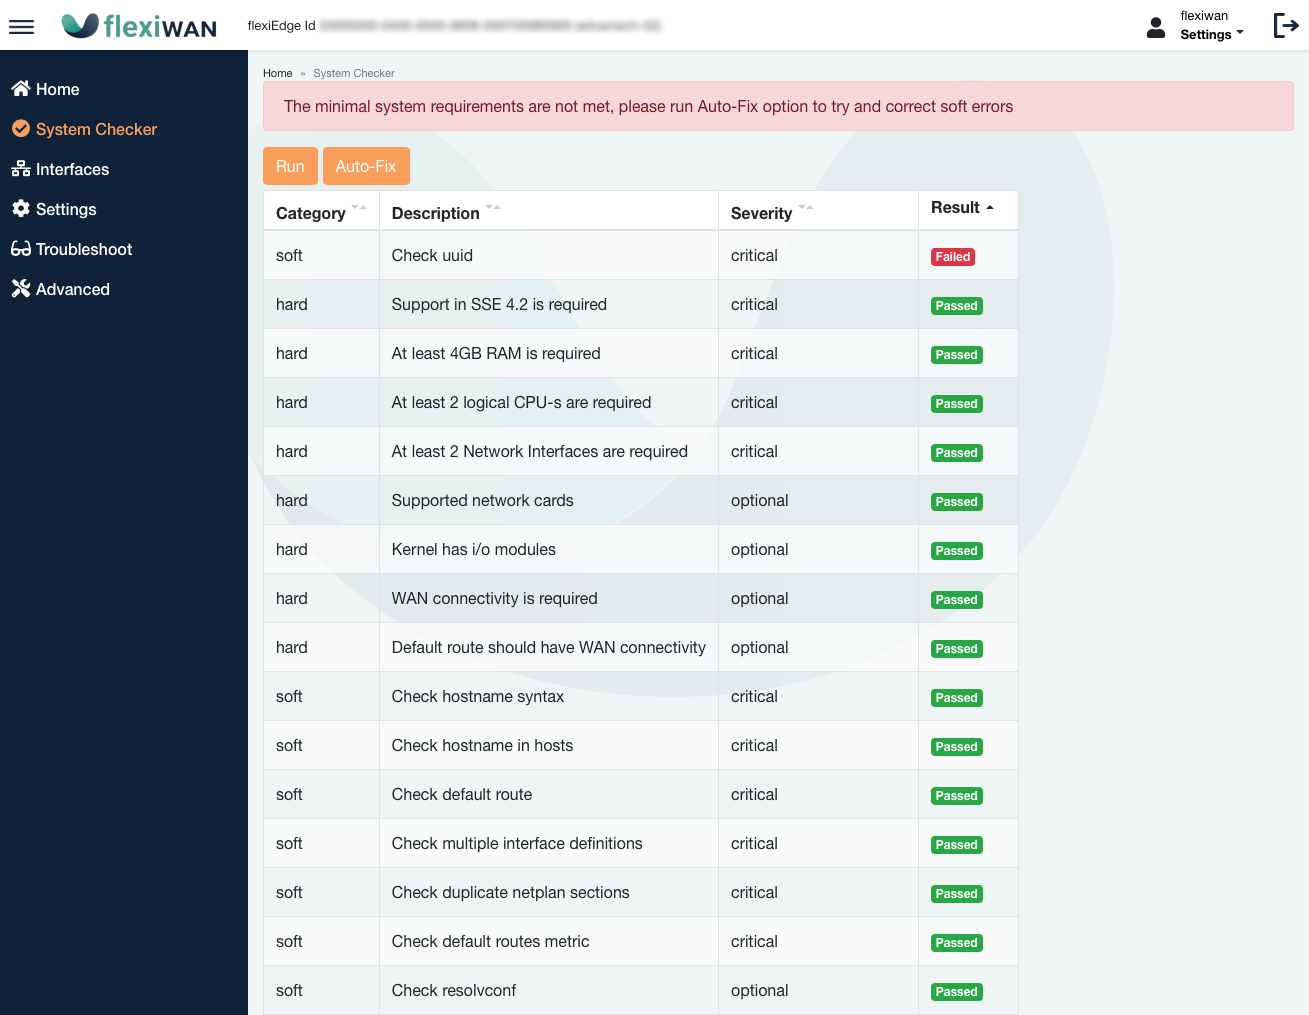
If installed on supported hardware, in most cases there will only be “soft” failures which can be fixed by clicking on “Auto-fix”:
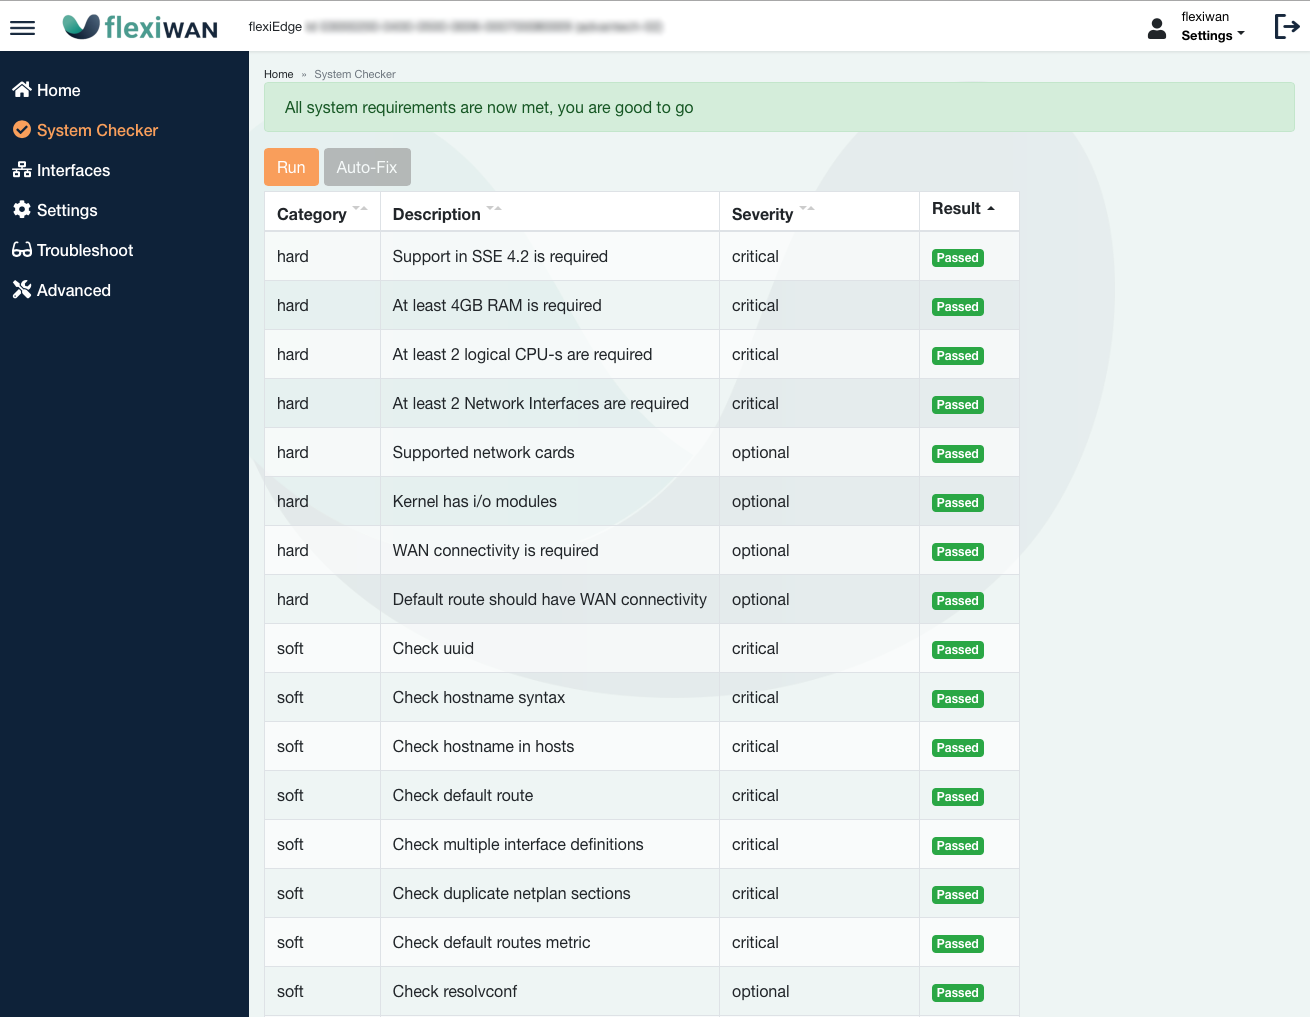
Confirm the output now says system requirements are met and navigate to the interfaces page.
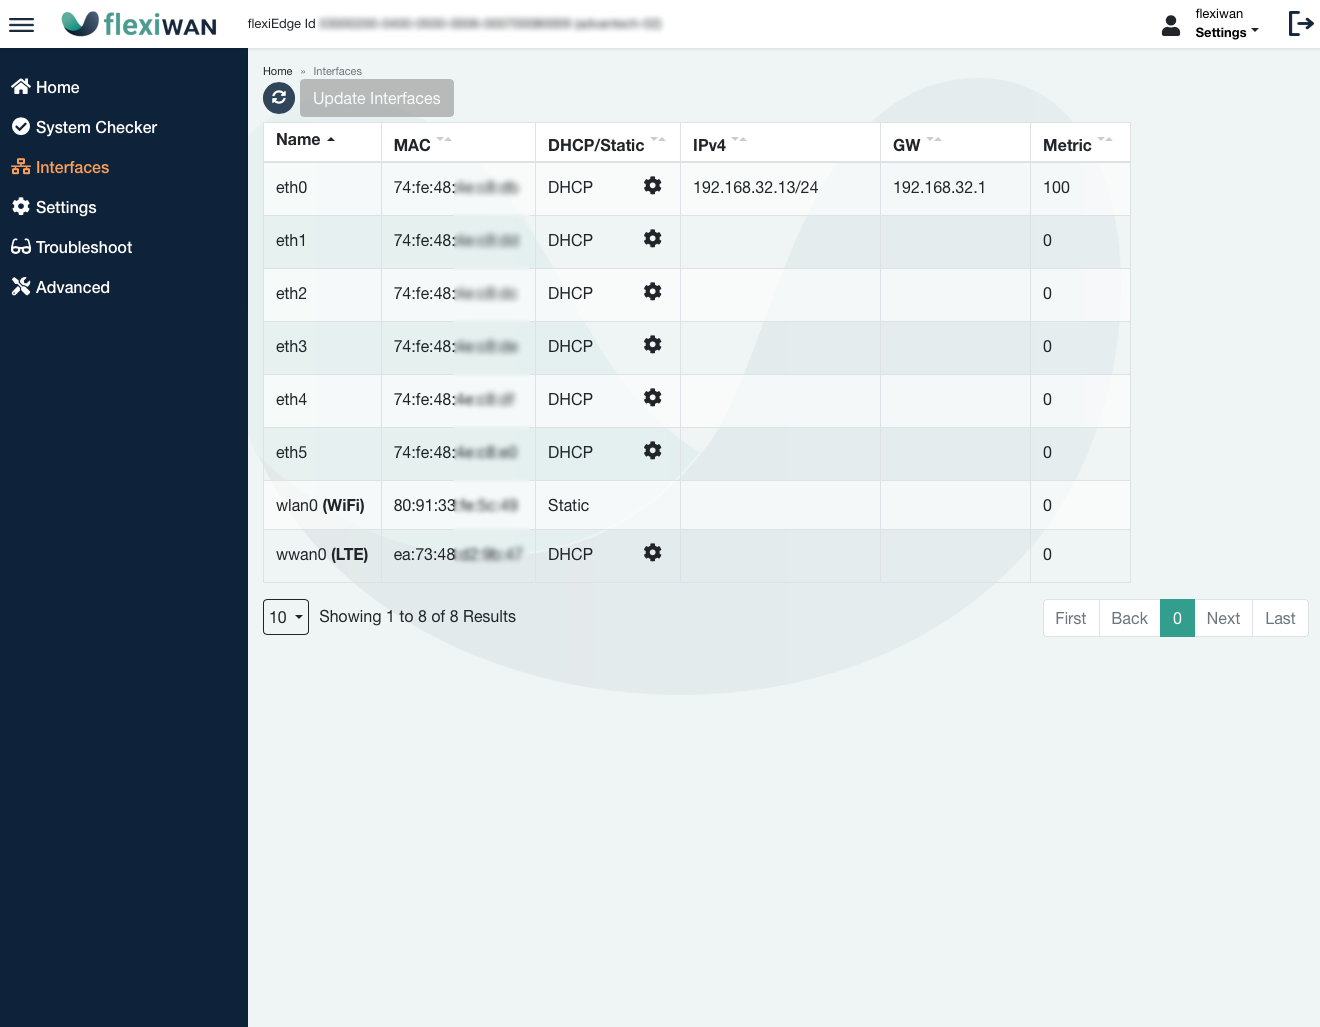
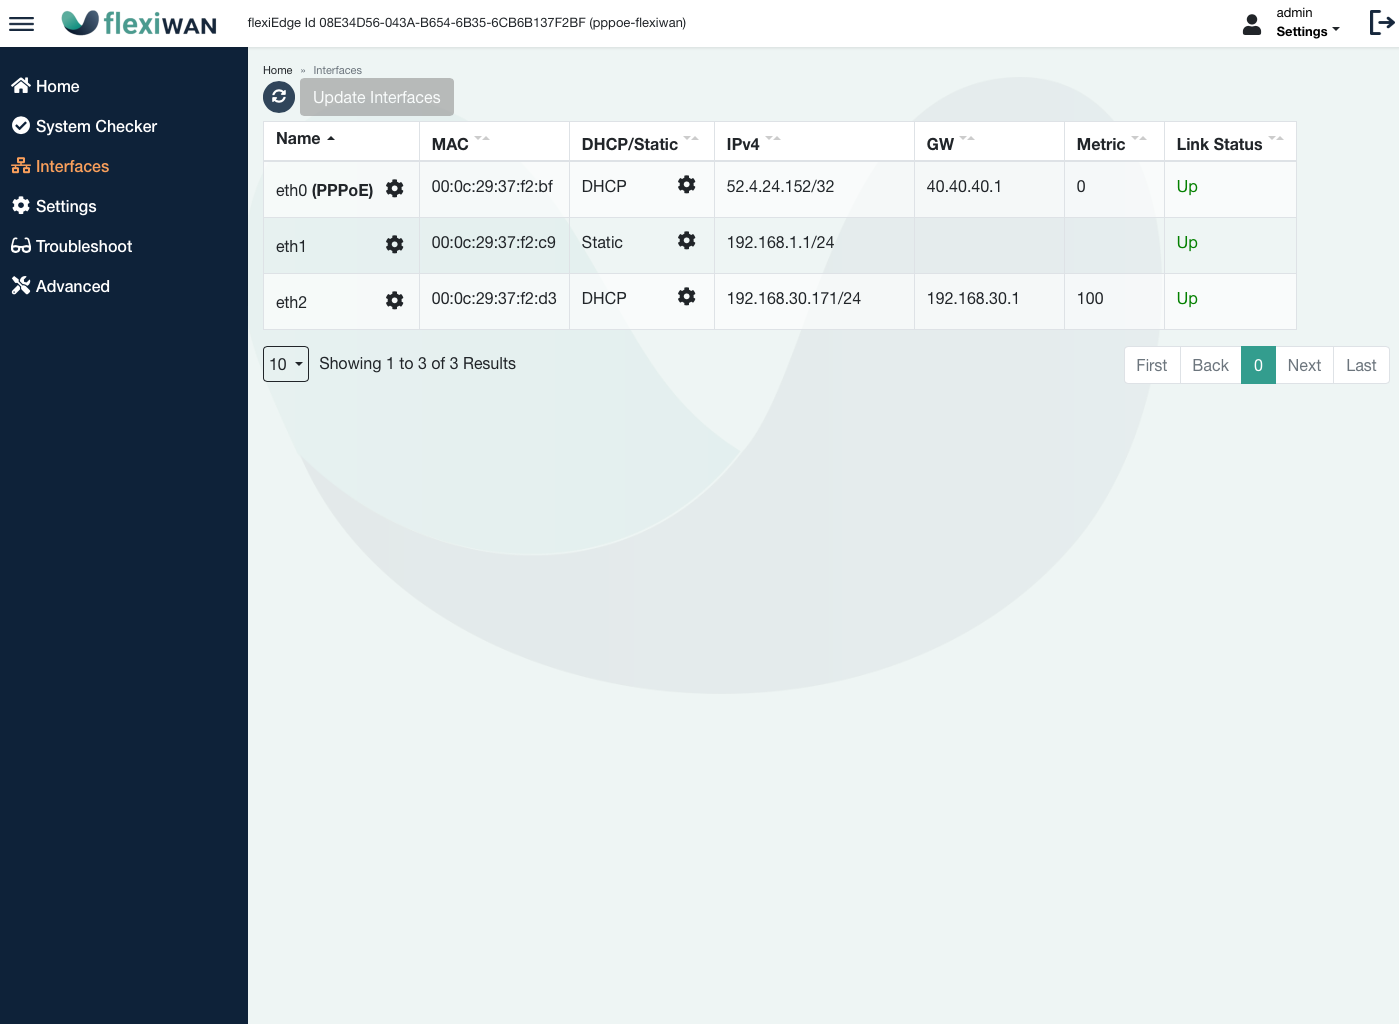
Network interfaces configuration
On the following page network interfaces can be viewed or configured. At this point only wired interfaces can be configured while WiFi or LTE interfaces can be configured through flexiManage.
Note
flexiWAN relies on netplan for interfaces configuration. It is recommended to configure WAN and LAN wired interfaces prior to adding the device to flexiManage for recovery purpuses. This way the device is reachable via configured interfaces even when flexiWAN is not running.
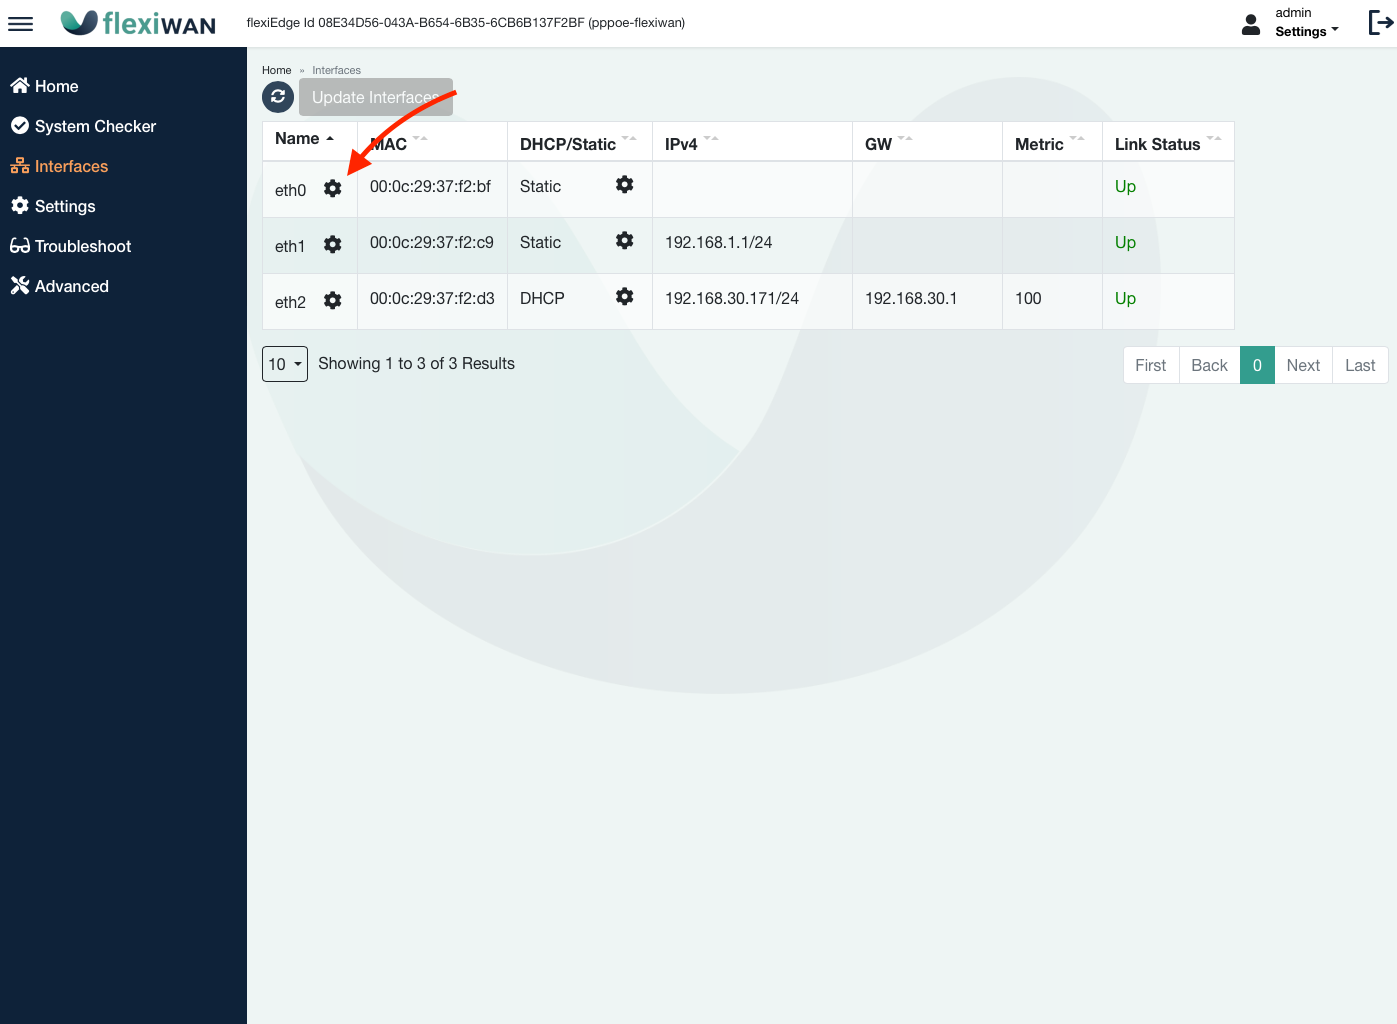
Configuring PPPoE
PPPoE can be configured directly from the interfaces page. Simply click on the settings icon next to interface name which will open PPPoE configuraton page.
From the PPPoE configuration page enable the interface and enter the credentials from PPPoE provider and click save. Optionally set custom DNS.
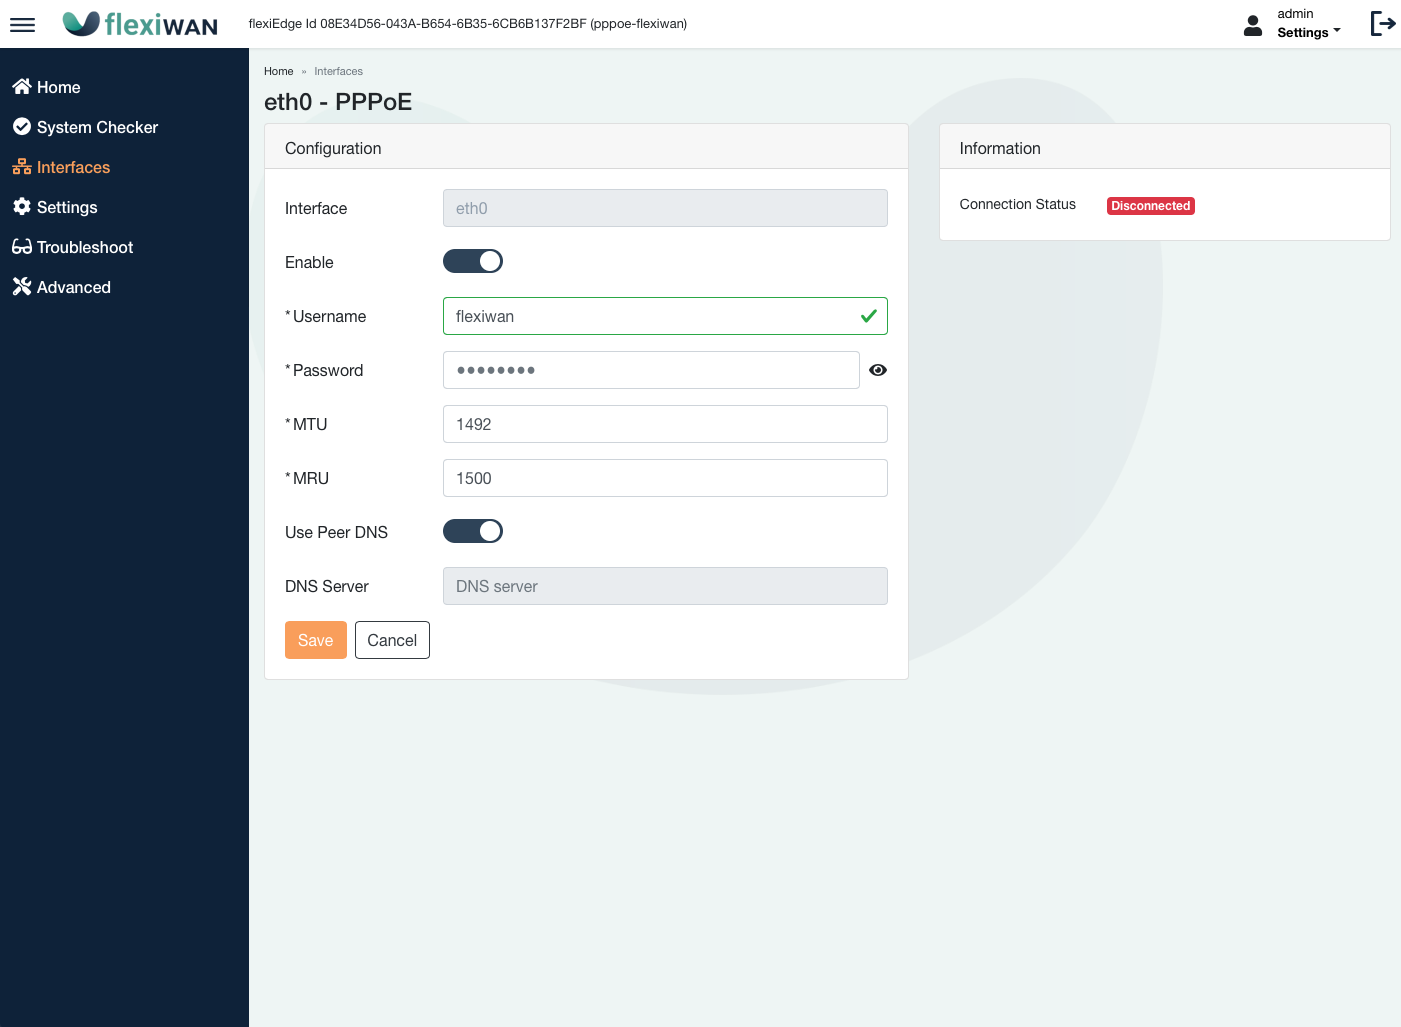
Once PPPoE is configured, wait for a few moments until the page shows PPPoE connection established.
After configuring the network interfaces move to the next and final step, click S ettings section from sidebar.
Note
Please note PPPoE can only be provisioned from flexiEdgeUI and its parameters cannot be modified from flexiManage.
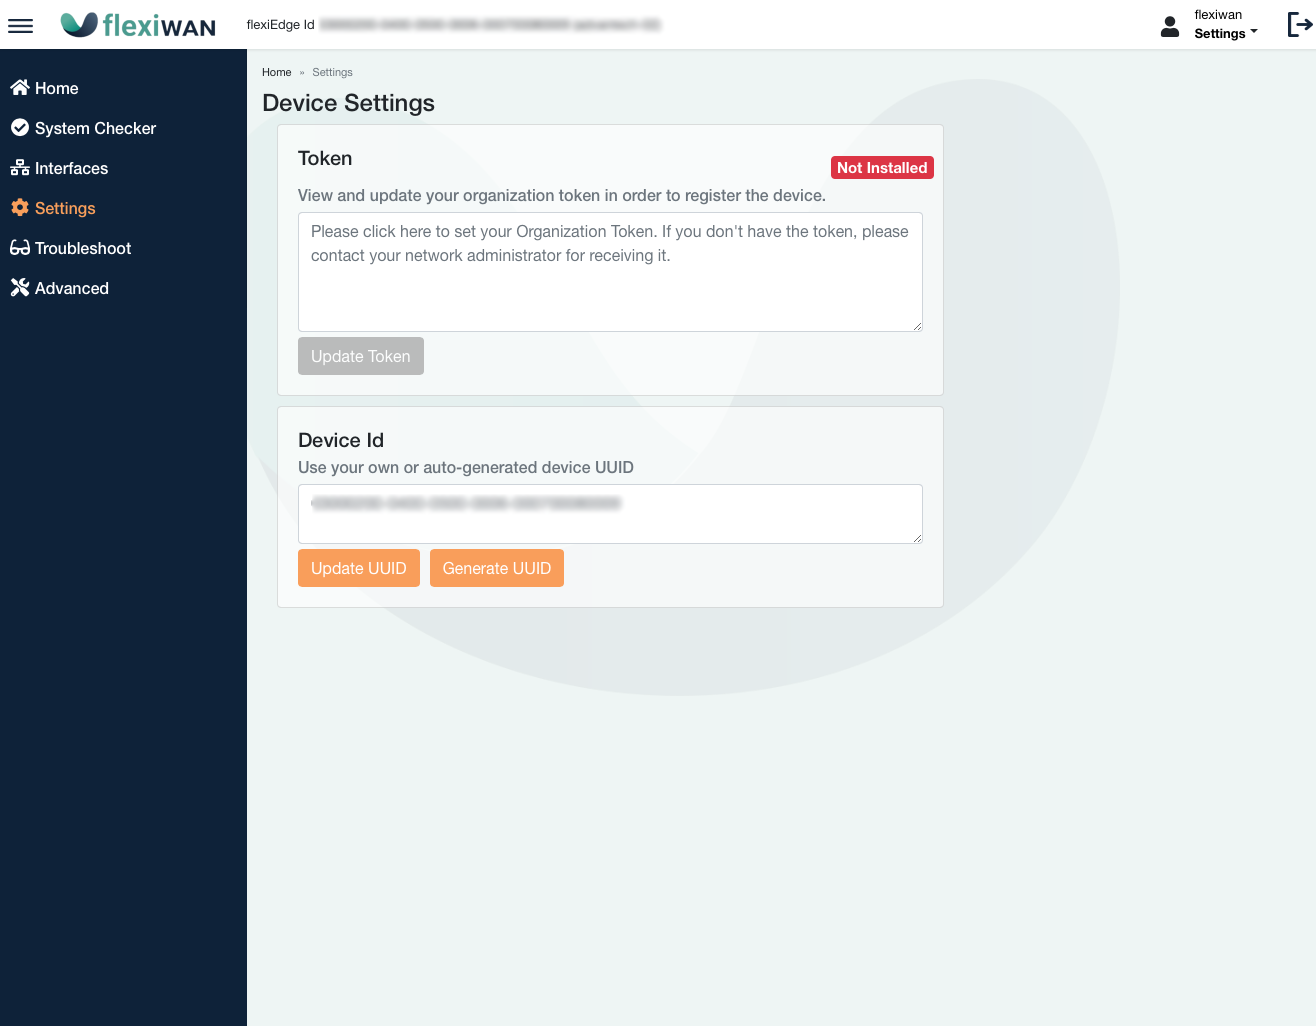
Adding the token
On the Settings page users can add a token in order to link the device to their flexiManage account and also optionally edit the UUID..
Troubleshooting & advanced options
Viewing logs
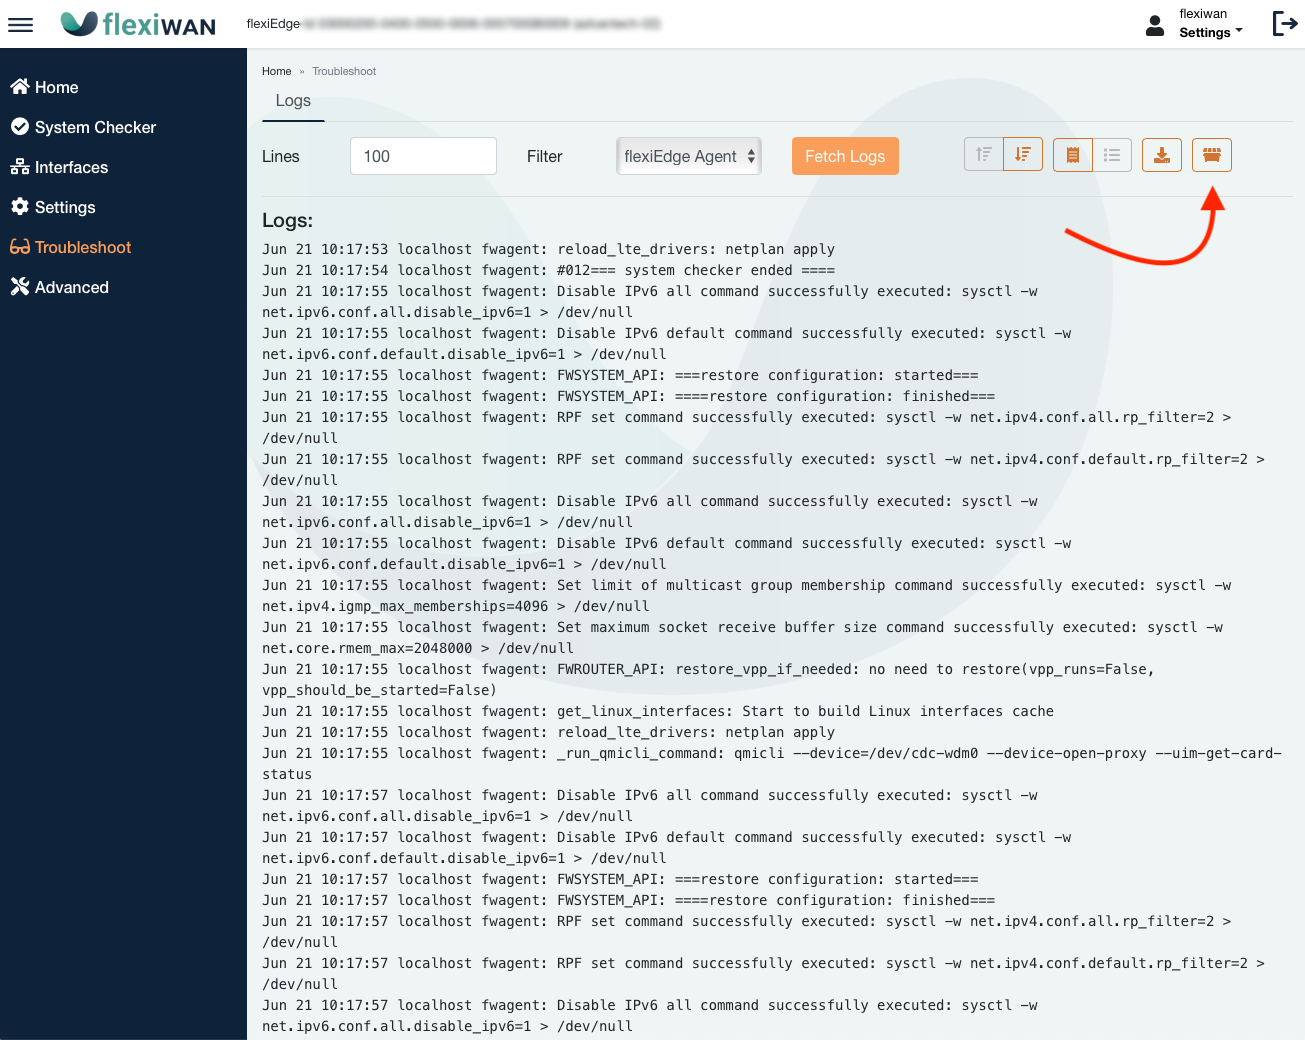
Troubleshoot page provides access to complete device logs. Each of the logs can be viewed by clicking on “Fetch Logs” button.
add image
Grabbing all logs
In order to grab all logs from a device, simply click on the top right icon as shown in the screenshot below. Arrow points to “fwdump” function which prepares the full system logs for support troubleshooting purpuses and offers the archive as a download through browser.
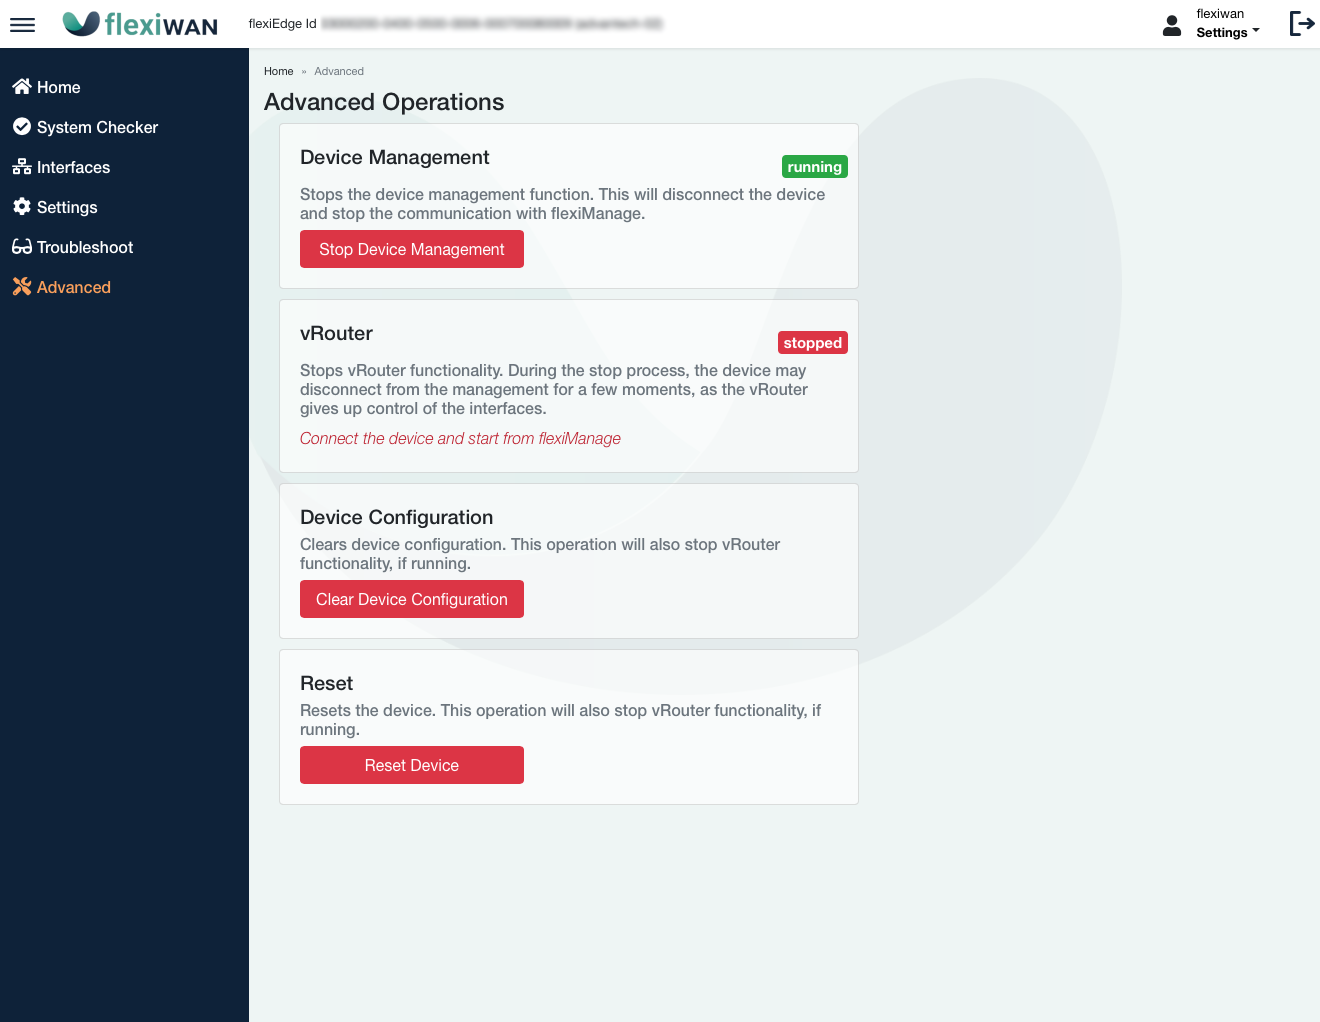
Advanced settings
Advanced page provides further troubleshooting operations.
Clear Device Configuration - clearts the configuration and connects the device to flexiManage in non-running state. Use this option to fix misconfiguration or if the vRouter is not starting.
Reset - running this option requires device deletion from flexiManage first, after which it starts the registration procedure from scratch.
Restricting access to flexiEdge UI
In order to increase security, users may want to limit access to flexiEdge UI using iptables. To that, simply enter the following commands using Command tab or device shell:
/sbin/iptables -A INPUT -p tcp ! -s 1.2.3.4 --dport 8080 -j DROP
Where 1.2.3.4 is the IP of the device you wish to allow access from, while blocking all other IP’s. Use /24 if you wish to allow whole IP range. Make sure to save rules to be persistant on reboot.
Disabling flexiEdge UI
Some users may want to disable flexiEdge UI completely after initial configuration. We only recommend disabling local UI after the device is configured and shown as running in flexiManage. flexiEdge UI can be disabled with the following two commands:
systemctl disable flexiwan-router-ui
systemctl stop flexiwan-router-ui
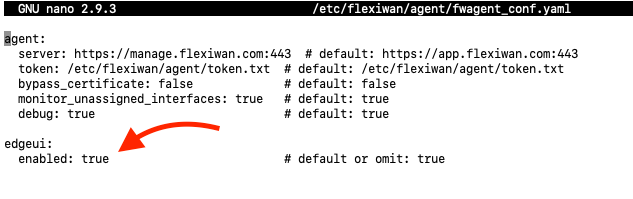
In order to enforce disabling the flexiEdge UI, edit the following file from the command line using nano or vi:
/etc/flexiwan/agent/fwagent_conf.yaml
Change the “edgeui” section from true to false and save the file.