Hetzner Cloud
Virtual Private Server (VPS) providers are a popular and affordable way to quickly test software or complete operating systems. Hetzner is a popular hosting and VPS provider which flexiWAN fully and officially supports. In this section we cover flexiWAN deployment on Hetzner Cloud.
Prerequisites
Account with flexiManage. If you do not have one yet, create it here.
An account with Hetzner Cloud.
Deploying a new VPS
Login to Hetzner Cloud and click on Add Server.

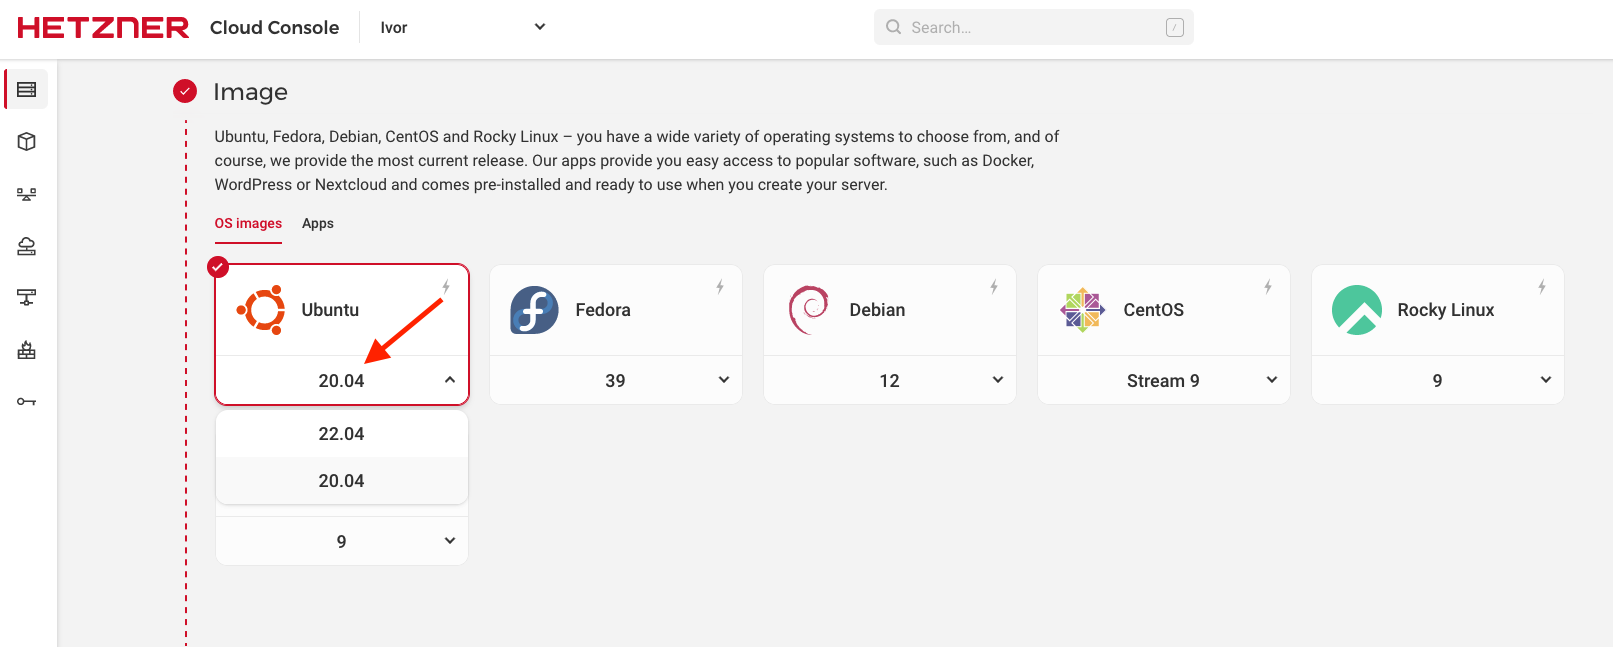
A new VPS configuration page will show. Under 1) Location, pick where you want to deploy VPS and from 2) Image, pick Ubuntu 20.04 LTS.
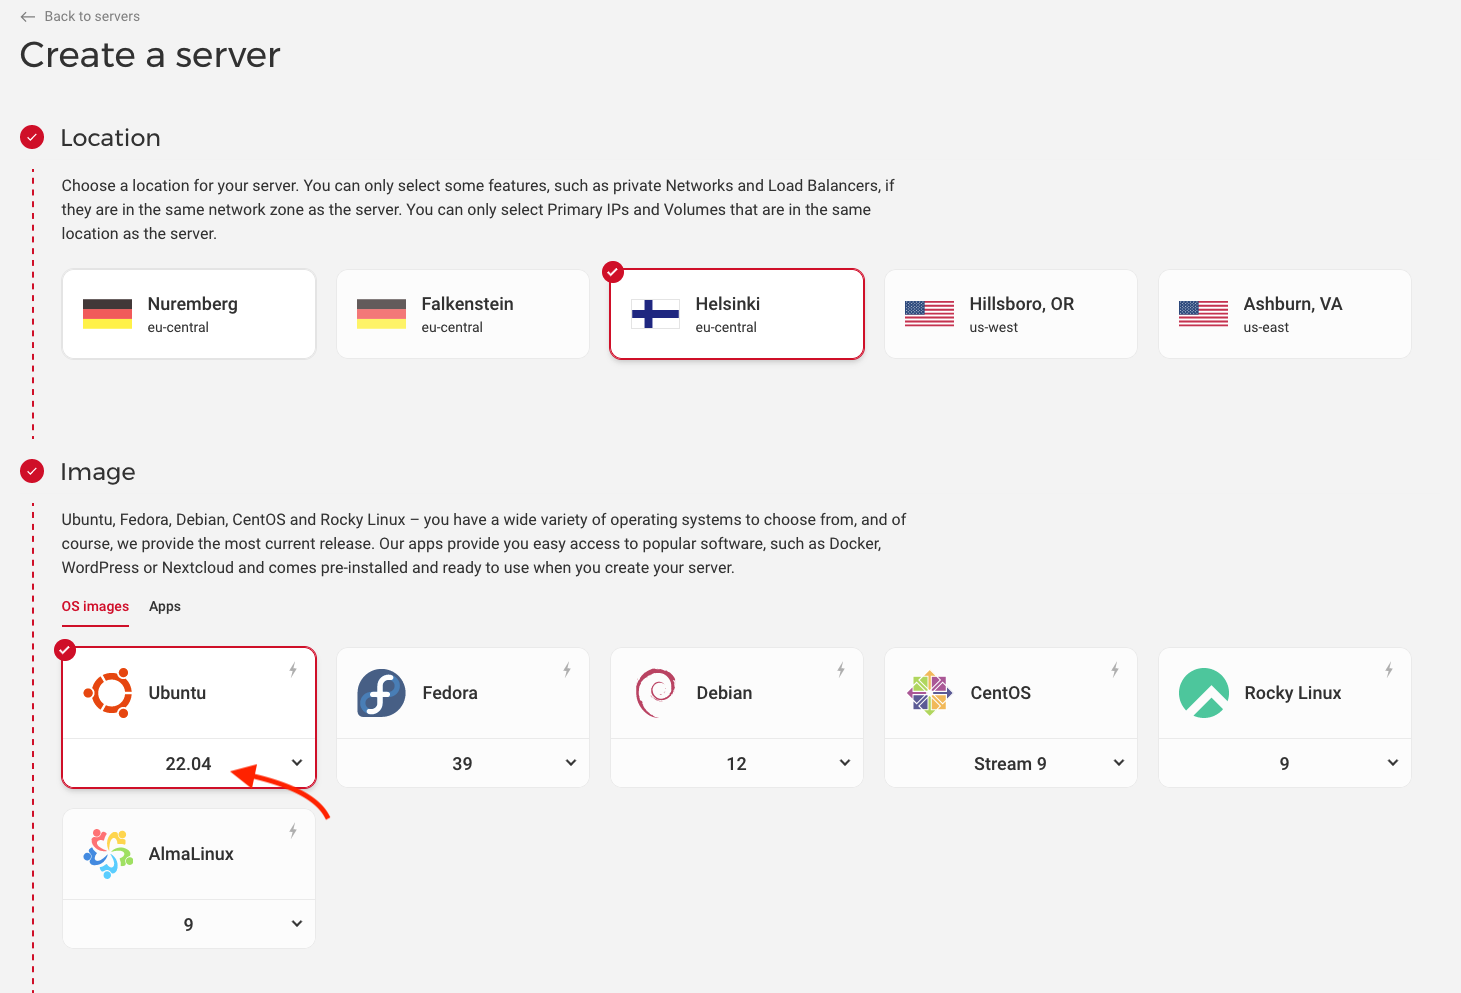
Make sure that under Ubuntu 20.04 LTS is selected by default.
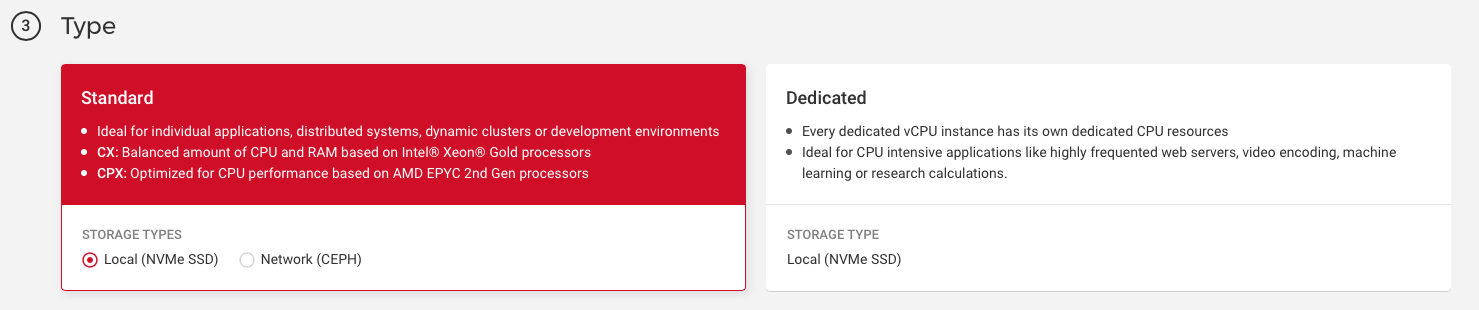
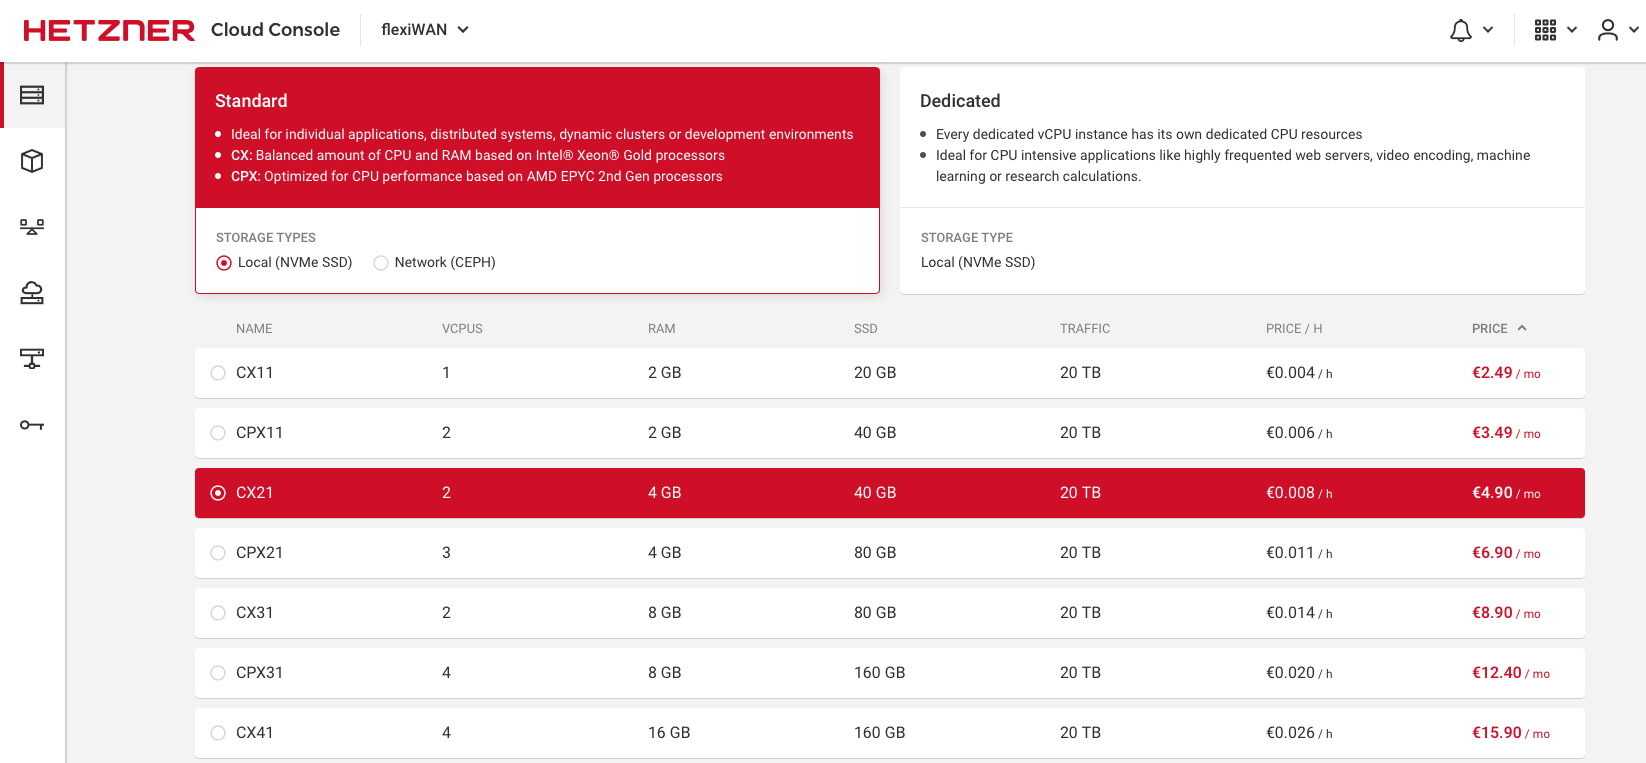
Under 3) Type section pick Standard. Dedicated VPS is available however for deploying current flexiWAN versions, dedicated is not necessary.
While still at the Type section, scroll down and select CX21 VPS type. This is a 2 CPU core, 4GB RAM and 40GB SSD VPS, which satisfies our recommended requirements.
Skip the Volume section and move to 5) Network section. In this section we create a LAN network for flexiWAN. Click on create network to add a new network. Note, in case you’ve already used Hetzner, it may show other created local networks.
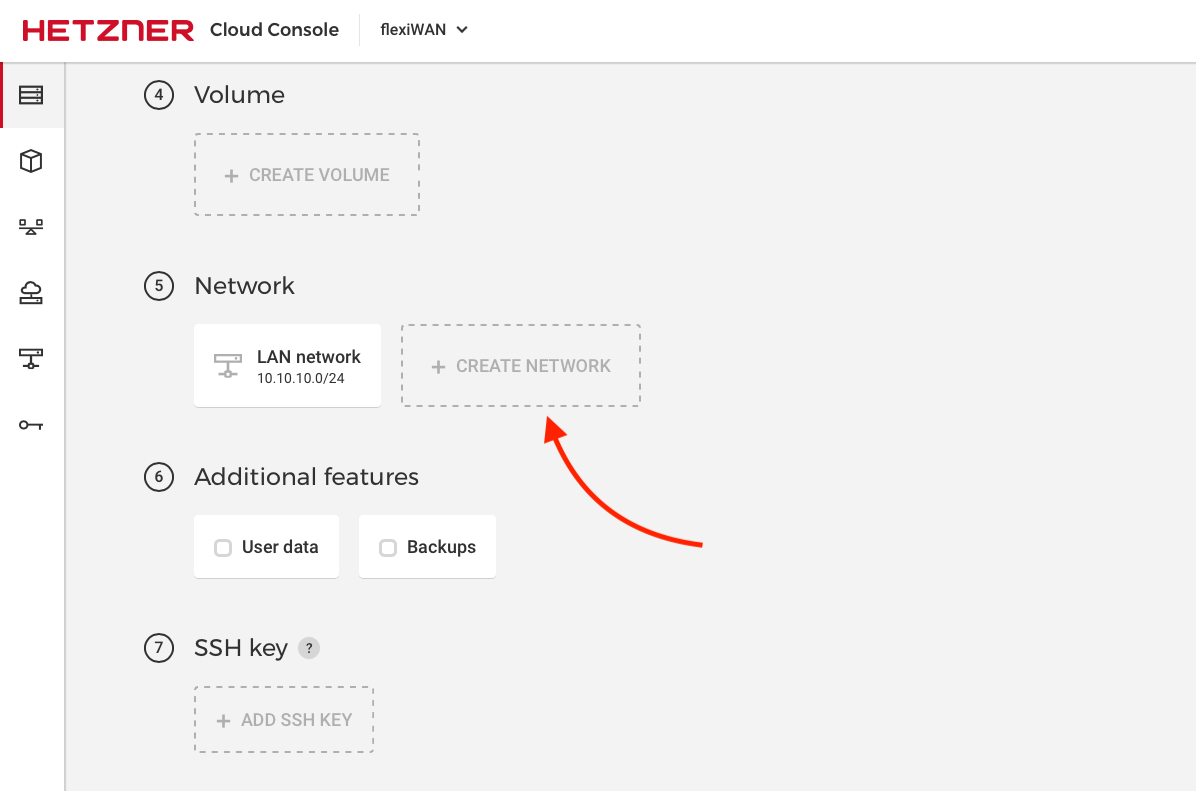
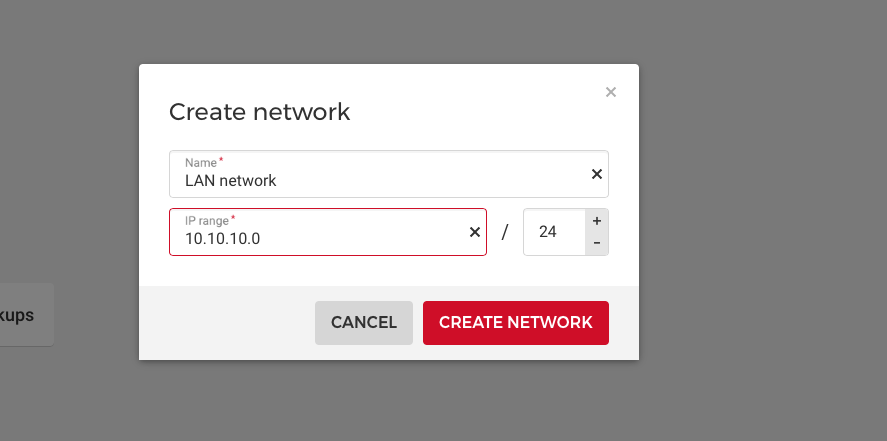
A Create network dialog will open, enter the LAN name and IP range you wish to use. Click Create network to create a new network.
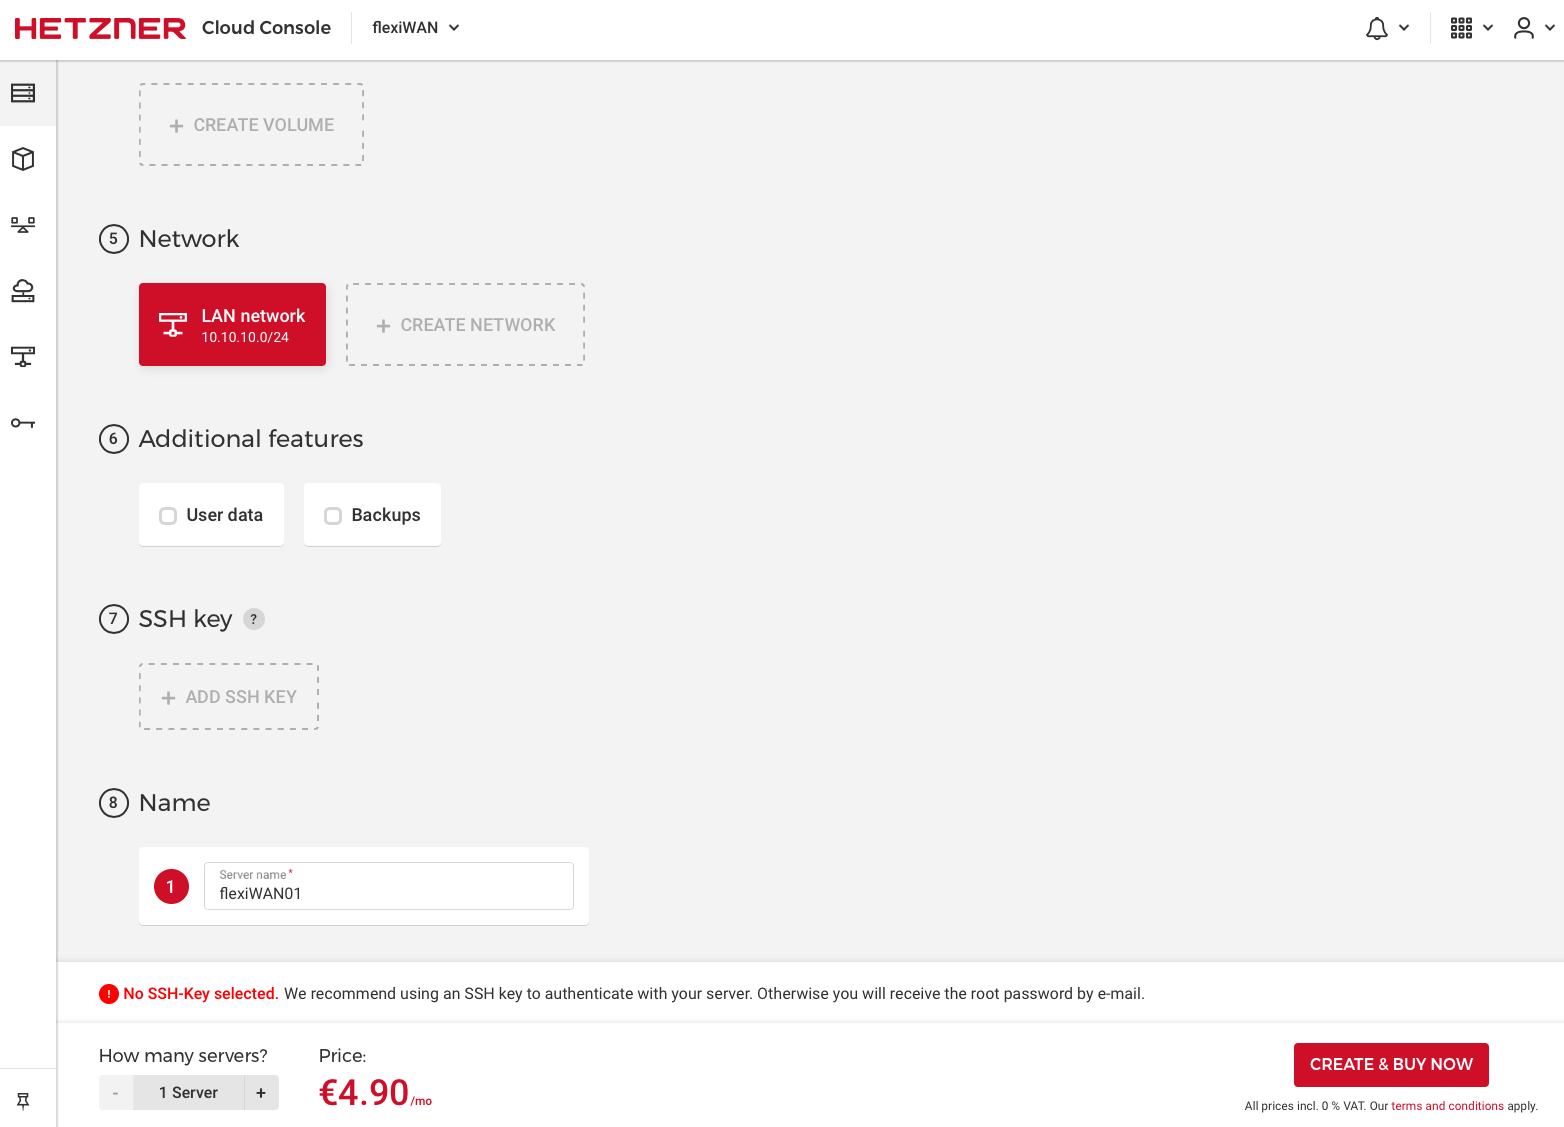
In the next step optionally add SSH key for added security and finally enter VPS name. Afterwards click on the Create & Buy Now button.
That’s it! In a few moments you should be able to see the VPS has been added. Afterwards you will receive an email with VPS IP and username / password.
Preparing VPS for flexiWAN
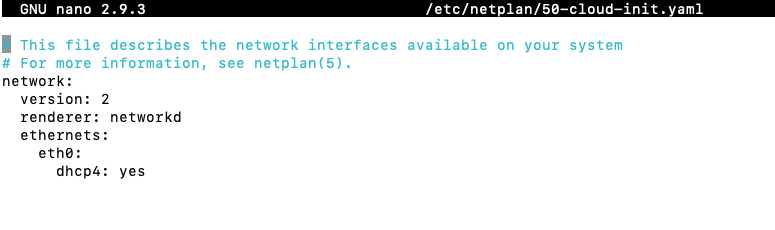
Before we can install flexiWAN, we must edit the default netplan. flexiWAN relies on netplan for network management, while Hetzner VPS deployment delivers Ubuntu without netplan installed. It’s required to fix the netplan file and replace the default interface name with actual one, in our case eth0.
After creating a new VPS, connect via SSH to it using the provided credentials. Elevate the console with sudo su and issue ifconfig command to view network interfaces. Confirm that eth0 interface is WAN.
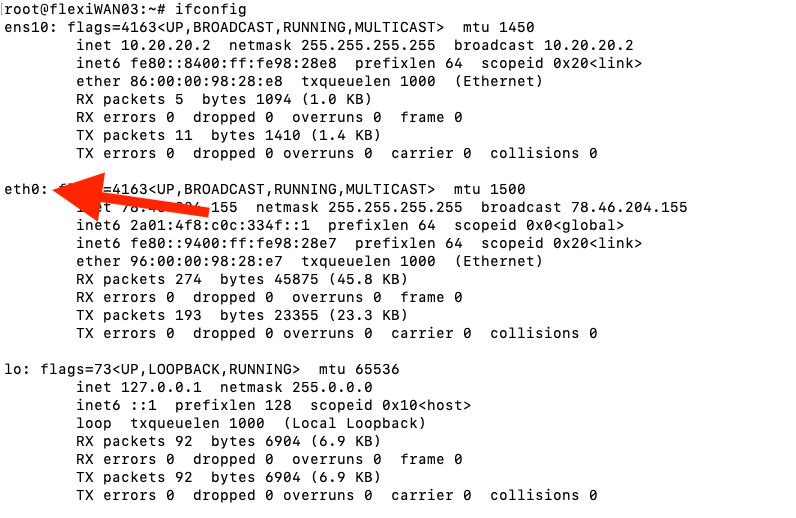
Open /etc/netplan/50-cloud-init.yaml in vi or nano. Find the default interace name “enp0s3” and change from “enp0s3” to “eth0” which is the actual network interface in Ubuntu. Make sure to not make any other changes and make sure to save the file.
Installing flexiWAN
Now that the Hetzner VPS is prepared, it is time to install flexiWAN. From SSH and as root, simply add the flexiWAN repository with the following command:
curl -sL https://deb.flexiwan.com/setup | bash -
After adding the repository, enter the second command to install flexiWAN.
apt-get install -y flexiwan-router
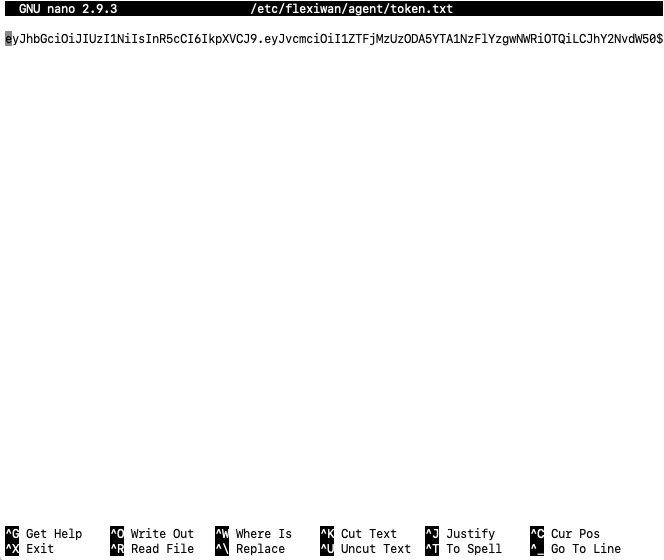
Wait for flexiWAN installation to complete and run the System Checker by following this guide. Lastly, after completing all system checker steps, simply add the token from your flexiManage account. Use nano or vi to create the following file and insert your organization token:
/etc/flexiwan/agent/token.txt
That’s it, in a few moments your flexiWAN VPS will show up waiting for approval. From there, please follow the steps mentioned in our Device Management section.