Initial Setup
Welcome to the initial setup guide for your flexiWAN deployment. This section is designed to help through the steps necessary to get your flexiEdge device up and running with internet connectivity and registered with flexiManage. Completing this setup is essential to ensure that your device is integrated correctly into your network and ready for advanced configuration and management through flexiManage.
Whether you’ve manually installed flexiEdge or received a pre-configured device with flexiWAN, it is important to perform the initial network configuration to establish connectivity. This process involves accessing the flexiEdge webUI, configuring network settings, and registering your device with flexiManage. Once your device is connected and registered, you’ll be ready to move on to more detailed configurations as needed.
This section covers the following:
Connecting to the flexiEdge Web UI: Use a web browser to connect to the flexiEdge device via its local IP address. The webUI serves as your central hub for all initial setup tasks.
System Health Check: The system checker verifies the status of hardware and software components on your flexiEdge device. This step helps identify any issues that need to be addressed before proceeding.
Setting Up Network Interfaces: Configure the IP address, gateway, and DNS settings for your network interfaces. These configurations are crucial for enabling your device to connect to the internet.
Registering the Device with flexiManage: Use the webUI to complete the registration process, linking your device to flexiManage. This step integrates your device into your account.
flexiEdge WebUI
The main function of the local flexiEdge UI is to streamline the initial configuration and troubleshooting processes. After completing the initial setup, any additional device configurations are handled through flexiManage. flexiEdge UI is enabled by default and can be accessed via any network interface.
To access it, open a browser and navigate to the device’s IP address followed by port 8080 on the currently active network interface. By default, the following networks are available:
10.0.0.1/30 - management network available when using flexiWAN ISO via ETH0
192.168.1.1/24 - default LAN network set on ETH2
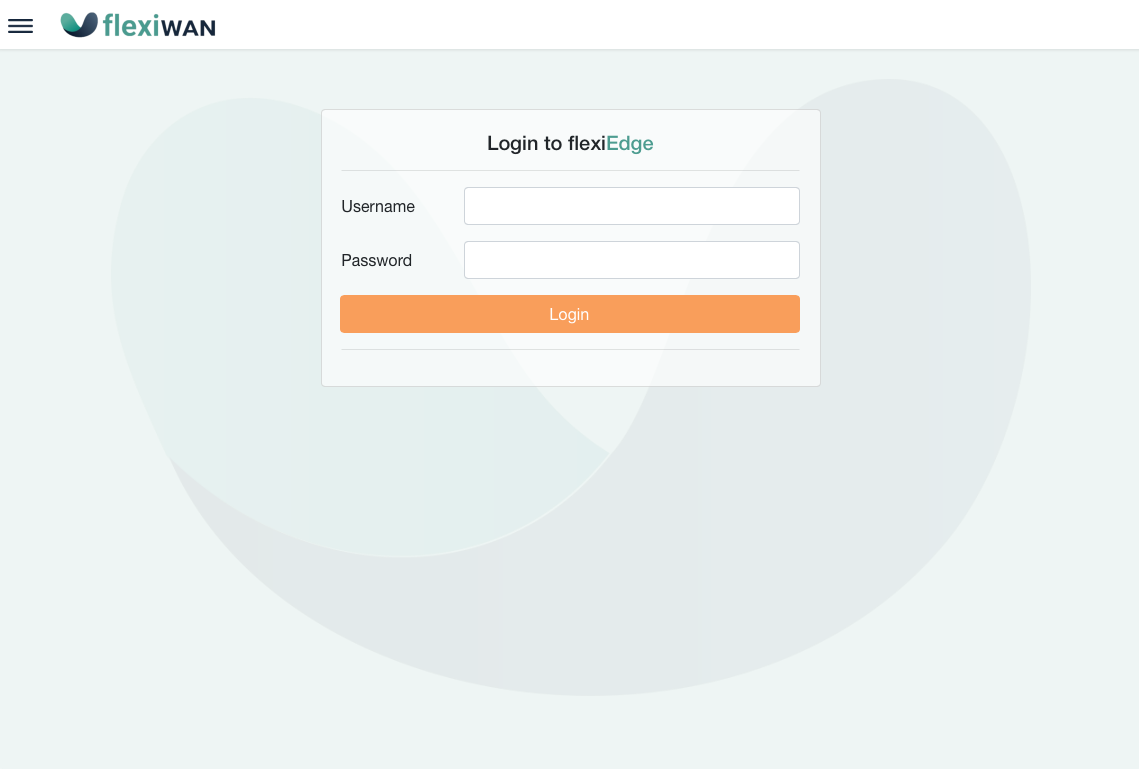
Example URL for flexiEdge Web UI: HTTP://192.168.1.1:8080/
After opening the flexiEdge UI page, enter username and password used when installing flexiWAN on the device. (default: admin / flexiwan).
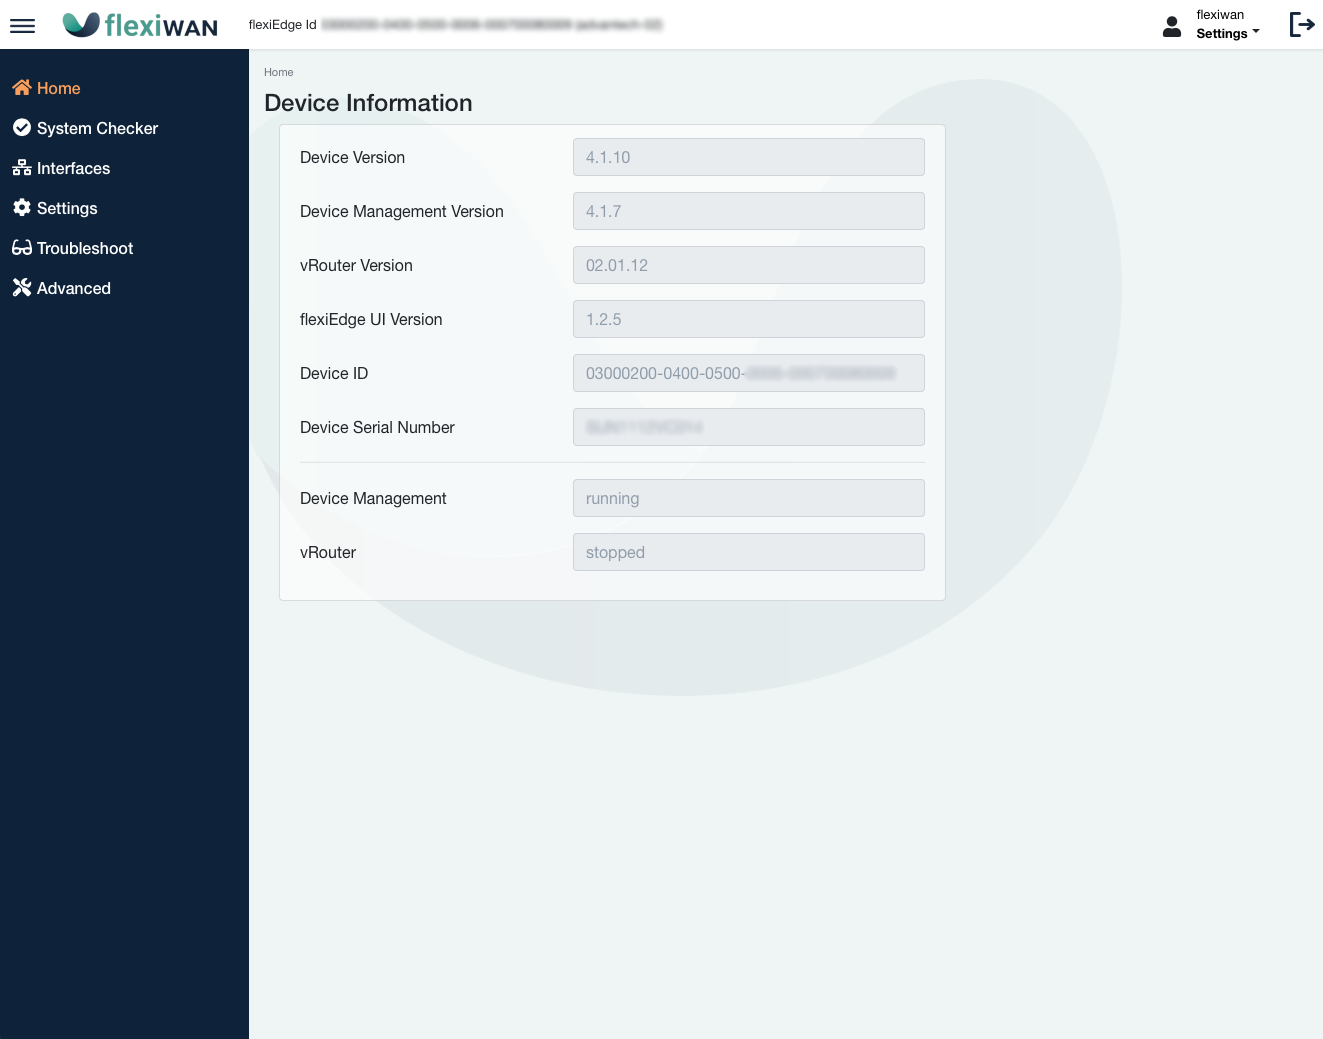
Upon logging in with credentials, Home page will display device information and status. From the sidebar additional options can be accessed.
The flexiEdge WebUI sidebar follows the post-installation configuration sequence:
System Checker - Running the system checker verifies if the device meets the prerequisites for running flexiWAN.
Interfaces - Configuring network interfaces to enable internet connectivity.
Settings - Inputting the token establishes the connection between the device and the flexiManage account.”
Upon successfully completing all three steps, the device will be connected to your flexiManage account and will await approval.
System checker
System checker is a post-installation tool which verifies system requirements and fixes software configuration errors. Click on System Checker page and run it to check if the system meets the requirements.
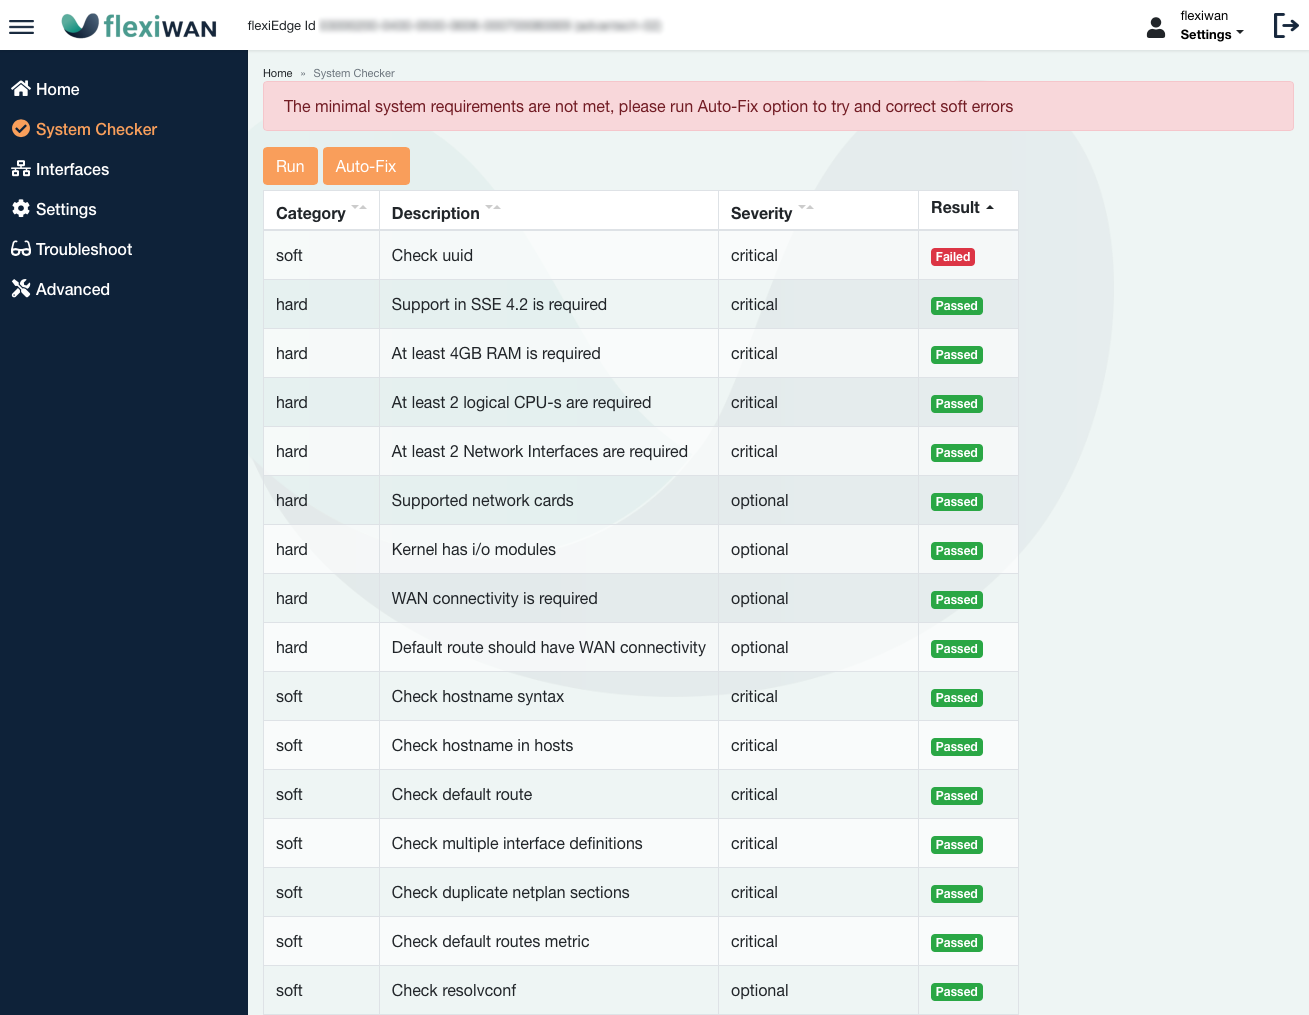
If installed on supported hardware, in most cases there will only be “soft” failures which can be fixed by clicking on “Auto-fix”:
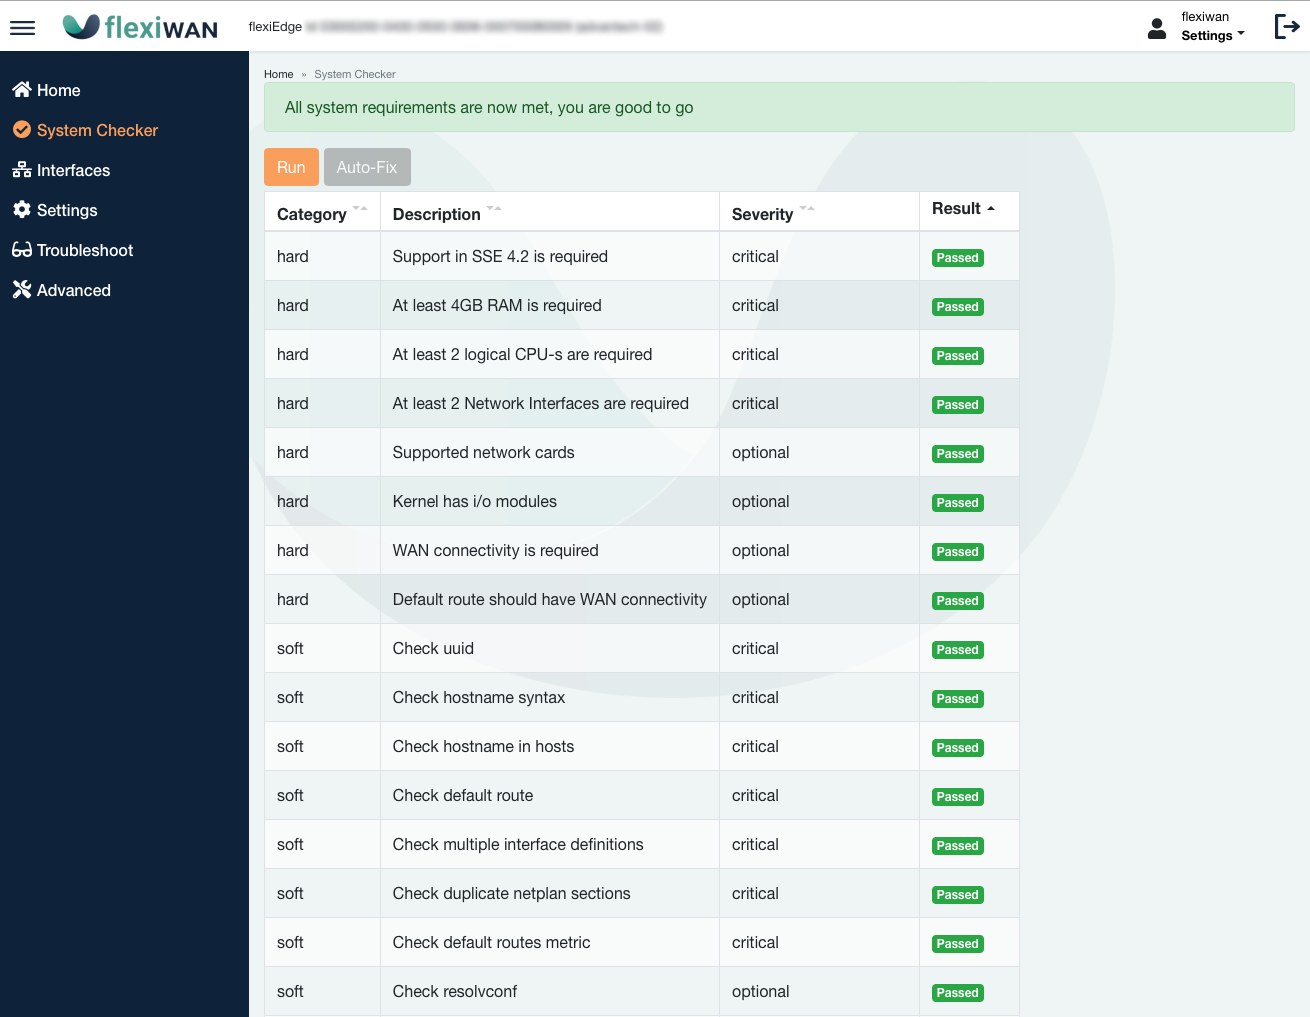
Confirm the output now says system requirements are met and navigate to the interfaces page for network configuration.
Network configuration
On the following page, you can view or configure network interfaces. At this stage, only wired interfaces (including VLANs) and PPPoE can be configured through the flexiEdge Web UI. Configuration of WiFi or LTE interfaces will be available later through flexiManage. The primary objective here is to configure the interfaces to establish internet connectivity, enabling the device to be registered with flexiManage.
Note
flexiWAN utilizes netplan for configuring network interfaces. When you configure interfaces using the flexiEdge UI, these settings are saved to netplan. It’s advisable to configure both WAN and LAN wired interfaces before adding the device to flexiManage, especially for recovery purposes. By doing so, the device remains accessible through the configured interfaces even if flexiWAN is not running. Additionally, if the device lacks connectivity, wired interfaces can also be manually configured directly via netplan.
Wired interfaces
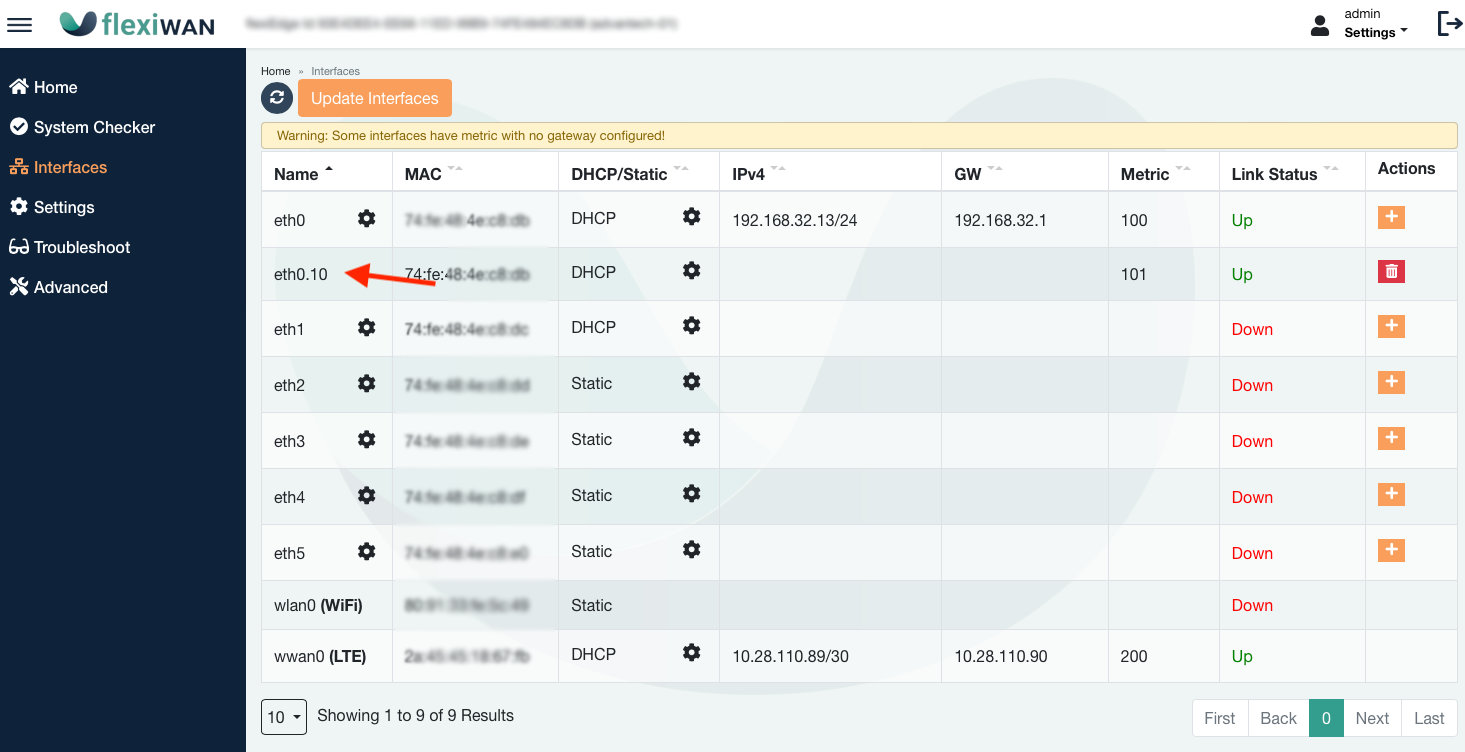
The interfaces page shows and displays all available network interfaces and allows you to configure them. You can set interfaces to obtain an IP via DHCP, assign a static IP, configure PPPoE, and add VLANs as needed.

Each interface can be configured to receive an IP address automatically via DHCP or manually assign a static IP address. To assign a static IP, simply select the “Static” option under the DHCP/Static column and enter the desired IP address within the IPv4 field. This flexibility allows you to tailor the network configuration according to your specific requirements, assigning WAN and LAN interfaces right from the flexiEdge.

Note
Important - make sure to click Update Interfaces after making each interface change or configuration.
PPPoE configuration
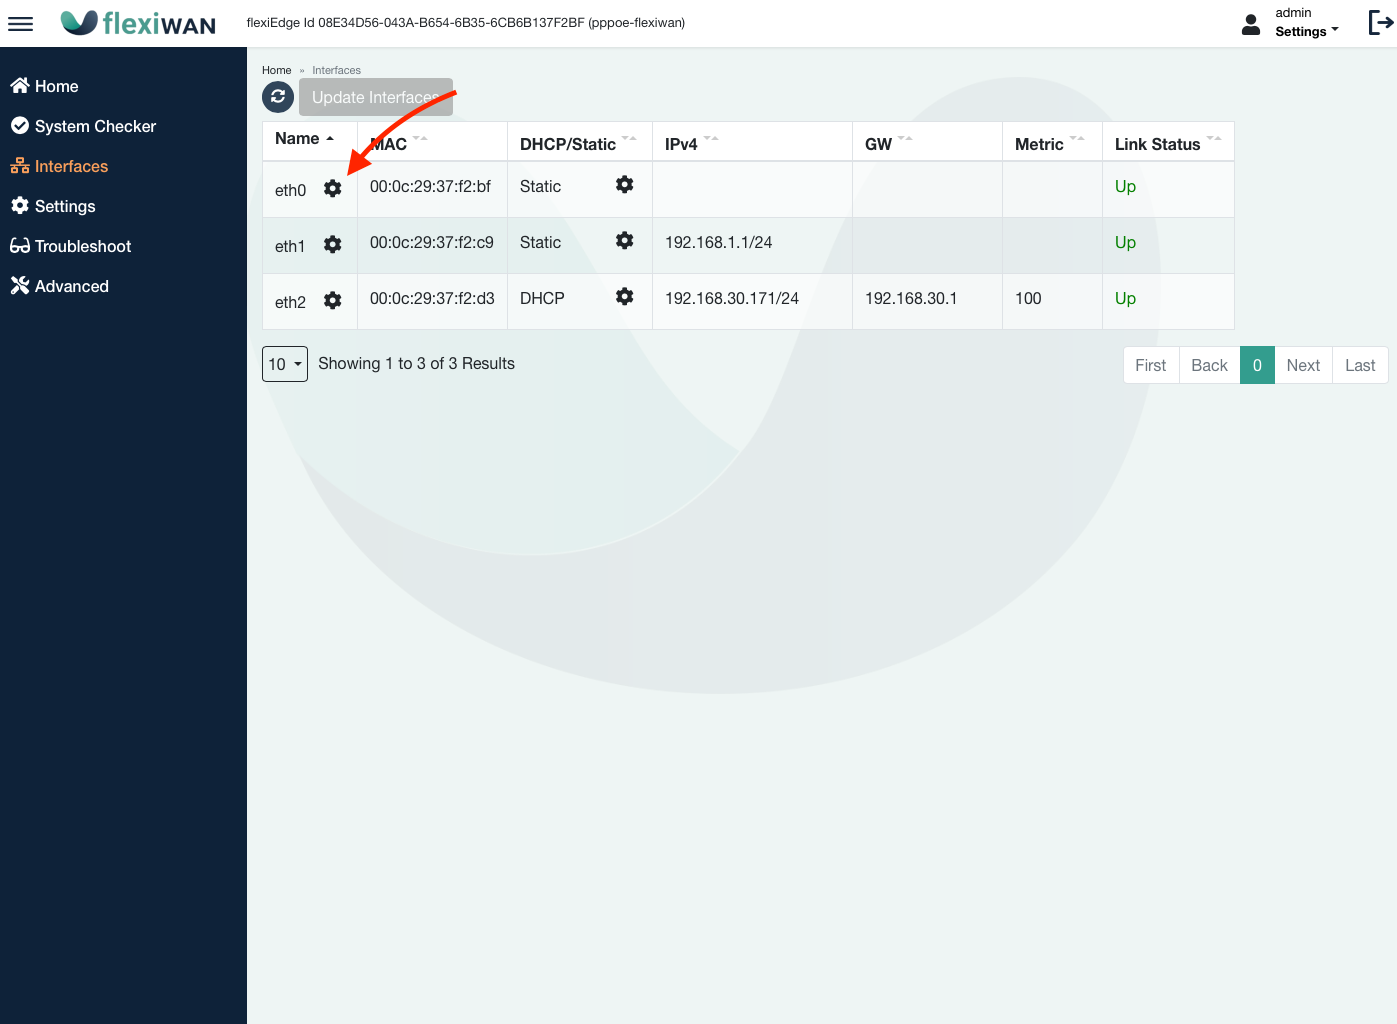
flexiWAN supports PPPoE. PPPoE can only be configured and provisioned from the flexiEdge UI interfaces page. Simply click on the settings icon next to interface name which will open PPPoE configuraton page.
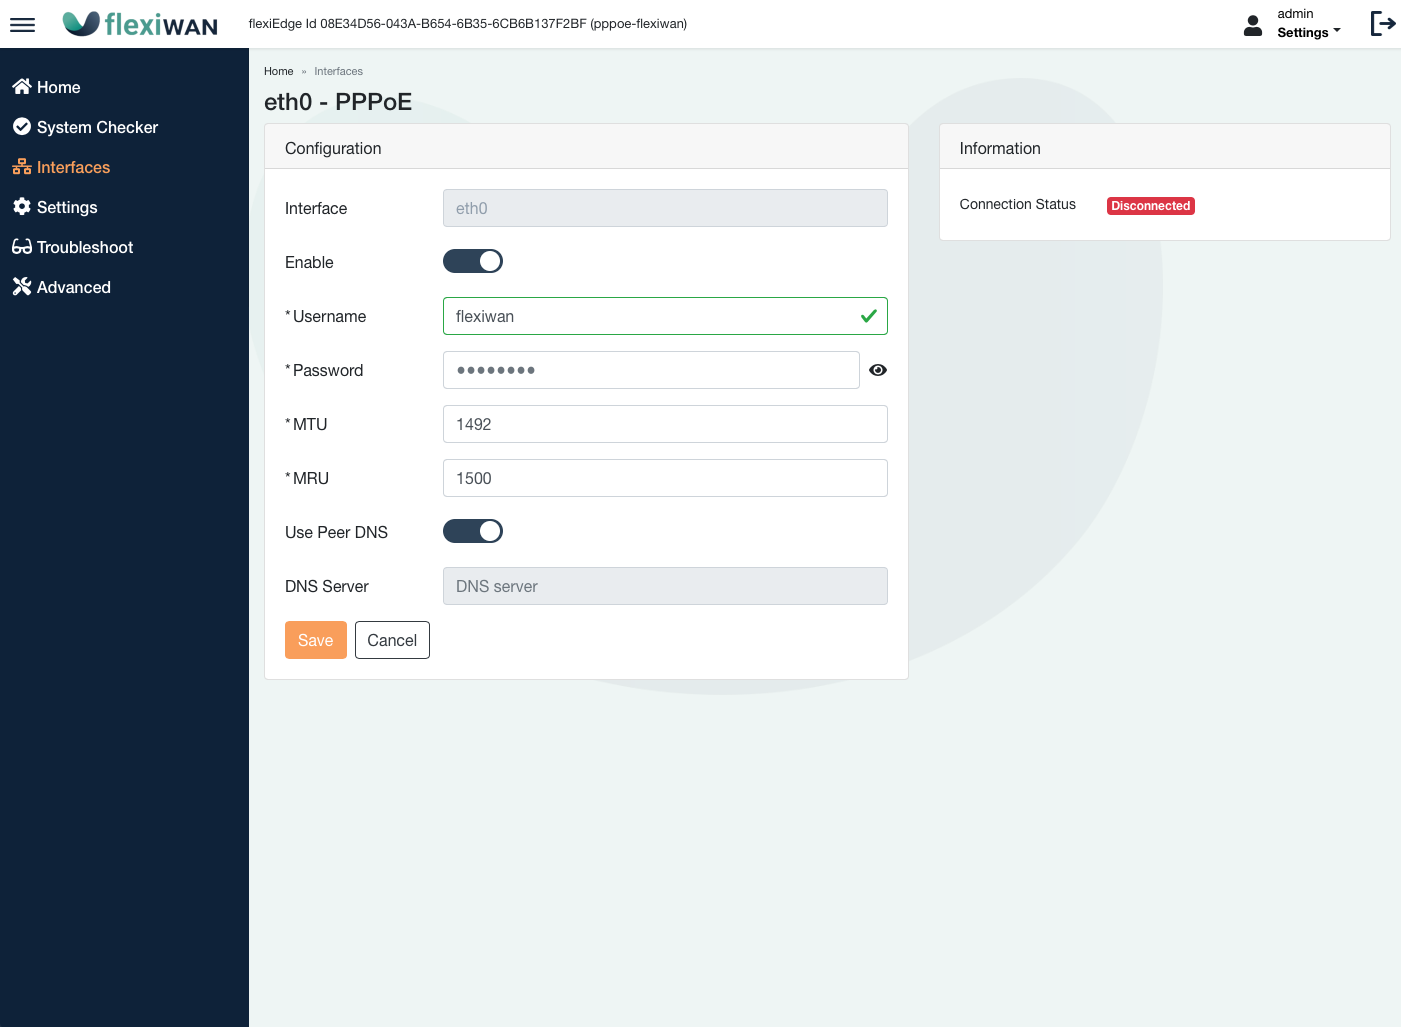
From the PPPoE configuration page enable the interface and enter the credentials from PPPoE provider and click save. Optionally set custom DNS.
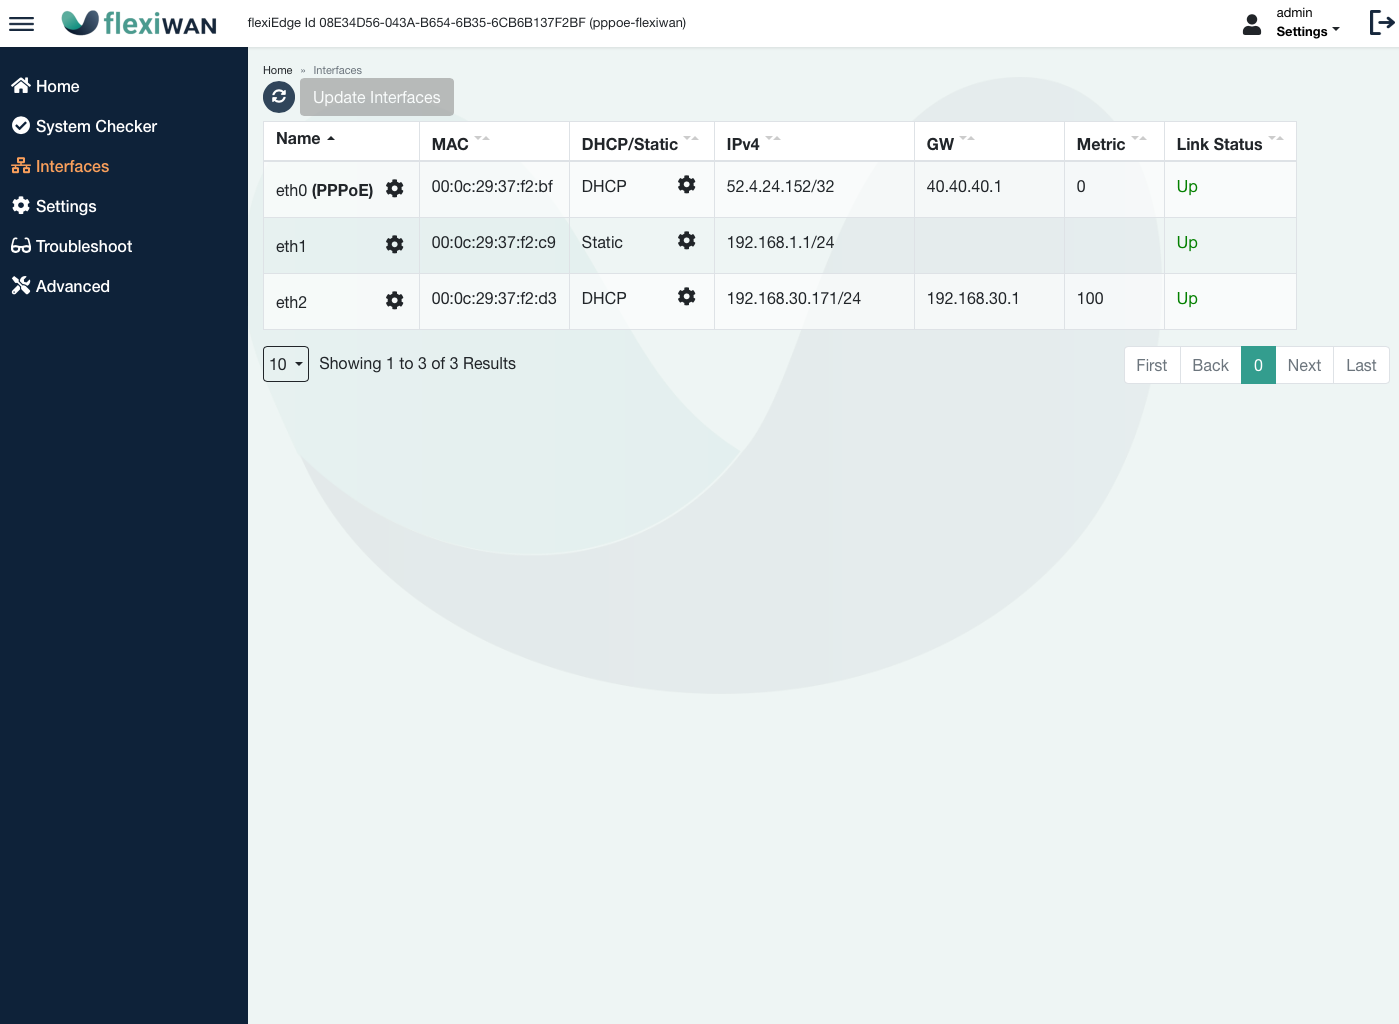
Once PPPoE is configured, wait for a few moments until the page shows PPPoE connection established.
Note
Please note that since PPPoE required to be provisioned before even connecting to flexiManage, it can only be provisioned from flexiEdgeUI. The configuration can be changed from flexiEdgeUI as long as the interface is not assigned in flexiManage. Detecting PPPoE provisioning may take a few moments.
VLAN configuration
Support for VLANs is available and they can be added through flexiEdge. However, unless VLANs are necessary for internet connectivity, it is recommended to add them using flexiManage rather than the local flexiEdge UI. Please note that VLANs added using the local edgeUI cannot be removed once the device is registered with flexiManage. Therefore, it is highly advisable to utilize flexiManage for adding VLANs whenever feasible, as it simplifies management.
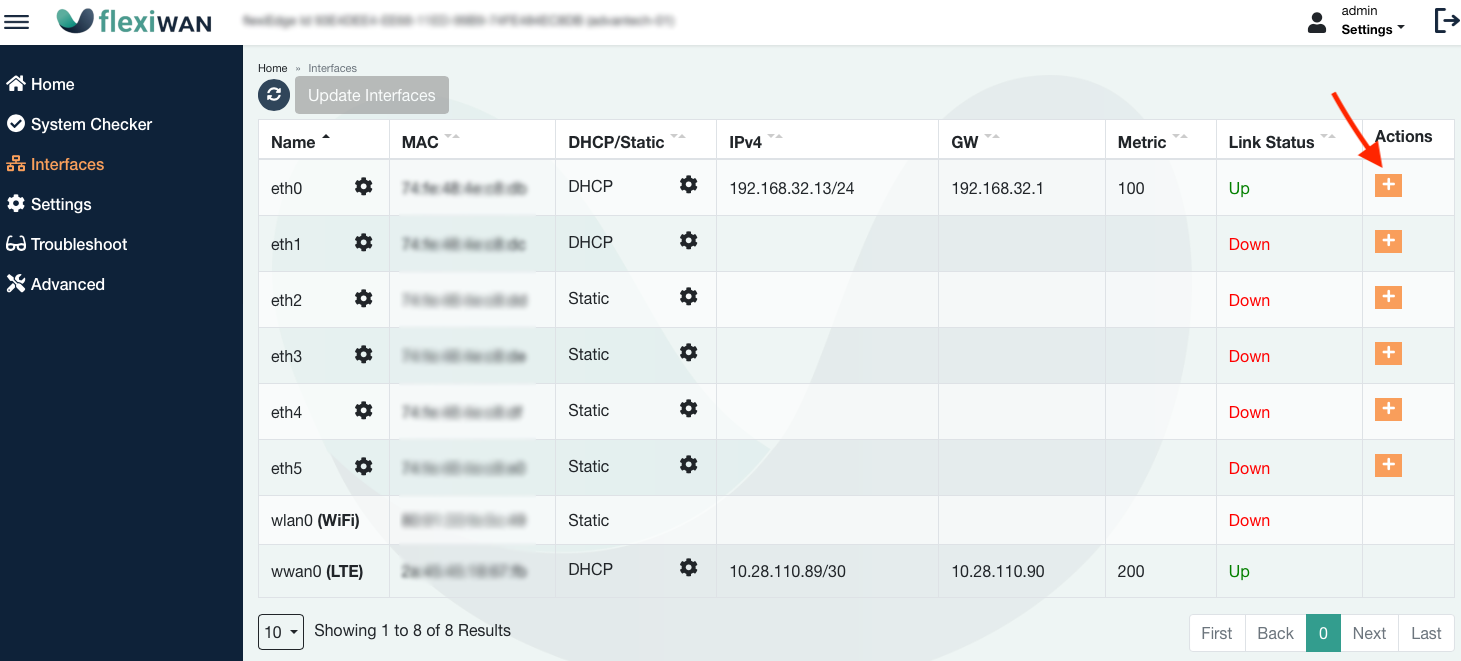
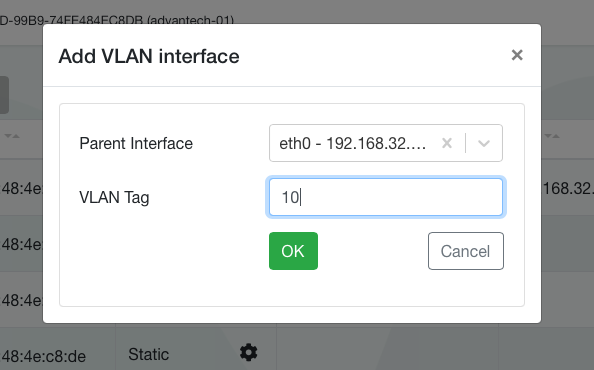
To configure VLAN’s, simply click on + sign from the Actions column.
Enter VLAN tag and confirm.
Added VLAN’s can be configured just as any interface.
After configuring network interfaces, follow the next steps to register device with flexiManage.
Device registration
The purpuse of device registration is to connect a newly installed flexiWAN device to your flexiManage account.
Token creation
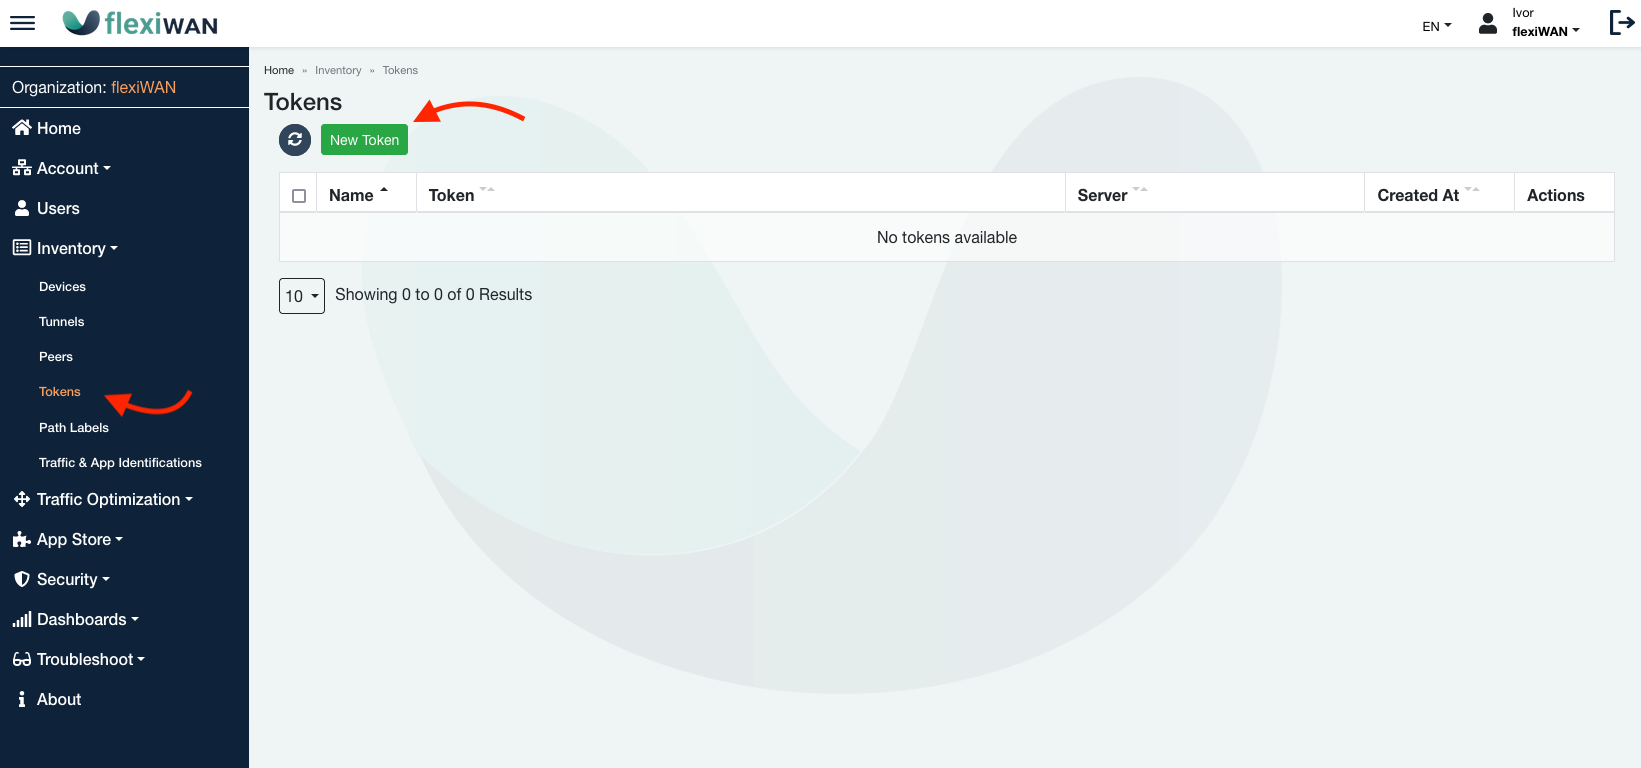
To register a device, begin by creating your organization’s token. The organization token requires generation only once and is applicable to all devices within a single organization. It’s worth noting that having multiple tokens within a single organization is also supported, enhancing security measures in the event of unauthorized physical access to a device. To create a token from flexiManage, go to Inventory > Tokens and select the “New Token” button.
Provide a token name and click “Add”. A new token will be created and presented in the Tokens page.
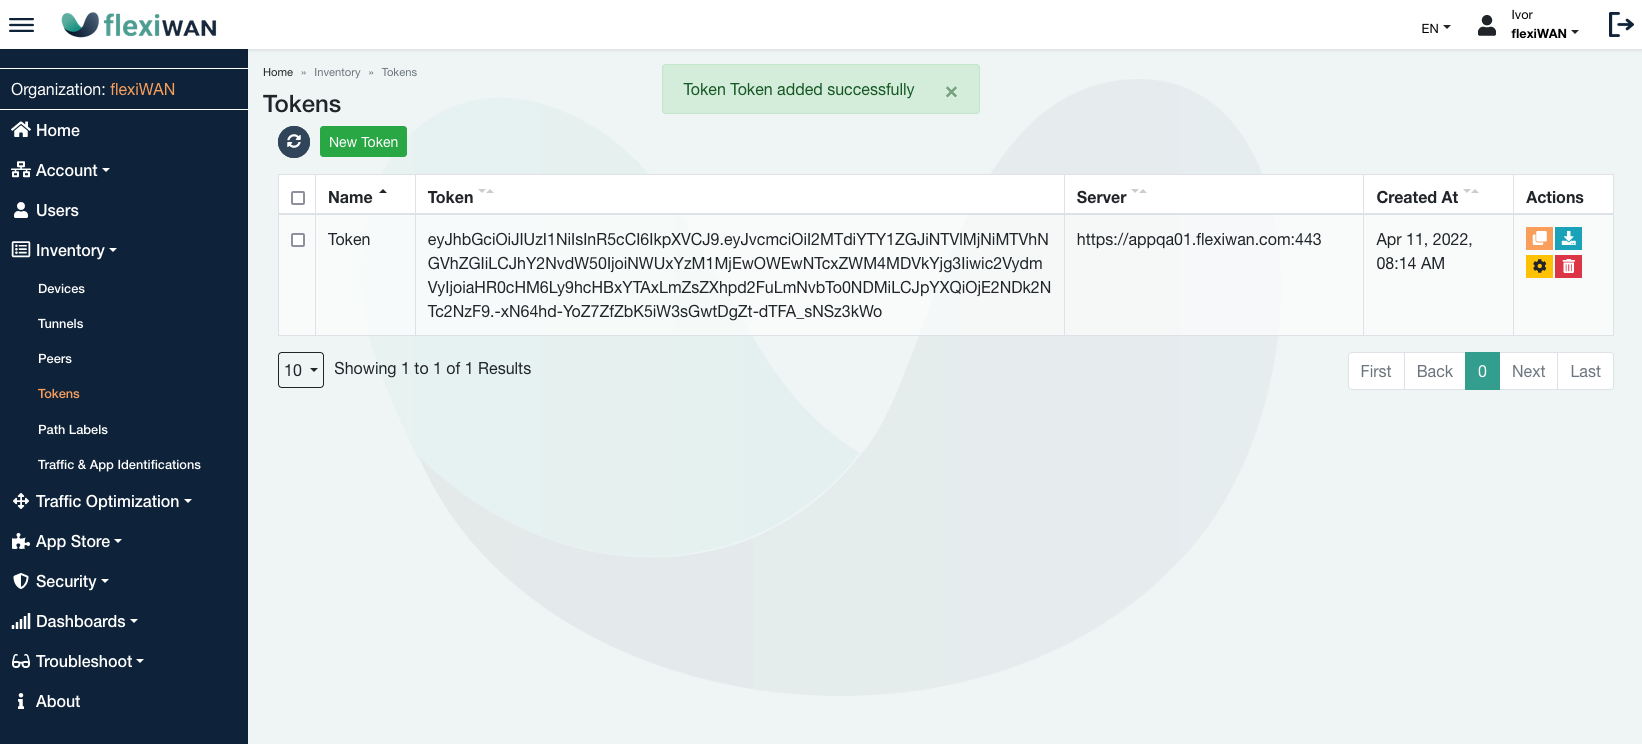
Copy or download the token in order to add it to the newly installed flexiWAN device. Token can be added to the device in two ways:
Using flexiEdge UI web interface.
Via SSH or using direct console.
Adding the token through the flexiEdge UI
Open a browser and point it to the IP and port 8080 of currently active network interface on flexEdge device. Example:
HTTP://192.168.100.10:8080/
After opening the flexiEdge UI page, enter username and password from Linux.
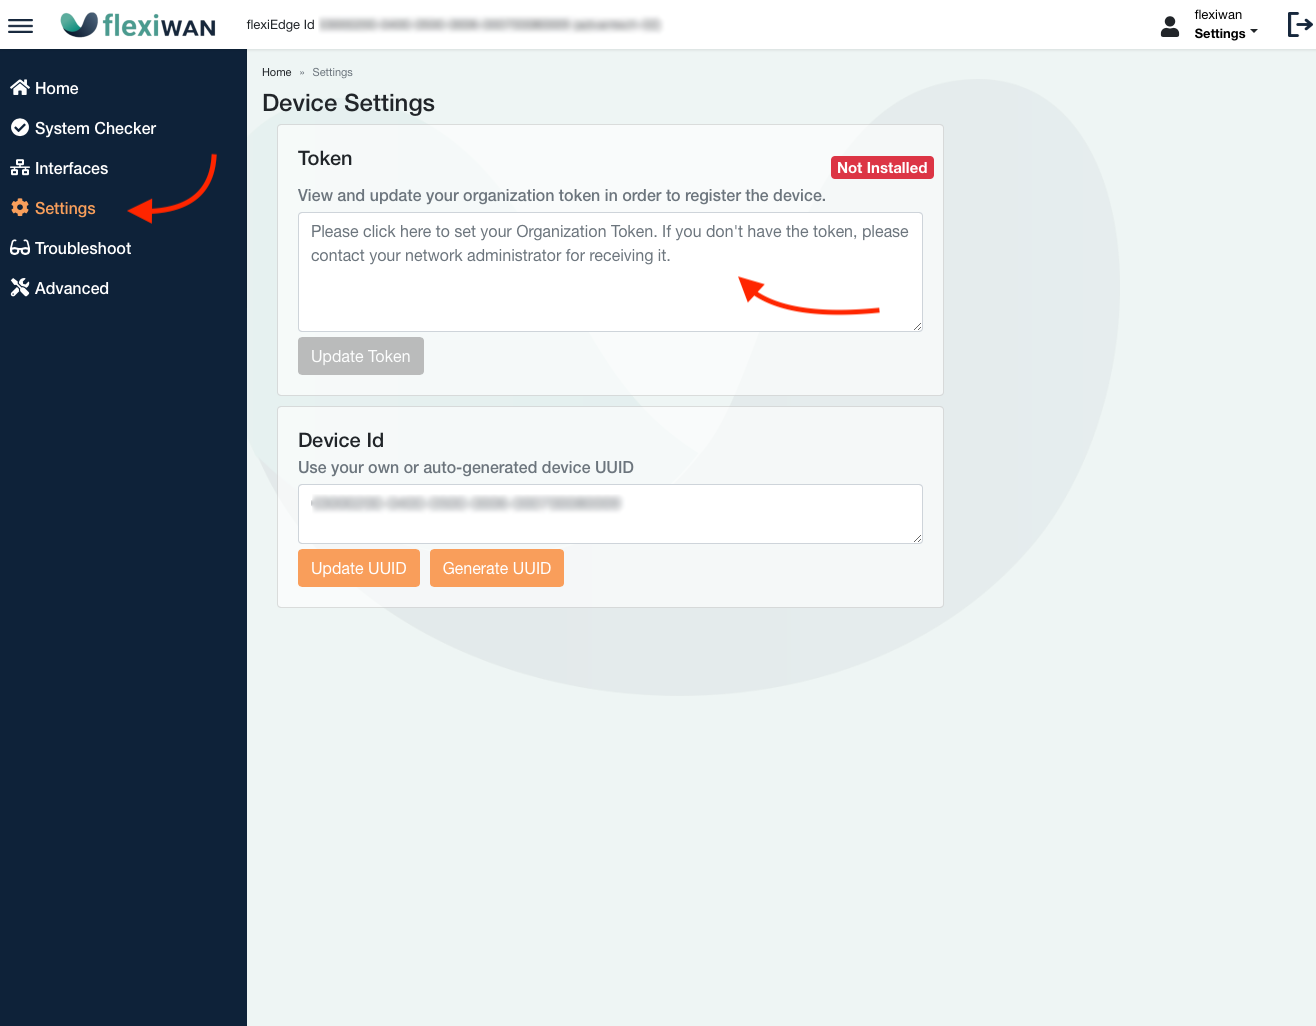
Navigate to Settings section and then enter the token copied from flexiManage. Click Update Token and after that continue to flexiManage Devices page to complete the device registration.
Note
Make sure to follow flexiEdge documentation and first run and pass system checker. Check flexiEdge UI to learn more.
Adding the token using SSH or console
For this step connect to a direct console or ssh connection to the device is required. Insert the token using text editor such as nano or vi:
nano /etc/flexiwan/agent/token.txt

Inserting the token is the final step where local EdgeUI or direct console / ssh connection to physical device are needed. Afterwards all management is done through flexiManage.
Registering a device
Once the token is added, the device will appear in the Inventory > Devices page as a new and unapproved device:
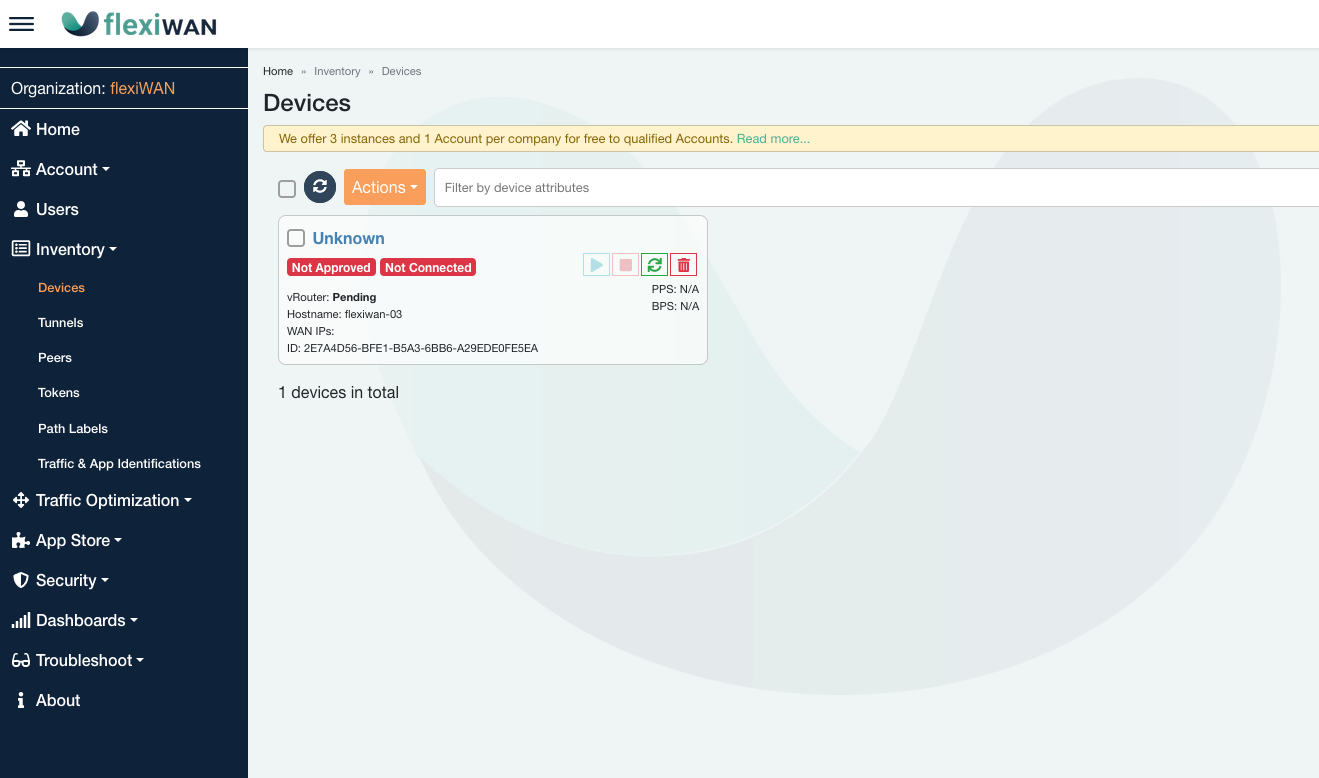
Click on the newly appeared “Unknown” device name to open the device settings. Enter the device name and description, then approve it.

Click on “Update Device” at any time to apply the latest configuration. Follow the next section to complete device configuration.
Troubleshooting
Unable to access flexiEdge UI
In case you’re unable to access flexiEdge UI using any of the IP’s, the issue is likely related to network not working. By default, flexiWAN images have the following network layout:
KVM/Proxmox, VMware, VirtualBox: ETH0, WAN - Configured as DHCP Client. ETH1 - LAN Network with IP address of 192.168.1.1/24.
ISO: ETH0 - Management network with IP 10.0.0.1/30. ETH1 - WAN - Configured as DHCP Client. ETH2 - LAN Network with IP address of 192.168.1.1/24.
Note
When using the flexiWAN ISO, interface names may not directly correspond to the physical Ethernet ports on the device. This variation depends on the specific hardware vendor and how the Ethernet ports are mapped to PCI lanes. Each vendor might configure these connections differently, leading to discrepancies between the interface names seen in the software and the actual physical ports.
Note
10.0.0.1/30 management network is not obligatory and can be replaced.
In case you are unable to connect to the device using SSH or flexiEdge WebUI, connect using console or VGA output and verify netplan configuration. Run the following commands to gather more information:
ifconfig -a- lists all interfaces available on the device. Verify which interface is online or has received an IPOpen
/etc/netplan/network.yamland review how ethernet ports are configured.
In case eth0 or eth1 is connected to the upstream device, simply configure the interfaces as DHCP to receive an IP. Use the following netplan file as an example, which shows eth0 and eth1 configured to receive an IP via DHCP.
## This file is generated from information provided by
# the datasource.  Changes to it will not persist across an instance.
# To disable cloud-init's network configuration capabilities, write a file
# /etc/cloud/cloud.cfg.d/99-disable-network-config.cfg with the following:
# network: {config: disabled}
network:
    version: 2
    renderer: networkd
    ethernets:
        eth0:
          dhcp4: true
        eth1:
          dhcp4: true
Another example shows how to configure static IP on eth0 to receive internet connectivity.
#network:
  version: 2
  renderer: networkd
  ethernets:
    eth0:
      dhcp4: false
      addresses:
      - 192.168.1.122/24
      routes:
      - to: default
        via: 192.168.1.1