North Bound API
About
flexiWAN provides a RESTful APIs that allow developers and system administrators to automate and integrate their networking infrastructure with other systems and tools. With these APIs, you can programmatically interact with the flexiWAN system to:
Configure devices and services - Set up and modify the configurations of flexiEdge devices and tunnels without the need for manual intervention.
Monitor the network - Collect data on network performance, traffic patterns, and health indicators to analyze and improve network operations.
Manage policies - Implement and adjust routing policies, security settings, and access controls based on dynamic requirements.
Integrate with third-party services - Connect flexiWAN with other IT systems, such as monitoring solutions, customer management systems, or cloud services.
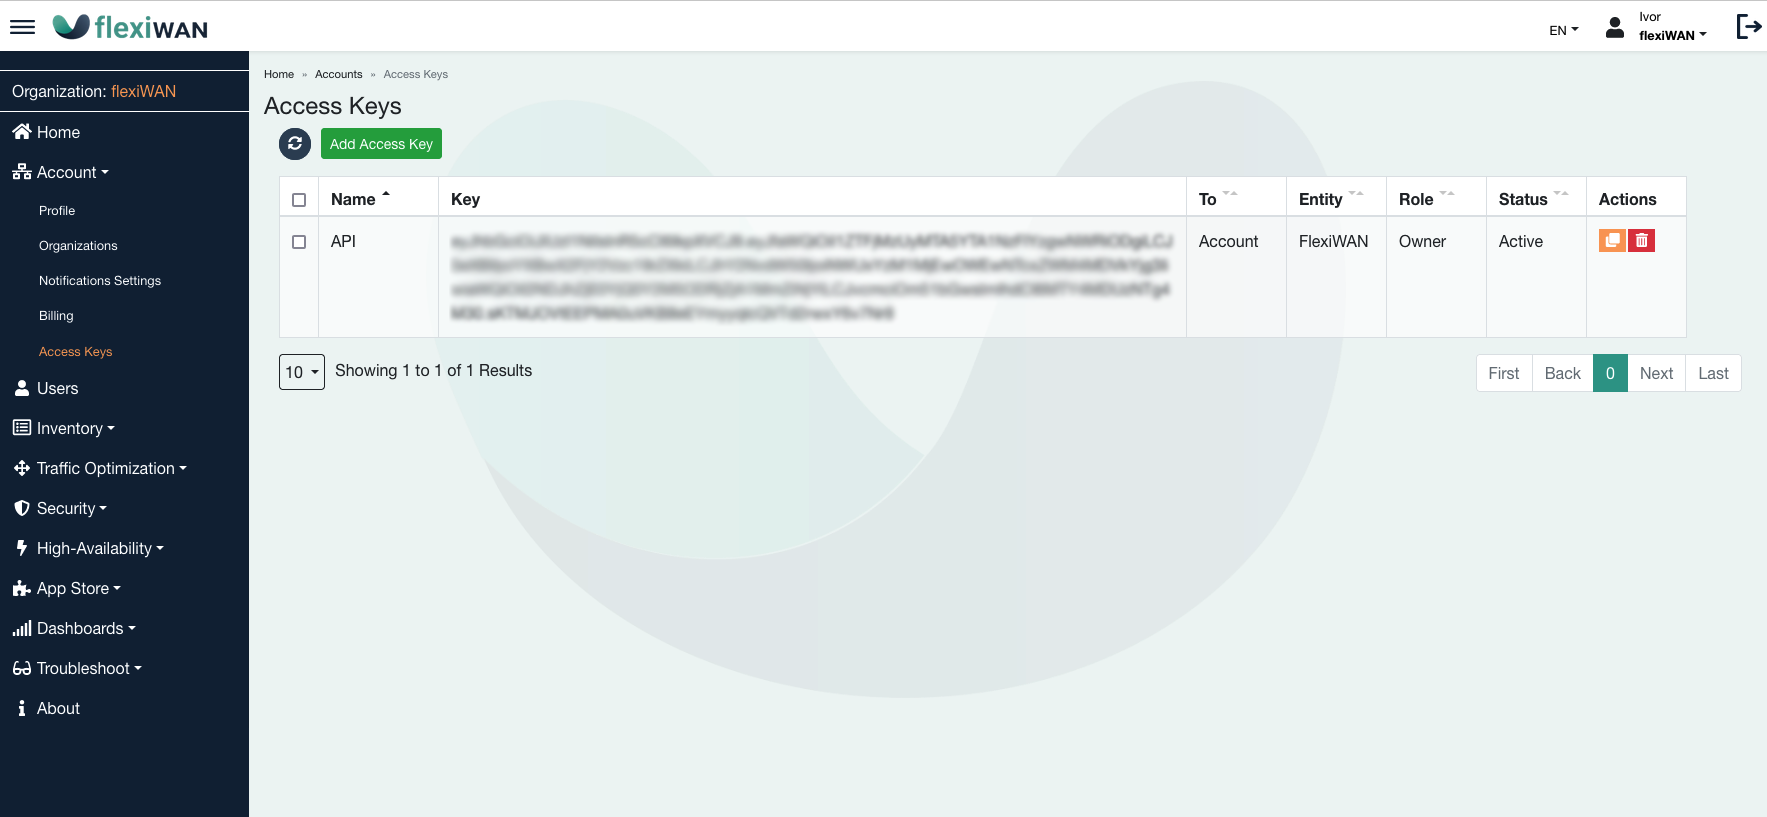
Access Keys
Access keys serve as a secure method to authenticate and interact with the flexiManage API. This section of the documentation guides users through the process of managing Access Keys within the flexiWAN system, detailing the steps to create, view, and use Access Keys for API operations.
To create a new Access Key, navigate to the Account section in the flexiManage sidebar and click on Access Keys. From the Access keys page, users can view a list of existing keys or create a new key by clicking the Add Access Key button.
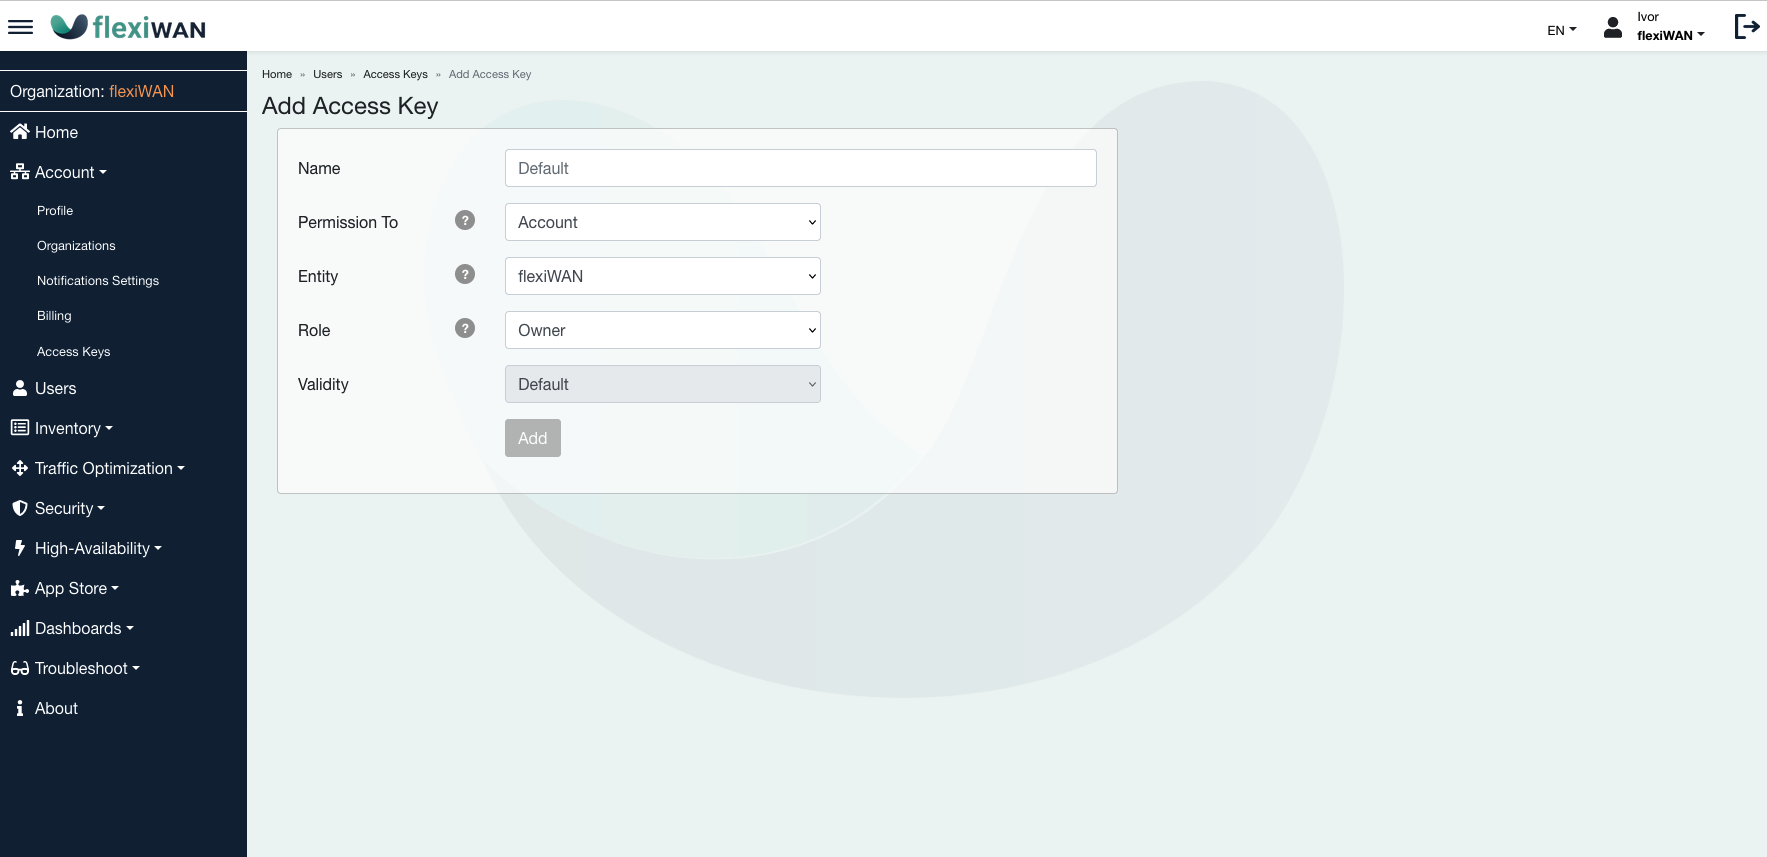
When creating an Access Key, users are presented with several configuration options:
Name: Assign a descriptive name to the key for identification purposes. Choose a name that clearly indicates the key’s intended use or the user it’s associated with.
Permission to: Specify the scope of the Access Key. Users can grant permissions to:
Full Account: The key will have access to all groups and organizations within the account.
Specific Group: Limit key access to a specific group within the account.
Specific Organization: Restrict key access to a particular organization under the account.
Entity: When granting permissions to a specific group or organization, select the appropriate entity from the dropdown list. This ensures the Access Key is only able to interact with the designated group or organization.
Role: Define the Access Key’s role, which determines the level of access:
Owner: Full administrative access, including management and configuration capabilities.
Manager: Access to management functions but may have some restrictions compared to the Owner role.
Viewer: Read-only access, allowing for monitoring and reporting without the ability to alter configurations or settings.
Difference between Normal Bearer Token And Access Keys
On normal user operations, the UI remembers the last organization and permission used. Access Keys, get permission to the entire account and can access any organization with the same access key. This mandate to specifiy the organization to be used on some of the API calls. To see the list of organizations under an account, use the GET organizations API
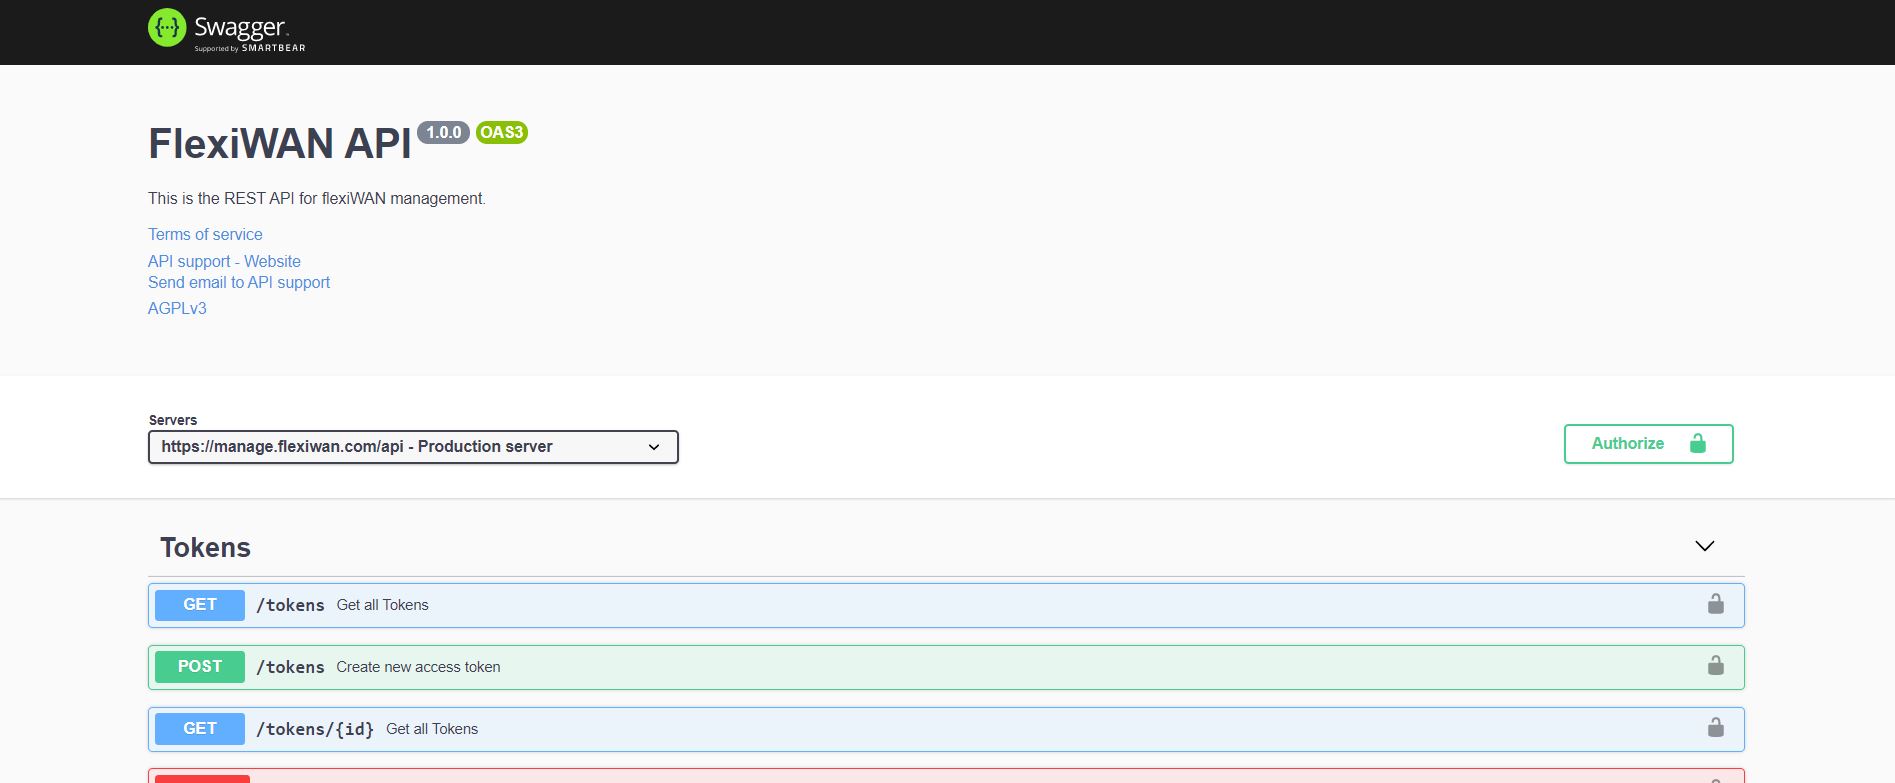
Swagger API
The flexiWAN North Bound API of the flexiManage is represented by accessing the swagger API in https://manage.flexiwan.com/api-docs - access Swagger UI to view the complete list of supported API calls.
Authorize Swagger UI
After creating an access key, it can serve as a bearer token for authentication. This is accomplished by adding an “Authorization” header to the REST API requests. To employ the access key with the Swagger API, select the “Authorize” button located at the top of the page. Then, copy and paste the access key into the “bearerAuth” field provided.
Apply API examples
Apply API is added to allow dynamic integration of new device configurations.
Apply to multiple devices can be found in https://manage.flexiwan.com/api-docs/#/Devices/devicesApplyPOST
Apply to a specific device can be found in https://manage.flexiwan.com/api-docs/#/Devices/devicesIdApplyPOST
In most cases it result with creating jobs that sent to devices. The created jobs returned in the response body as well as a link in the Locaion header to follow the created jobs status. The apply API is used for some of the existing functions.
Create tunnels
Create tunnels:
This example calls to devices apply to create a tunnel between two devices with no path labels.
{
   "method": "tunnels",
   "devices": {
      "63054504ceb73f58528ab912": true,
      "63054513ceb73f58528ab988": true
},
   "meta": {
      "pathLabels": [],
      "tunnelType": "site-to-site",
      "topology": "fullMesh",
      "hub": "",
      "advancedOptions": {}
   }
}
For using a path label, add the path label IDs in the pathLabels list, for example:
"pathLabels": [
   "5e8f465d622b105449e60828"
],
For cost, or other advanced parameters, use:
"advancedOptions": {
   "mtu": "1500",
   "mssClamp": "yes",
   "ospfCost": "100",
   "routing": "ospf"
}
Delete tunnels
Delete tunnels
This example calls to devices apply to delete a tunnel by ID
{"method":"deltunnels","tunnels":{"5e4c2aba71b763362c099fb2":true}}
Start vRouter
Start vRouter:
This example is applied for a specific device to start vRouter
{"method":"start"}
Stop vRouter
Stop vRouter:
This example is applied for a specific device to stop vrouter
{"method":"stop"}
Upgrade Devices
Upgrade devices:
This example upgrade software version for two devices
{"method":"upgrade","devices":{"5e4c1fee3fce30225c612ee8":true,"5e4c2a8b3fce30225c613071":true}}