Routing
Static Routes
Static routes are used to route traffic to various interfaces. Follow the steps detailed below to add static routes to flexiEdge.
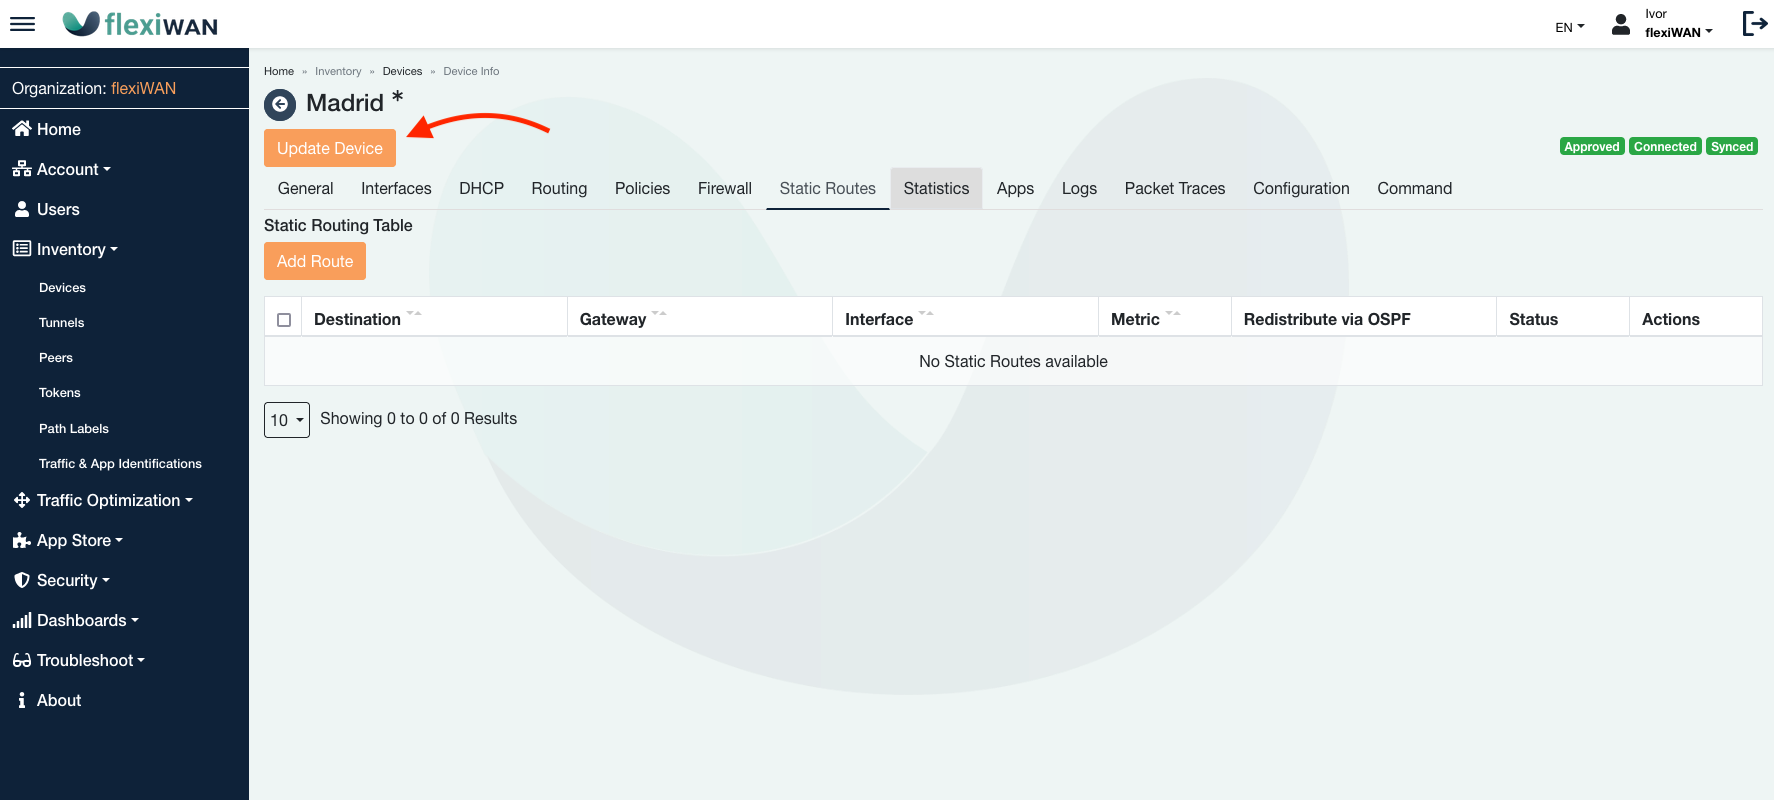
In order to define a static route for a given flexiEdge device, navigate to the device settings and click on the “Static Routes” tab. From there, click on “Add Route” button.
The following static route options can be configured:
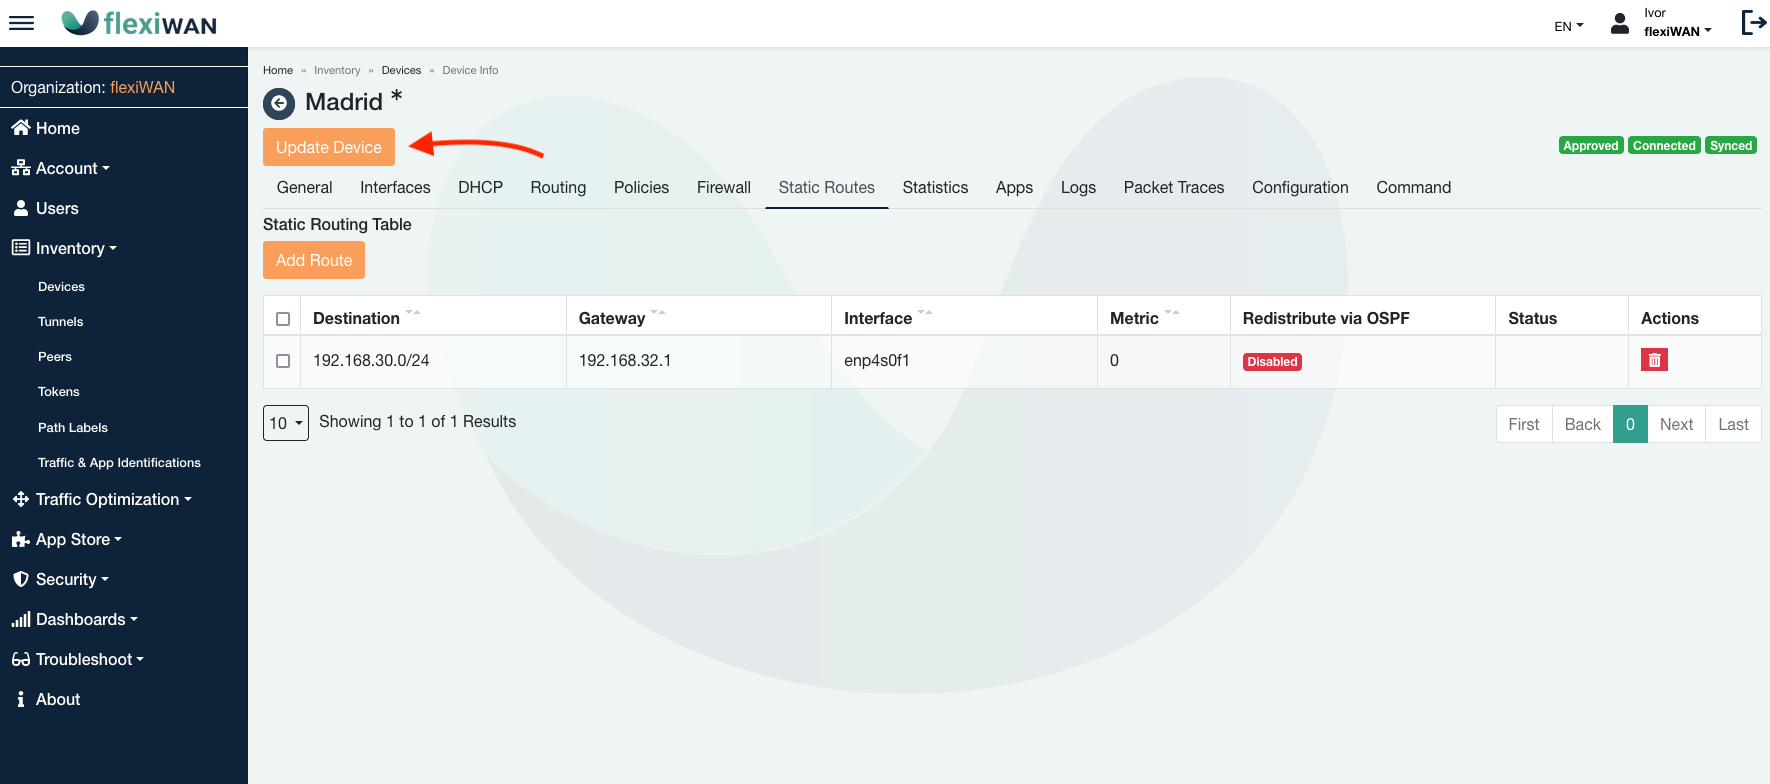
- Destination
Subnet and mask of the destination route
- Gateway IP
Gateway used for the route. Can be set using the dropdown or manually specified
- Interface
The outgoing interface. If the gateway is within a subnet of one of the router interfaces, the interface specification is optional.
- Metric
Route metric - optional
- Redistribute via OSPF
enables propagating the static routes to other sites connected via tunnels, using OSPF.
- Redistribute via BPG
enables propagating the static routes to other sites connected via tunnels, using BGP.

After creating a static route, make sure to click “Update device”, which will send a new job to the device.
OSPF Configuration
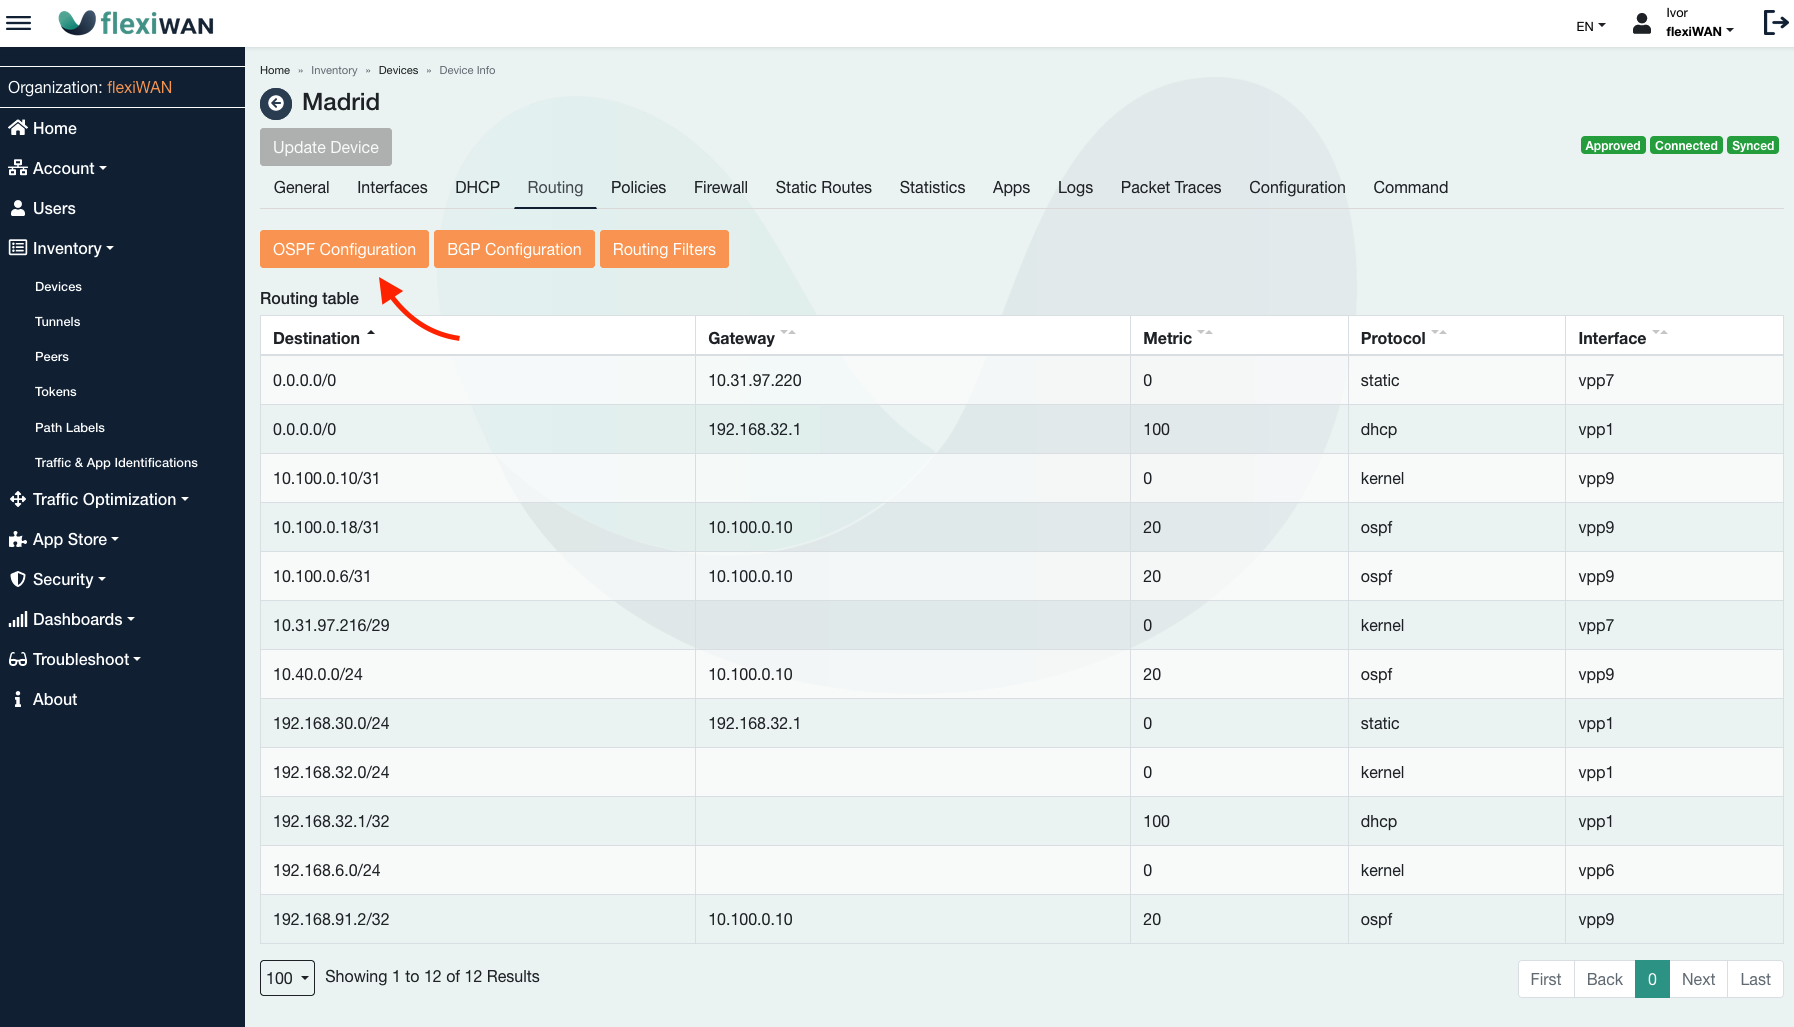
OSPF can be configured by clicking on the OSPF Configuration from the Routing tab.
Users can configure the router-id and area for LAN network along with authentication. Users can adjust OSPF parameters based on their network requirements as shown in the next figure.
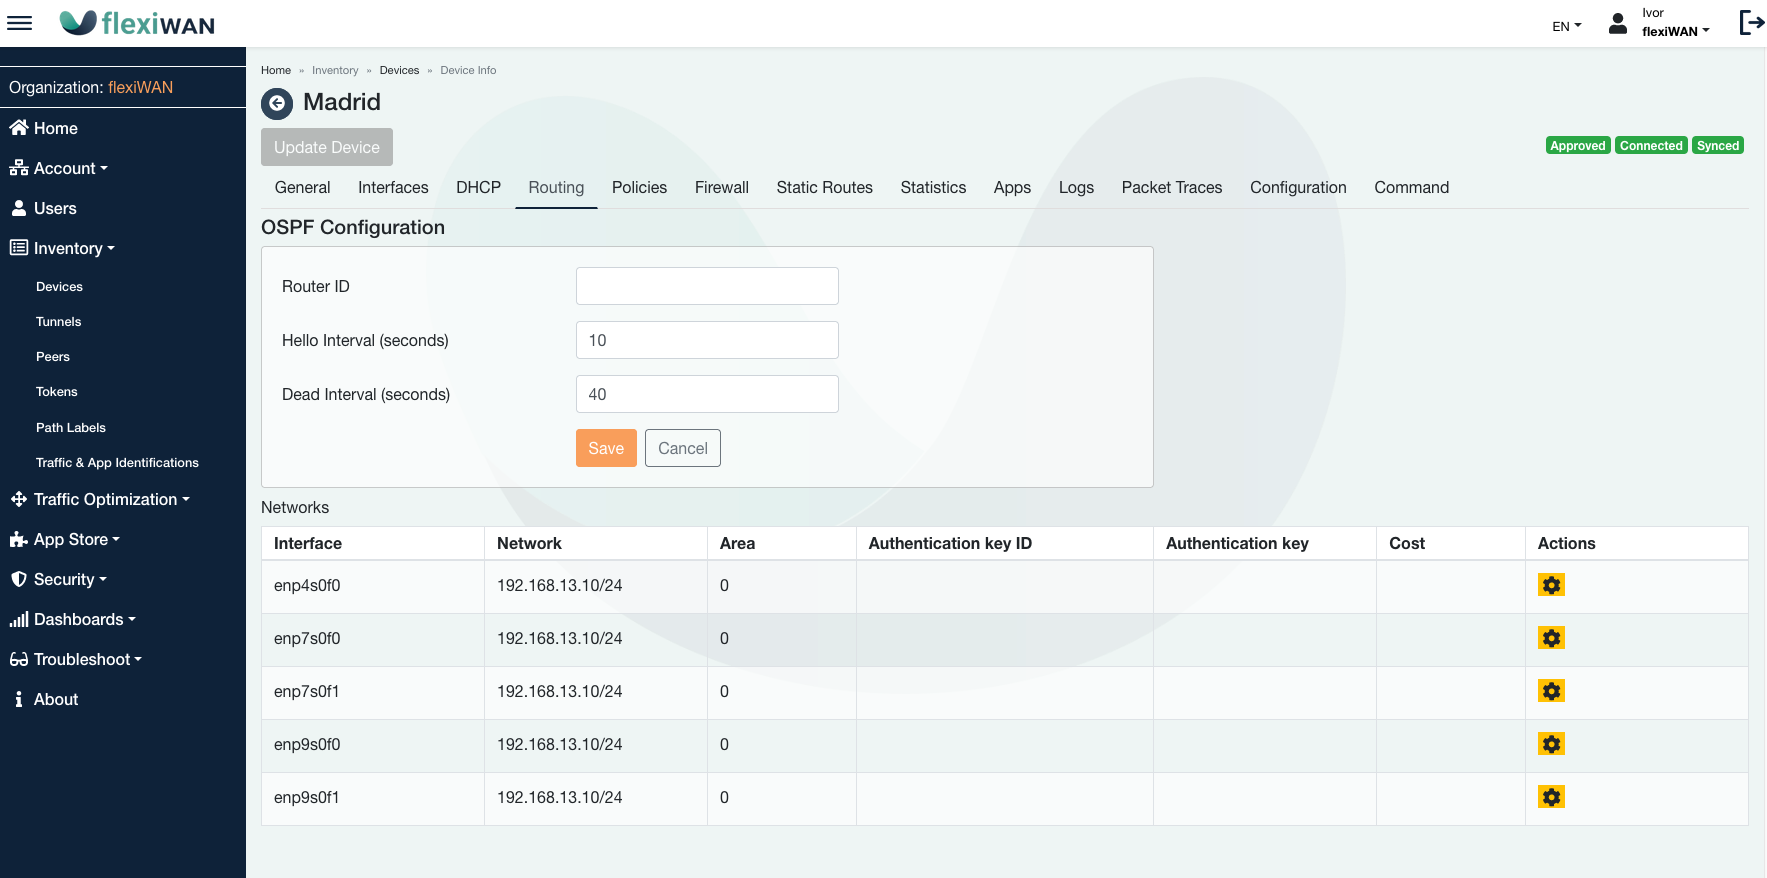
- Router-Id
Unique ID for each device, used for identification
- Hello Interval
In seconds, mention how frequent the hello message negotiates
- Dead Interval
In seconds where it wait to announce the peer is dead
Authentication and area ID can be viewed or configured for each interface by clicking on settings from the ‘Actions’ column.
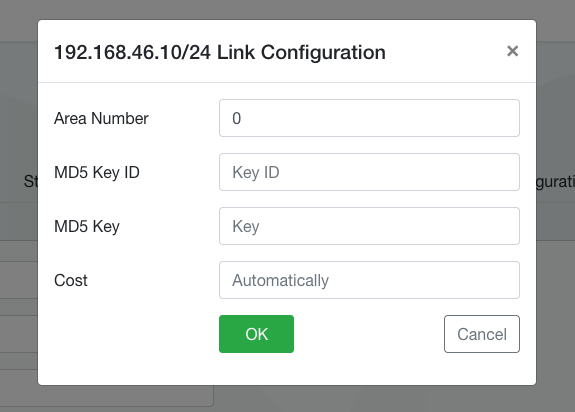
- Area ID
A number to indentify are and network.
- MD5 Key ID
MD5 Key Identification to configure the OSPF authentication
- MD5 Key
MD5 Secert Key for the OSPF authentication
The following topology shows the typical OSPF configuration with different areas configured for LAN. Pleae note, tunnel interface is part of the Backbone (area 0) without configuration options. Static routes can be redistributed via the OSPF as explained in the earlier sections.

BGP Configuration
Navigate to a device and click on Routing tab. From there click on BGP Configuration.
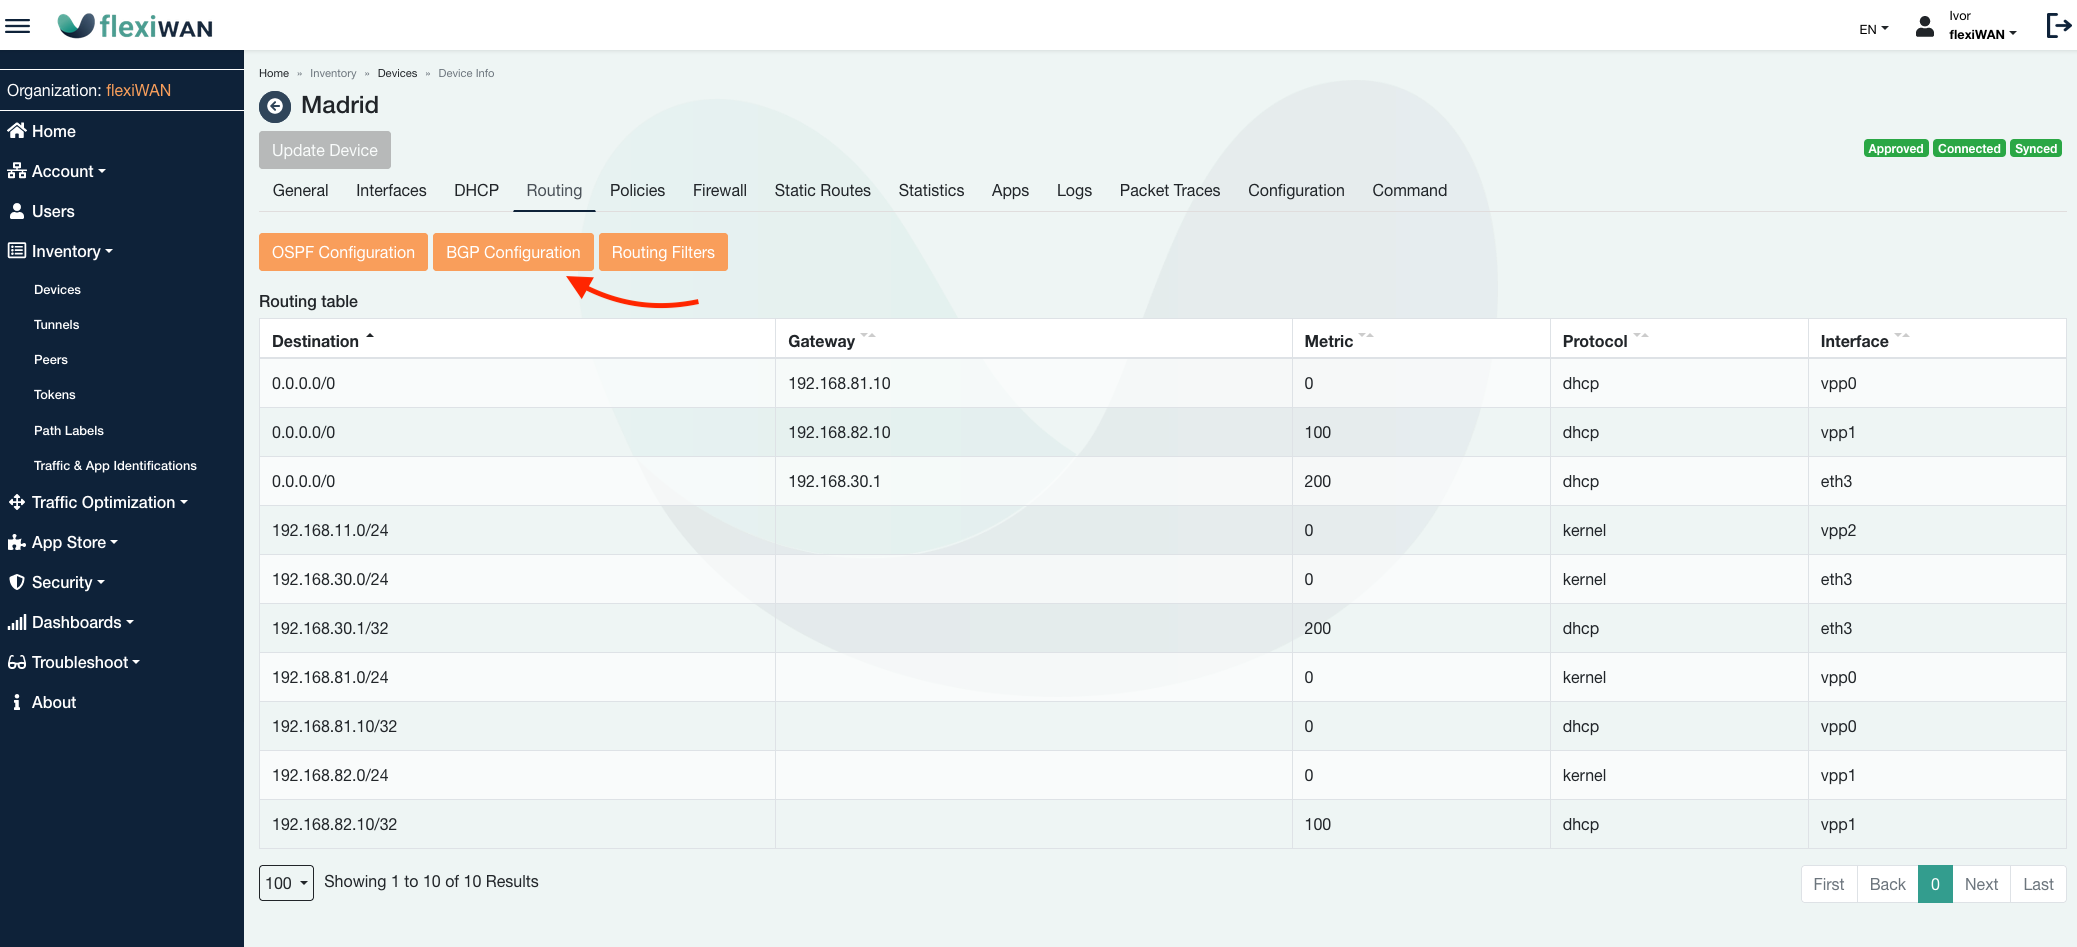
From the next screen BGP can be enabled and configured.

BGP is disabled by default, once enabling it the following settings can be configured:
- Local ASN
Enter private AS Number, use from 64512 to 65535. Obligatory field.
- Router ID
Set an IPv4 address, must be unique and not conflict other edges.
- Redistribute OSPF routes
Optional, use when combining OSPF and BGP together on LAN interface.
- Keepalive interval
Default is 30, configures period of time between keepalive messages.
- Hold interval
Default is 90, configures time when no response received until the peer is considered as unreachable (usually set to 3 times the keepalive interval)
Add BGP Peers
When tunnel is established with BGP, flexiWAN will automatically configure the BGP peer neighbors to other flexiEdge sites. For non tunnel peering, BGP neighbors can be manually specified by via Add button.
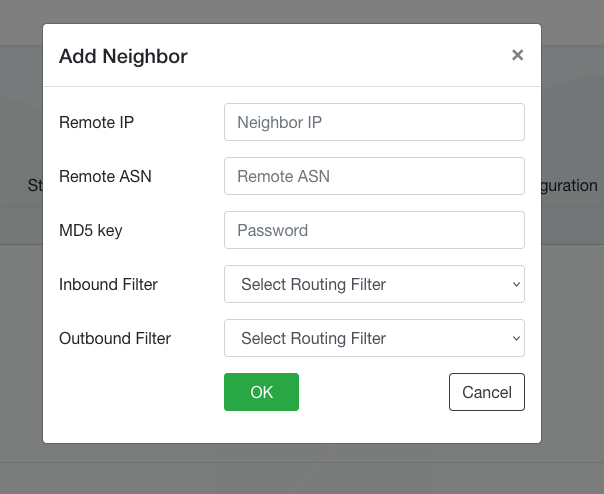
- Remote IP
Specify IP of remote router this edge will peer with.
- Remote ASN
set AS Number from remote router
- MD5 key
Use for authenticating with remote router
- Inbound / Outbound filter
Apply filtering filters, see below for more information.
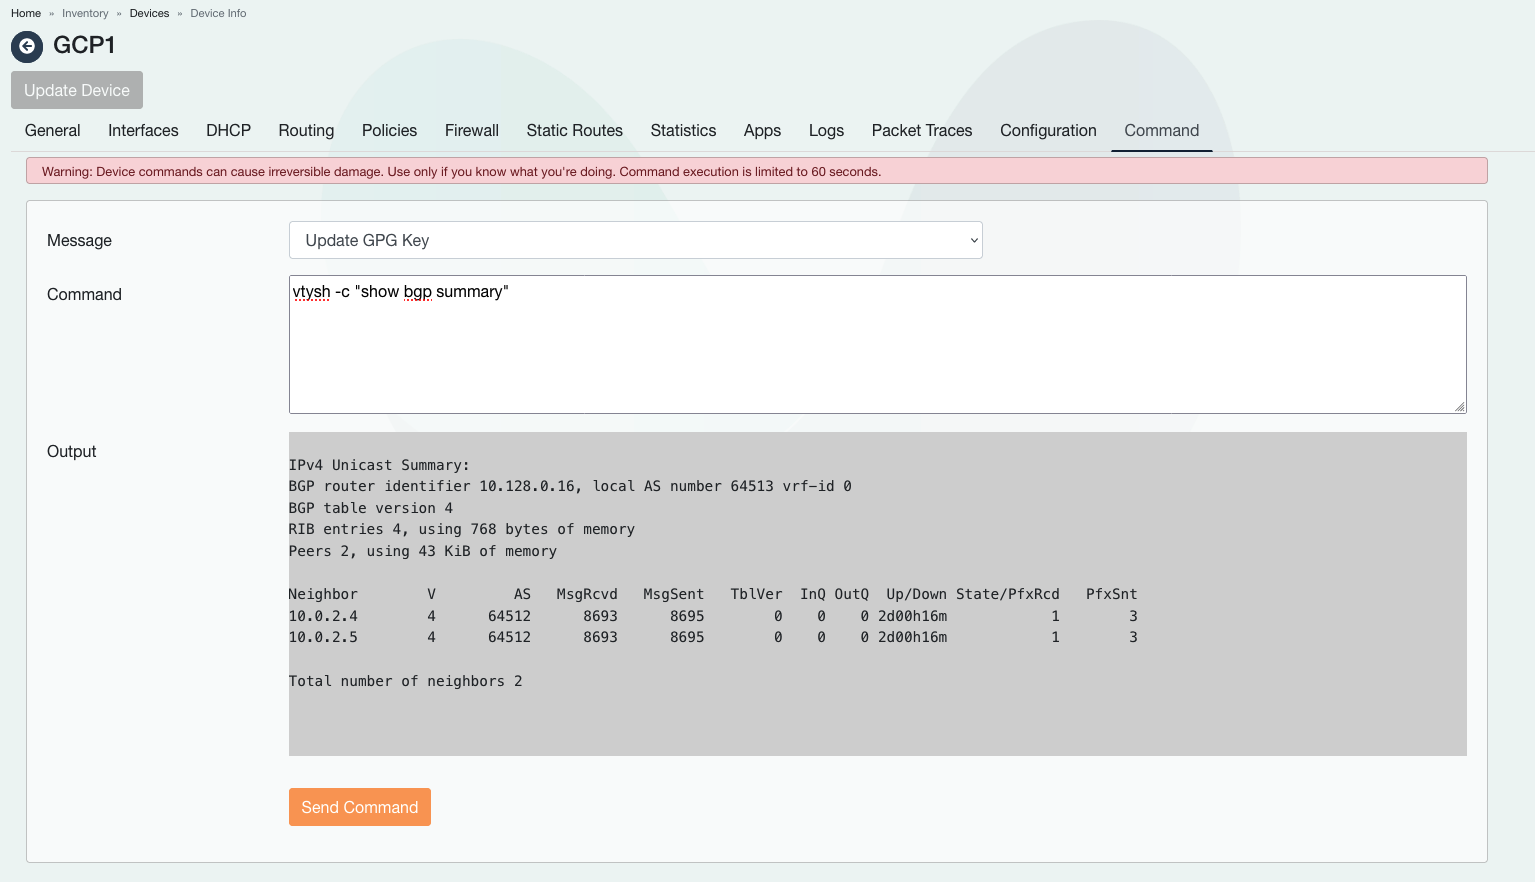
View BGP status
To view BGP summary and list of neighbors, navigate to device settings and from Command tab execute the following command:
vtysh -c "show bgp summary"
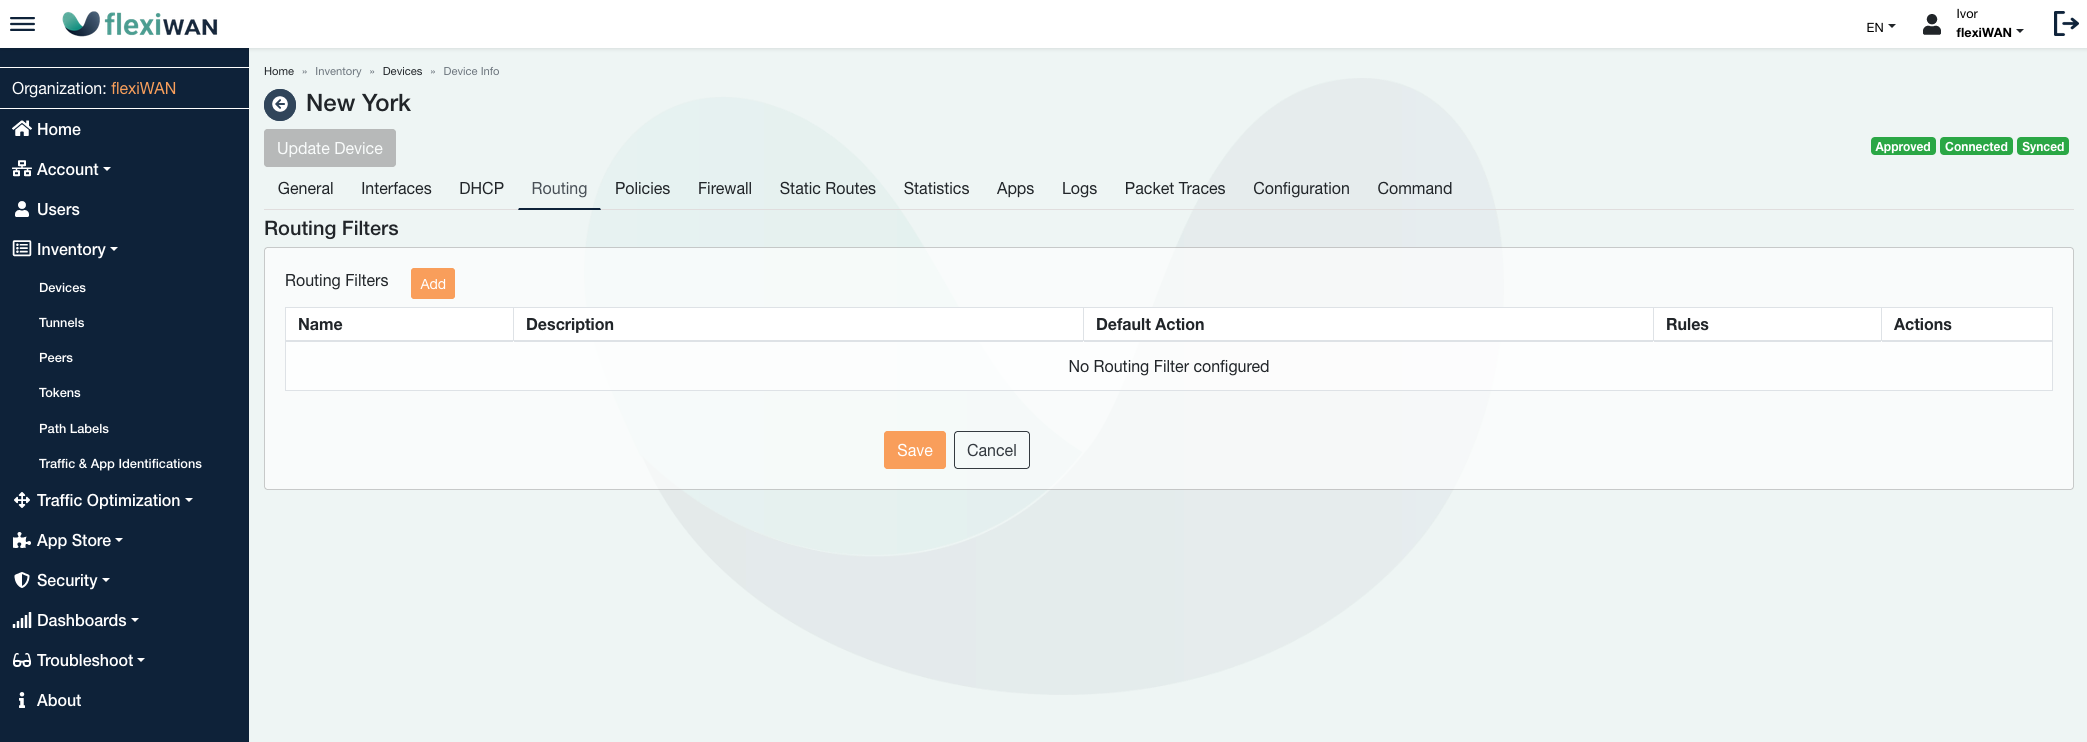
Routing filters
Routing filters can be used with BGP in order to filter traffic between peers. To configure routing filters navigate to Routing tab and click on Routing filters.

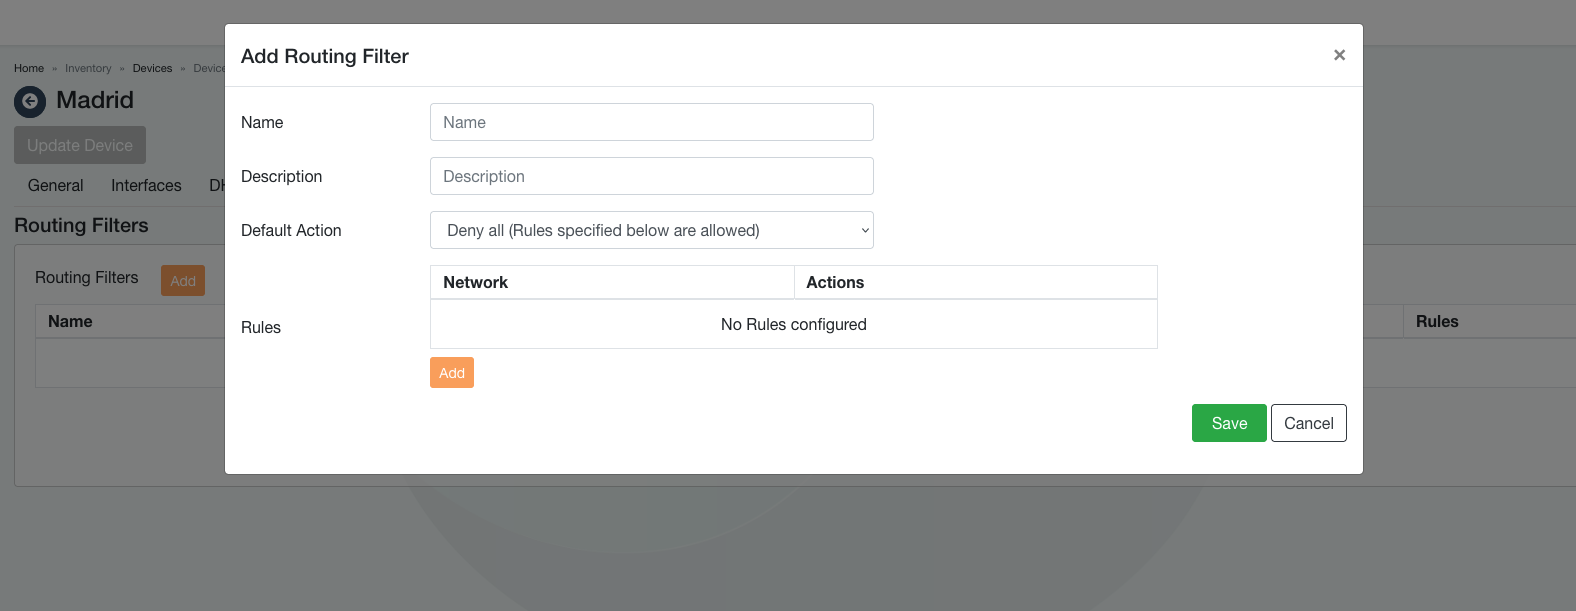
The following page shows filters, click on Add to create a new filter.
Enter filter name, description and select default action. Under default action two options are available:
- Deny all
Traffic from rules added under Network will be allowed, the rest is denied.
- Allow all
Traffic from rules added under Network will be denied, rest is allowed.
Finally, under Network section set an IP with mask to allow or deny traffic.