Google Cloud Platform
flexiWAN Integration with Google Network Connectivity Center
Follow this guide to sucessfully deploy flexiWAN on GCP with its Network Connectivity Center. To find out more about Google Network Connectivity Center click here. Documentation is structured so it follows GCP deployment flow, covering initial VM instance configuration and flexiWAN deployment. After sucessfully completing flexiWAN deployment, follow the guide to configure BGP peering in GCP and flexiWAN.
Prerequisites
To follow this guide make sure to have the following ready:
Deploying a VM instance
The following section covers how to create WAN and LAN VPC networks and deploy a VM with both VPC networks attached on GCP. This is handled via VPC networks section in Google Cloud. It is recommended to remove the default VPC network before continuing.
Creating WAN network
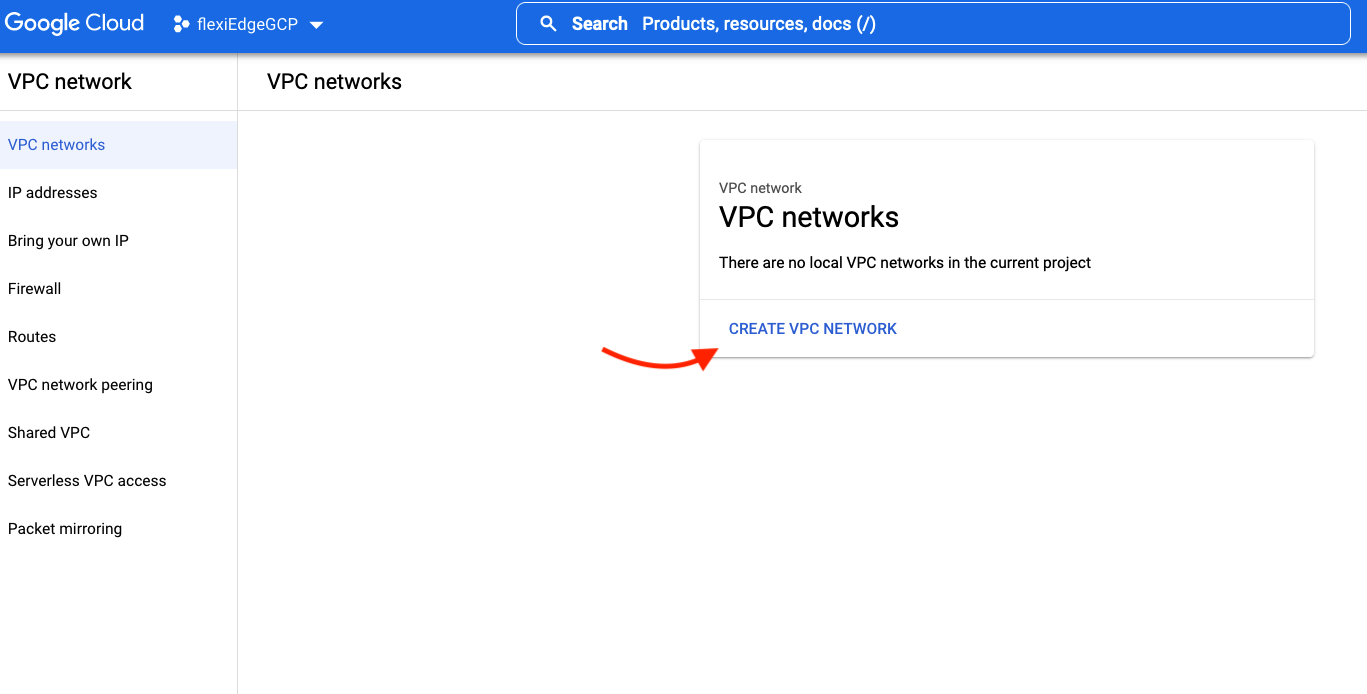
Navigate to VPC networks section and from it click on Create VPC Network. This section will not appear if the default network is not removed, however a new VPC network can be added still.
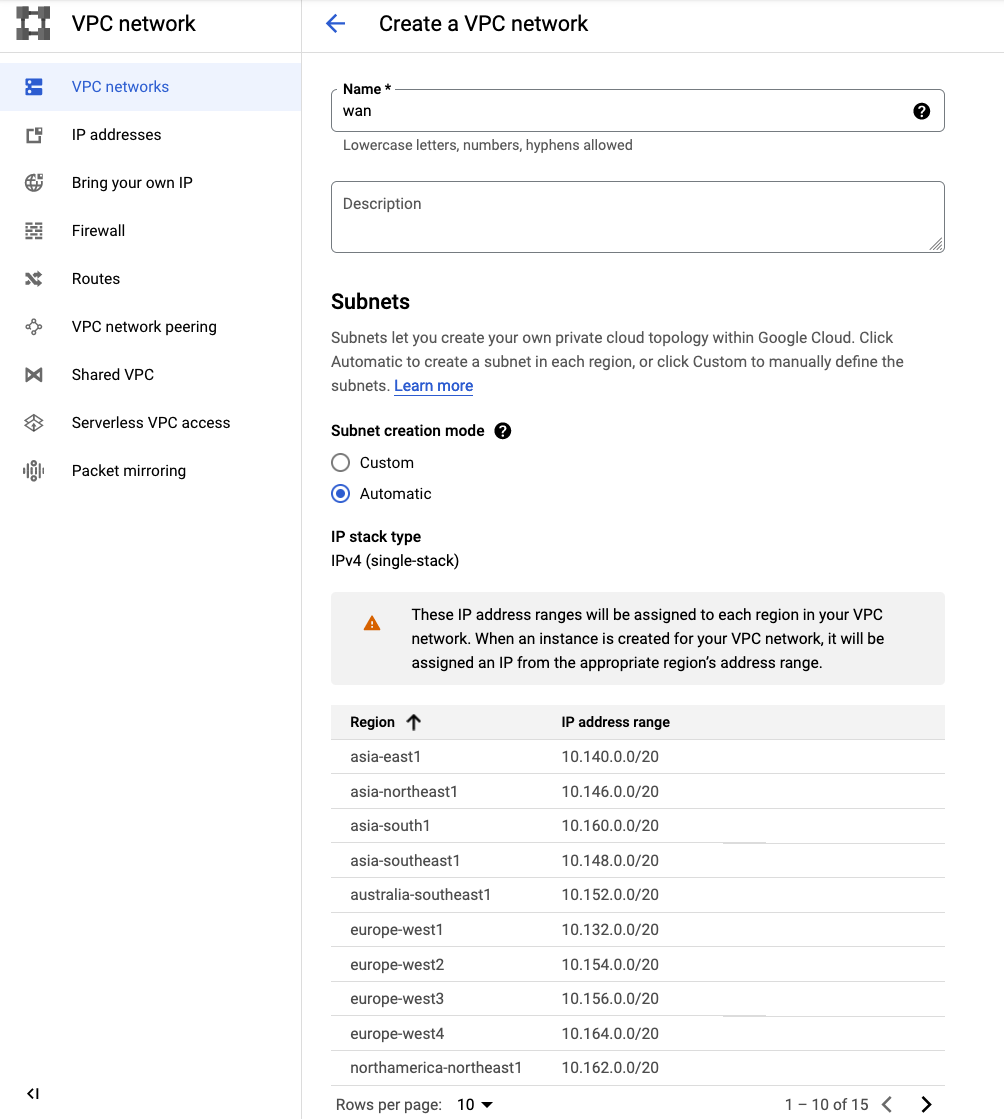
Name the VPC network as wan and set subnet creation mode to automatic.
Under firewall rules enable as shown on the screenshot. Click Create to complete WAN VPC creation.
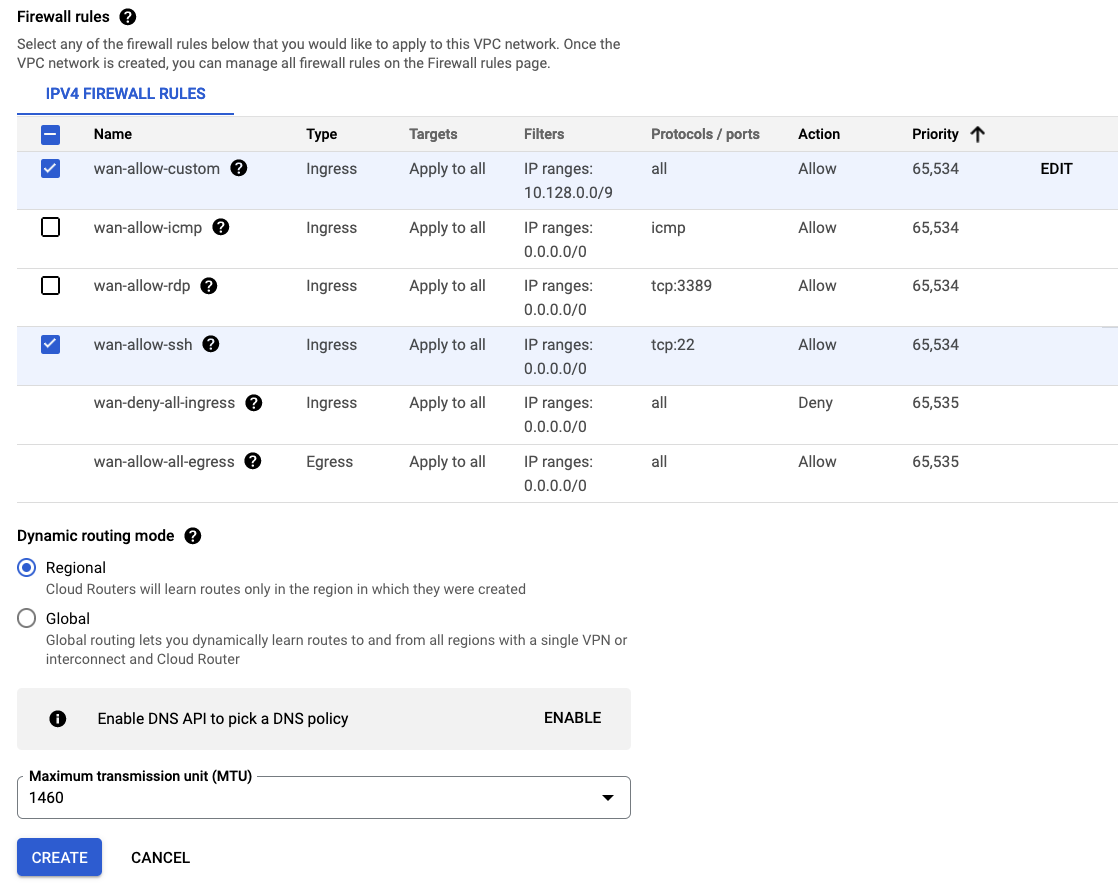
That’s it, now the WAN VPC network is ready.
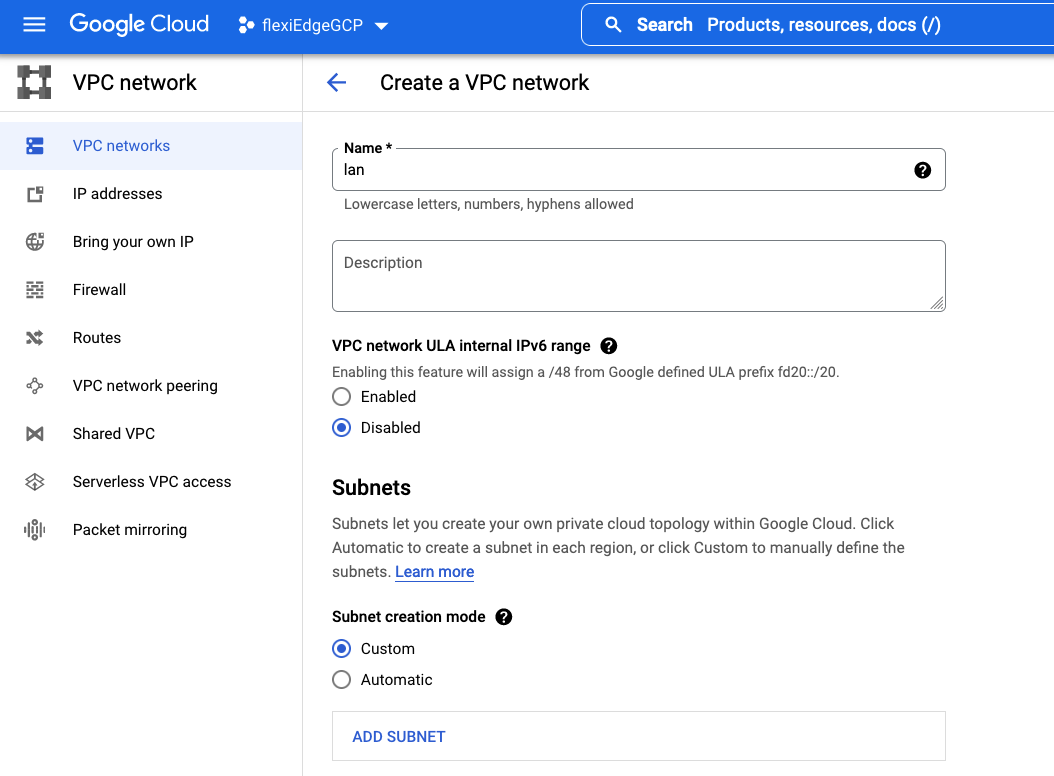
Creating a LAN network
After creating WAN VPC network, next step is to create LAN network. Again, click on Create VPC Network. This time name it lan and set Subnet creation mode to custom.
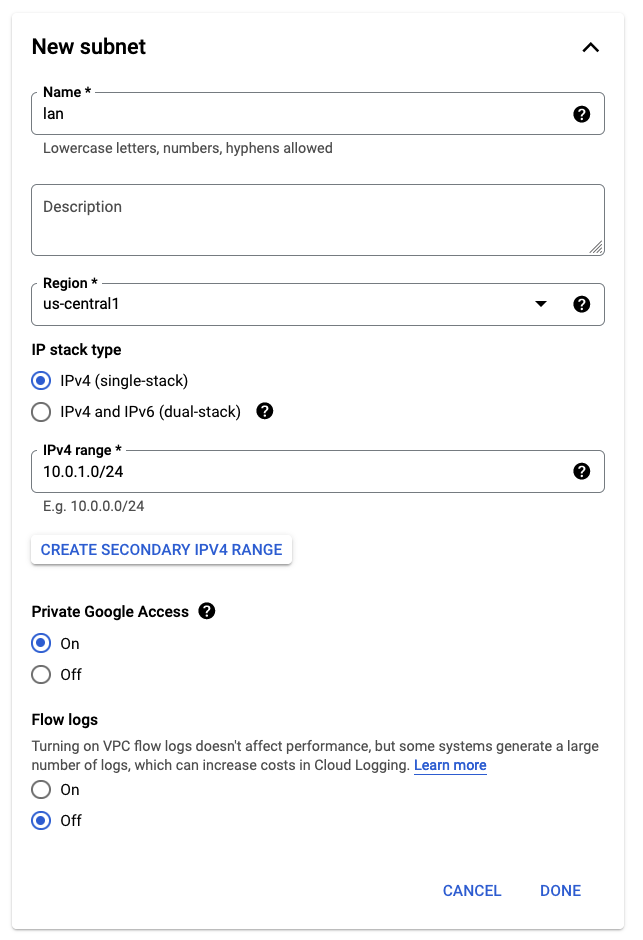
Under New subnet section pick a region and add a IP range not used anywhere else. In this case 10.0.1.0/24. Optionally, set Private Google Access to On.
That’s it, now both WAN and LAN networks are ready. Proceed to next section to create a new VM instance with both of these networks attached.
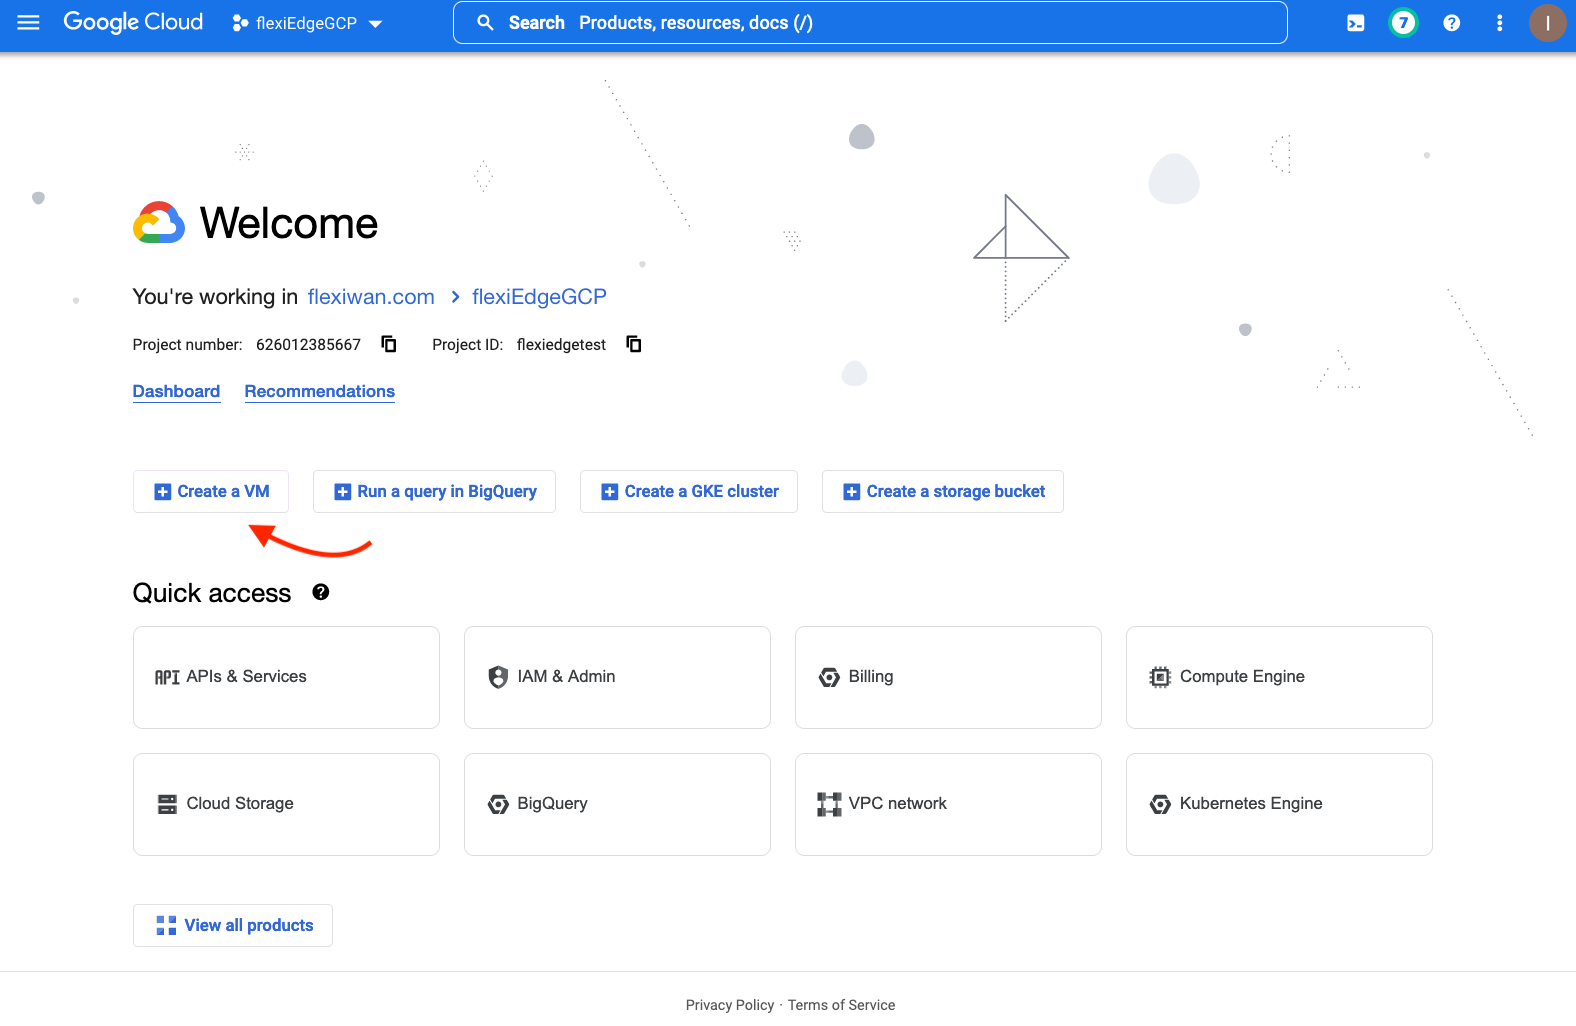
Creating a new VM
After creating a WAN and LAN networks, navigate to the main dashboard and click on Create a VM shortcut
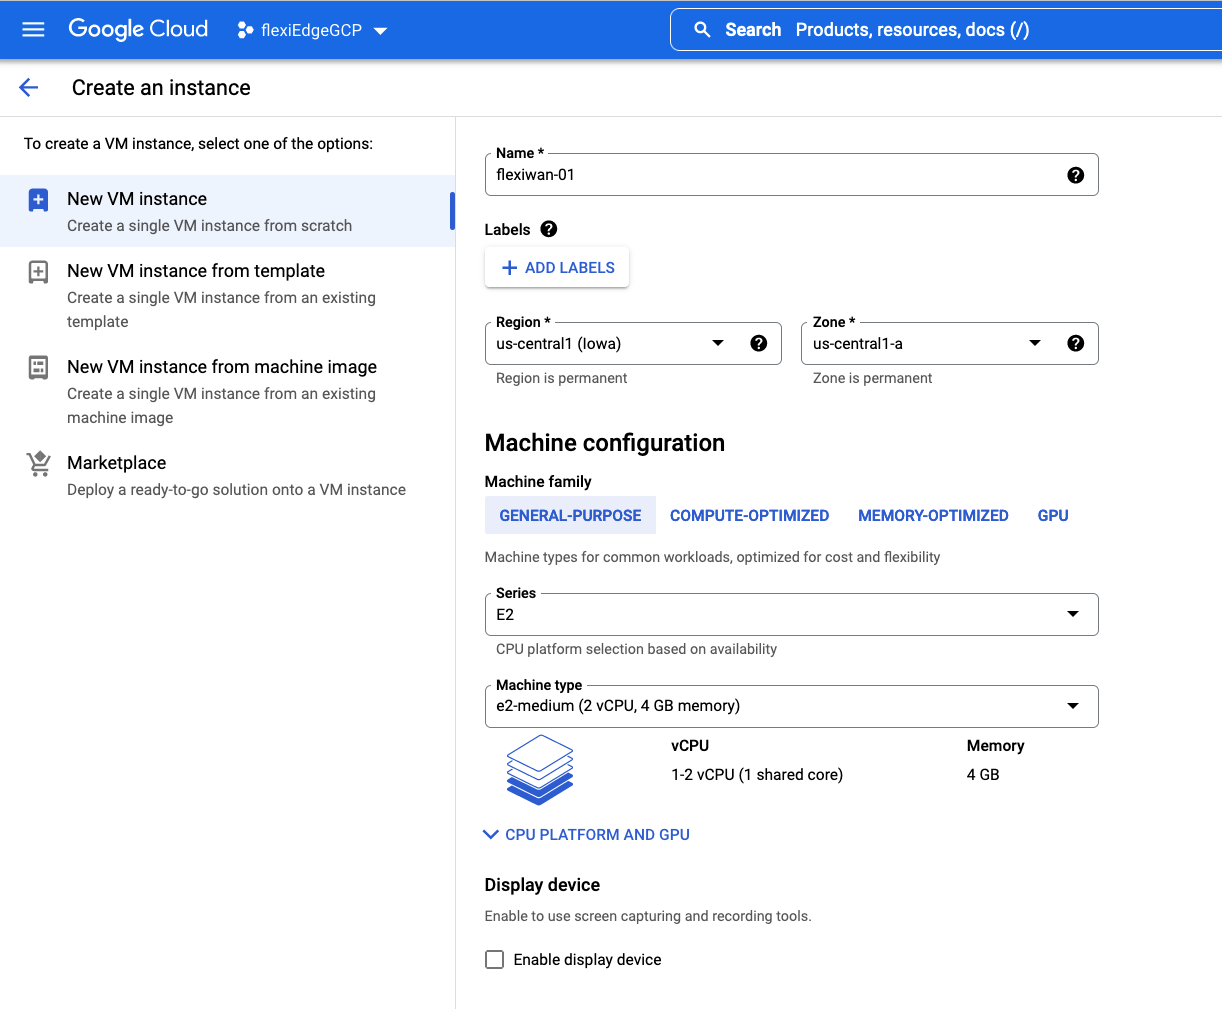
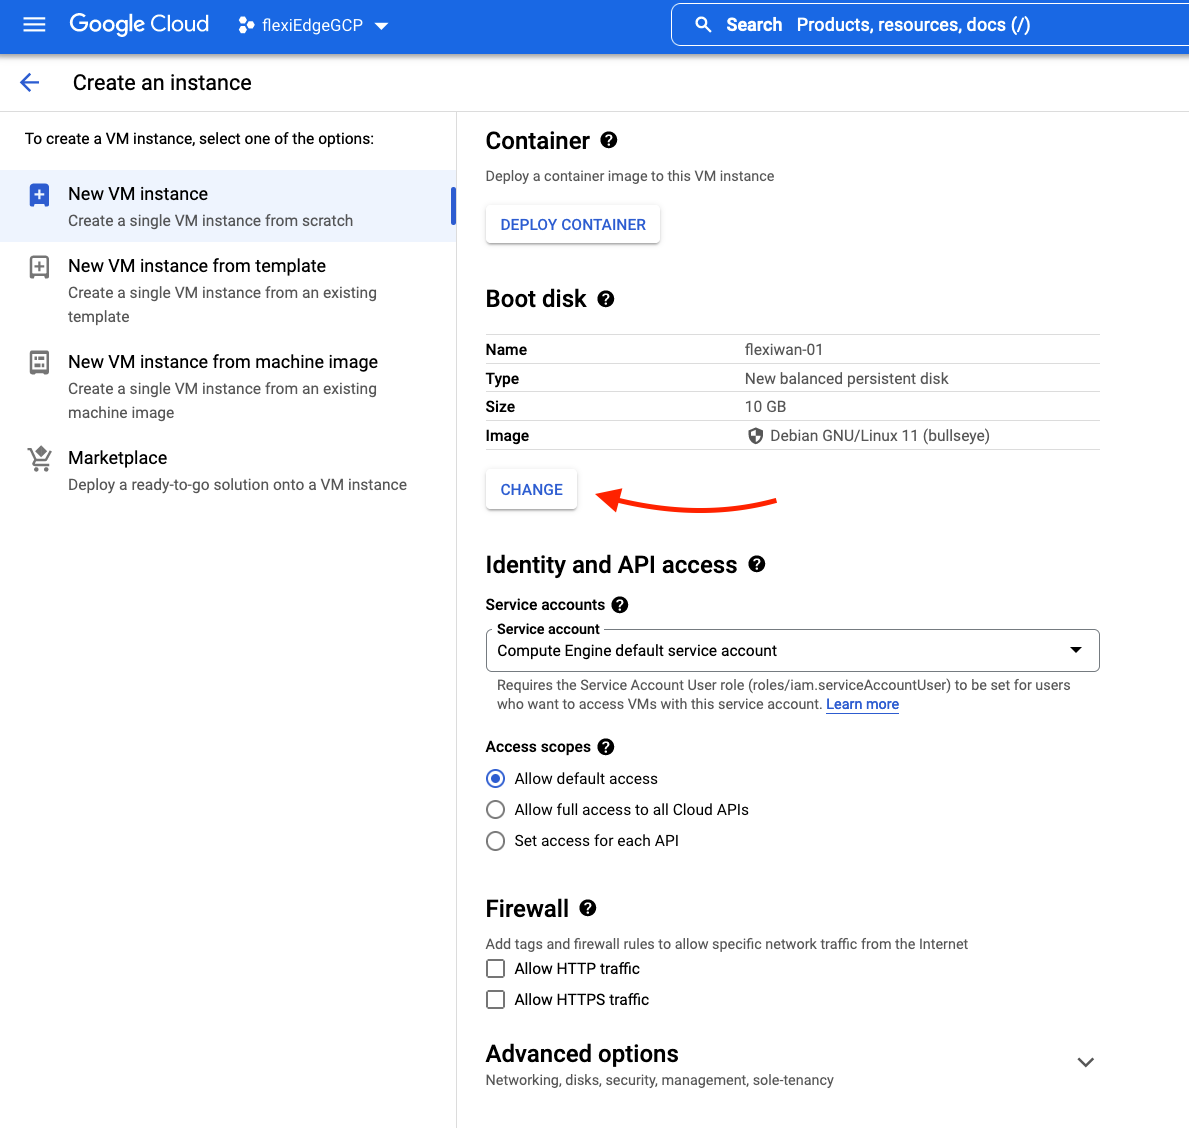
Name the instance, pick appropriate region and under the Machine configuration select E2-medium machine which has 2 vCPU’s and 4GB of RAM.
While still on the same page scroll to the Boot disk section and click on Change.
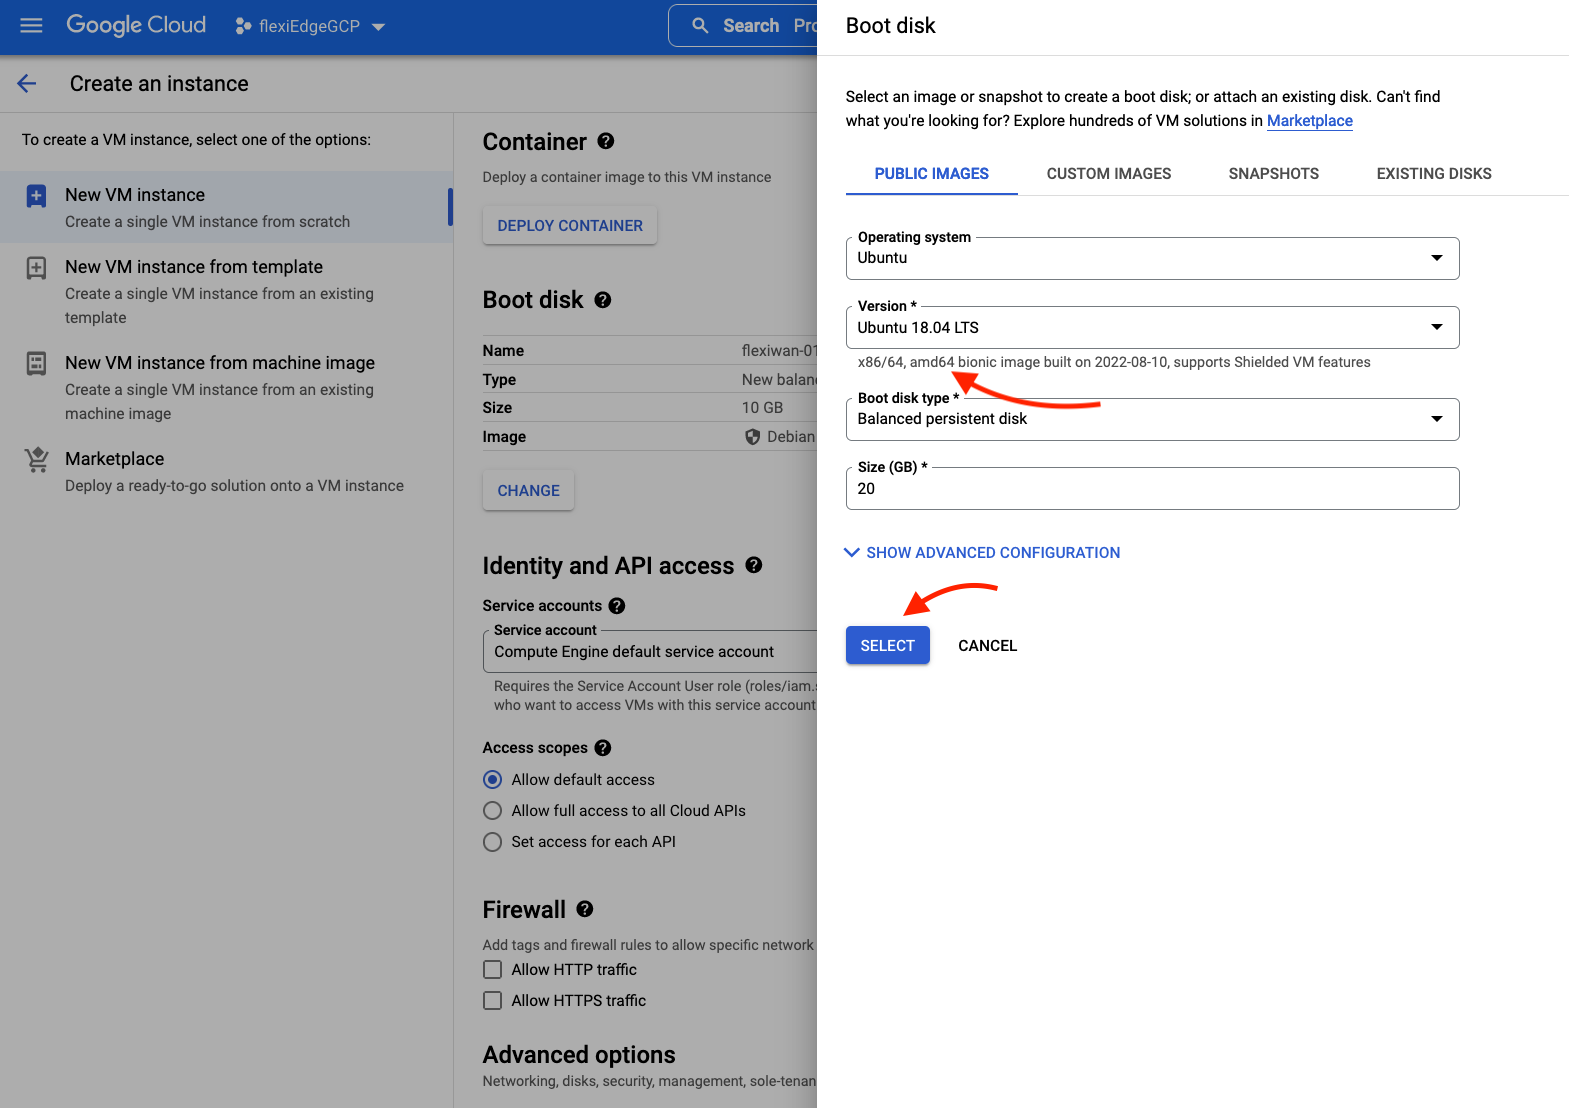
In the Boot disk section select Ubuntu as a OS and 18.04 LTS x86/64 version. Make sure to select AMD64 one and not ARM. Enter 20GB for the disk size and click on Select to close the screen.
Continue to the Networking section under Advanced options and make sure IP forwarding is enabled and VirtIO is selected as a Network Interface card.
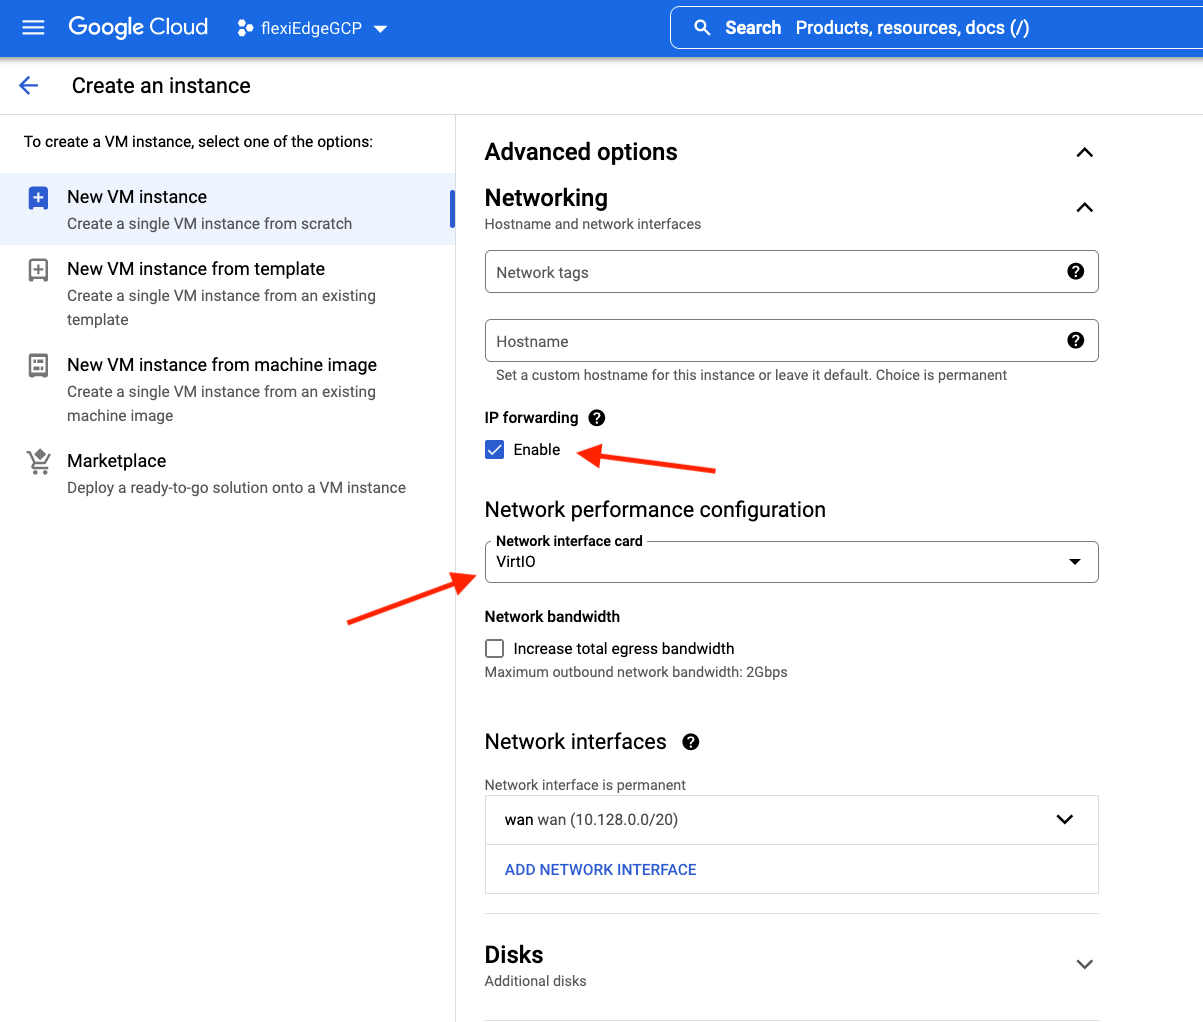
Navigate to Network interfaces. Make sure wan interace is already present, click on Add Network Interface to add LAN interface.

In the next section define a previously configured network for LAN interface. Make sure external IPv4 address is set to none.
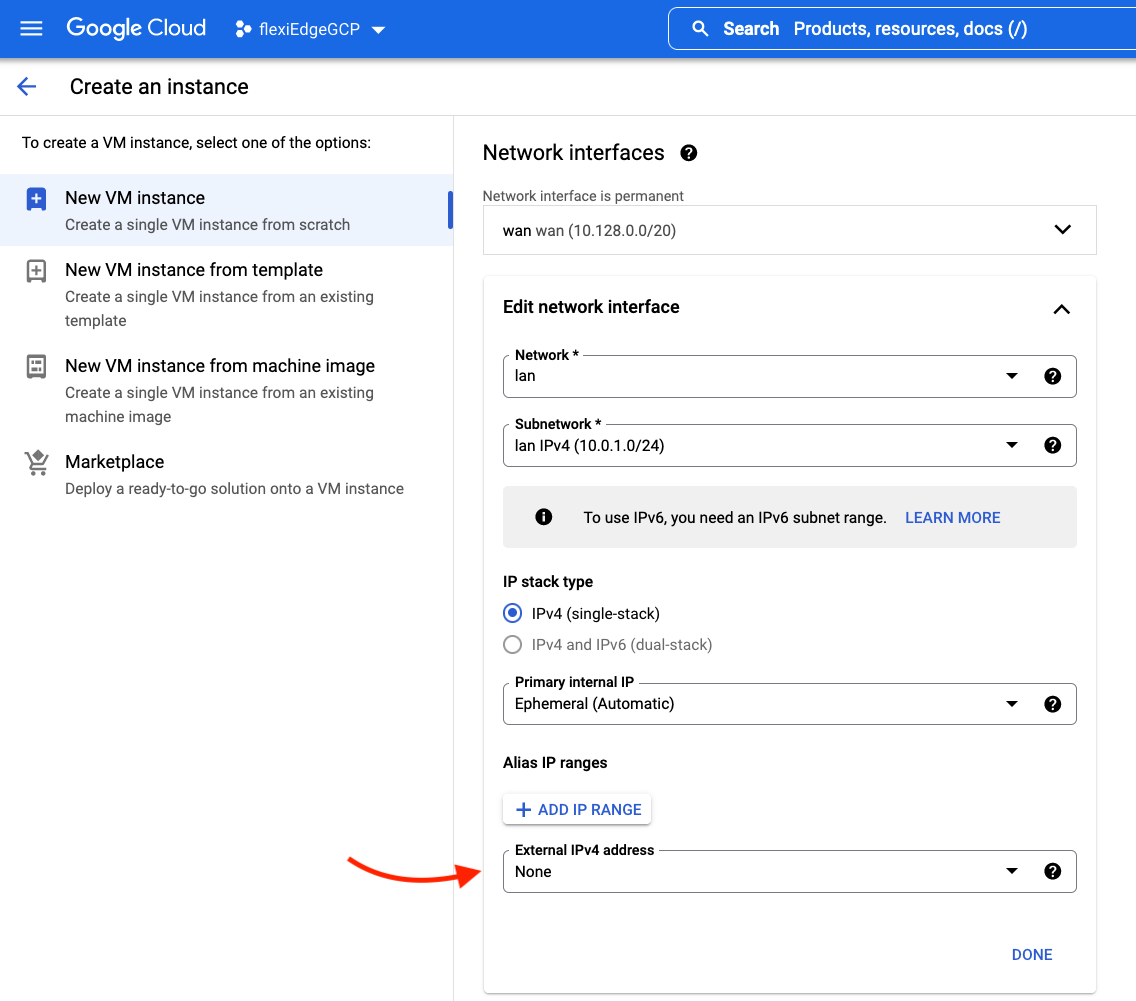
Confirm both WAN and LAN network interfaces are selected and click on Create at the bottom of the page.

That’s it, a VM instance should be deployed in a few moments.
gcloud CLI
In order to deploy VM from the gcloud command line, use the following command:
gcloud compute instances create flexiwan-01 --project=flexiedgetest --zone=us-central1-a --machine-type=e2-medium --network-interface=network-tier=PREMIUM,nic-type=VIRTIO_NET,subnet=wan --network-interface=nic-type=VIRTIO_NET,subnet=lan,no-address --can-ip-forward --maintenance-policy=MIGRATE --provisioning-model=STANDARD --service-account=626012385667[email protected] --scopes=https://www.googleapis.com/auth/devstorage.read_only,https://www.googleapis.com/auth/logging.write,https://www.googleapis.com/auth/monitoring.write,https://www.googleapis.com/auth/servicecontrol,https://www.googleapis.com/auth/service.management.readonly,https://www.googleapis.com/auth/trace.append --create-disk=auto-delete=yes,boot=yes,device-name=flexiwan-01,image=projects/ubuntu-os-cloud/global/images/ubuntu-1804-bionic-v20220810,mode=rw,size=20,type=projects/flexiedgetest/zones/us-central1-a/diskTypes/pd-balanced --no-shielded-secure-boot --shielded-vtpm --shielded-integrity-monitoring --reservation-affinity=any
Installing flexiWAN
After a new VM instance is deployed and running, click on SSH button to connect to it via browser.
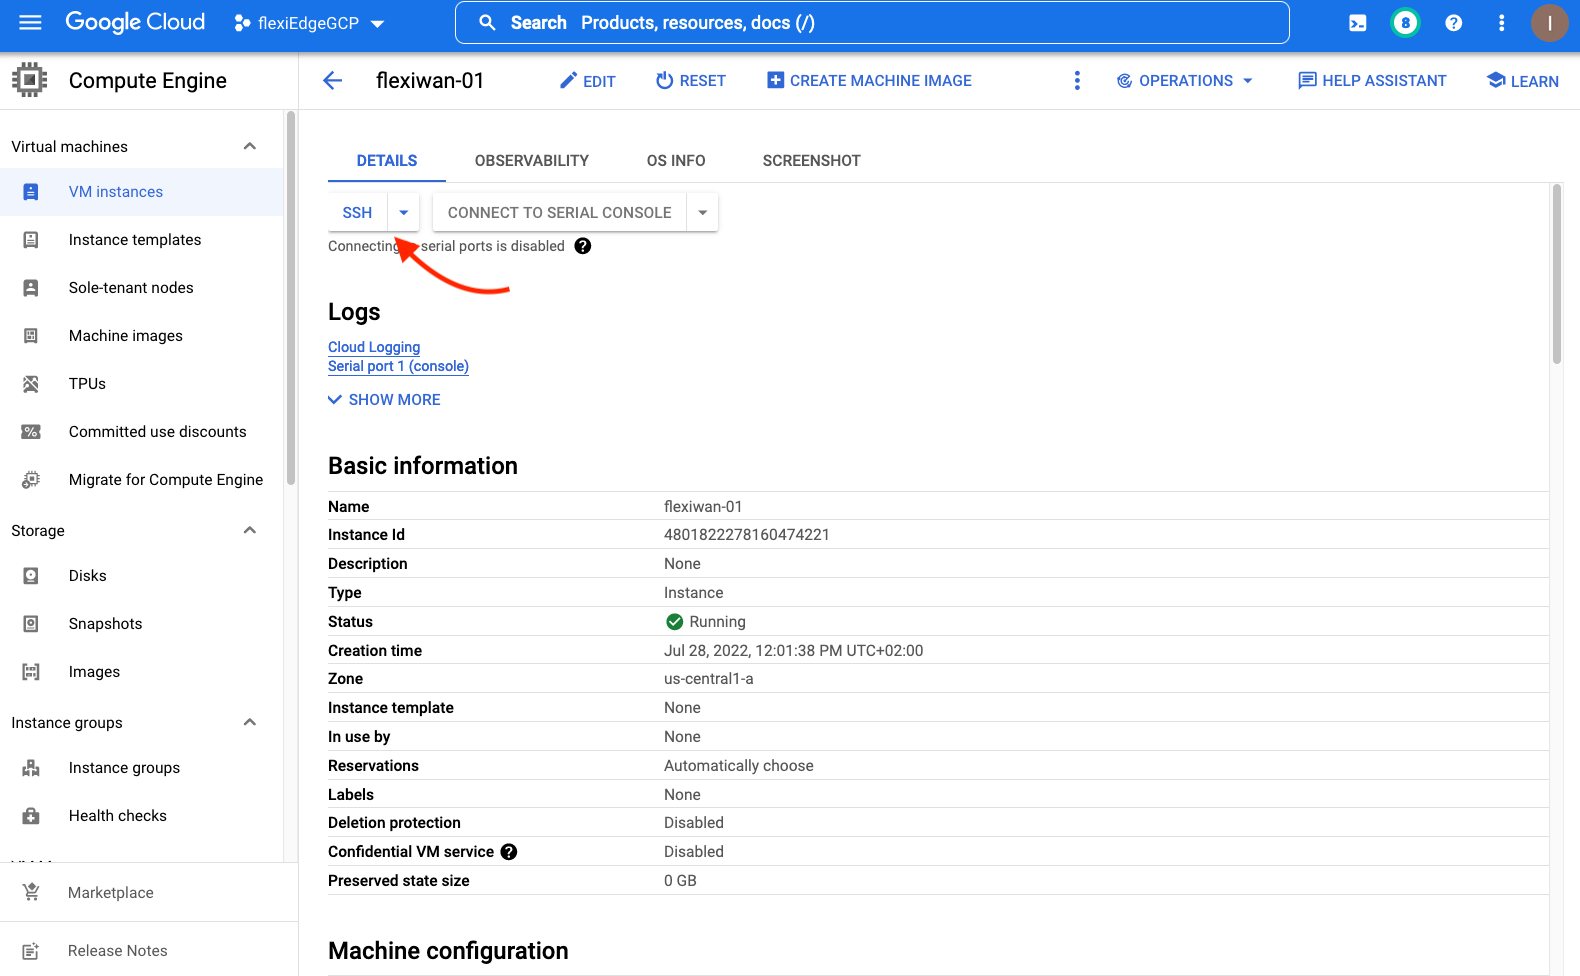
A pop-up window will open with direct access to the device. Run the following commands:
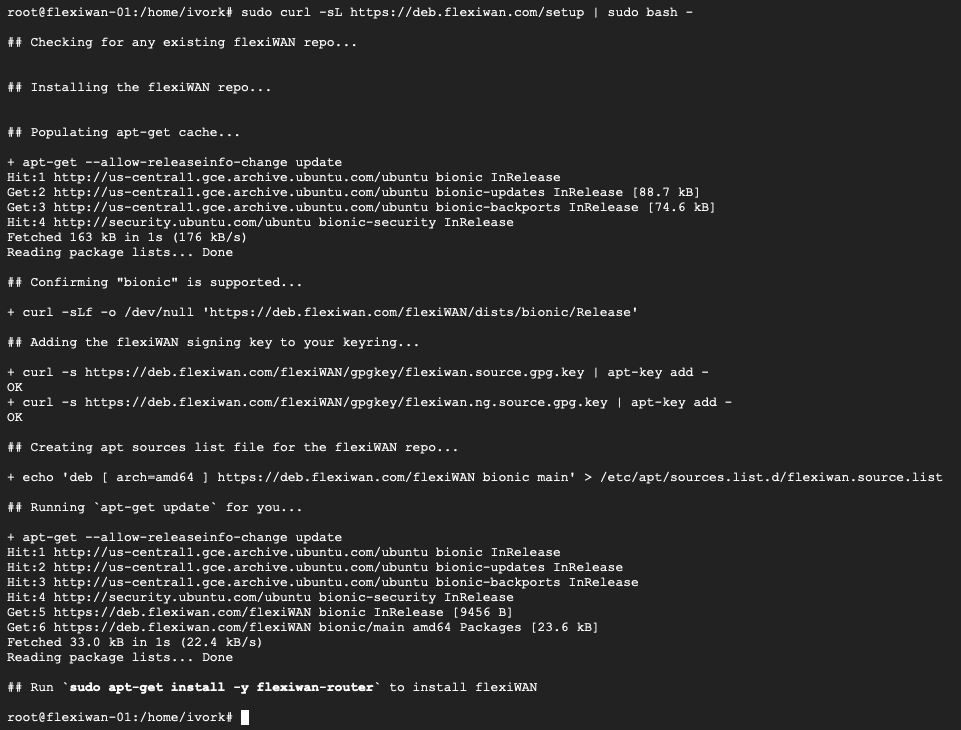
sudo su- to elevate privilegessudo curl -sL https://deb.flexiwan.com/setup | sudo bash -- this step adds the flexiWAN respository.
Enter the following command to install flexiWAN on the GCP VM:
apt install flexiwan-router
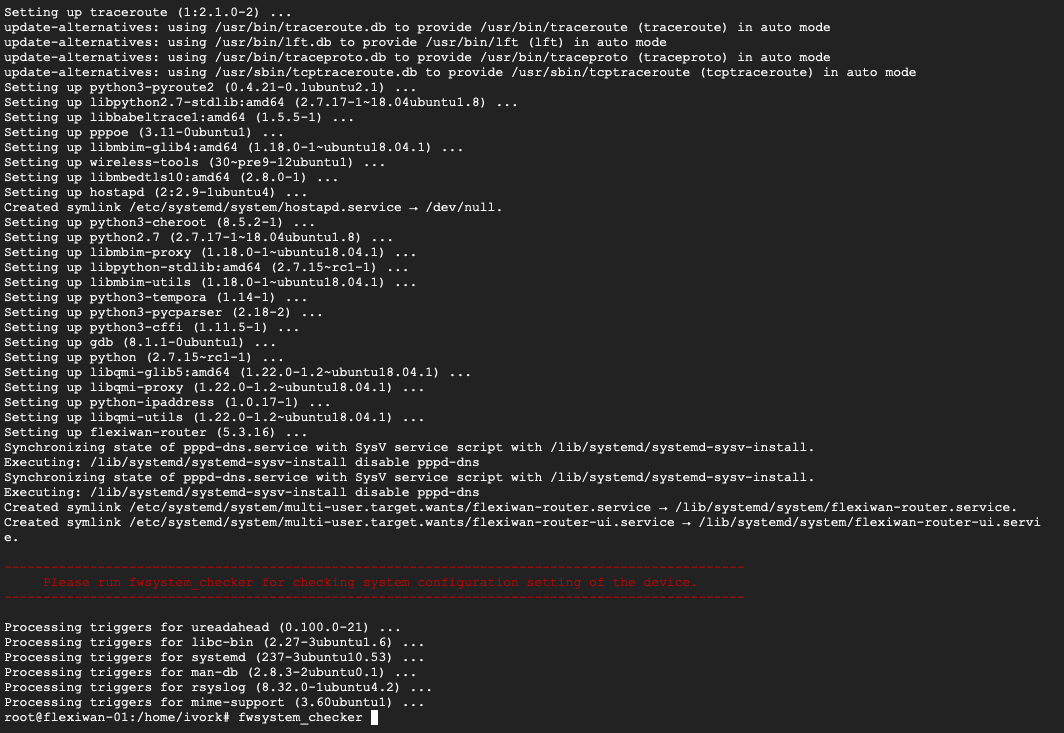
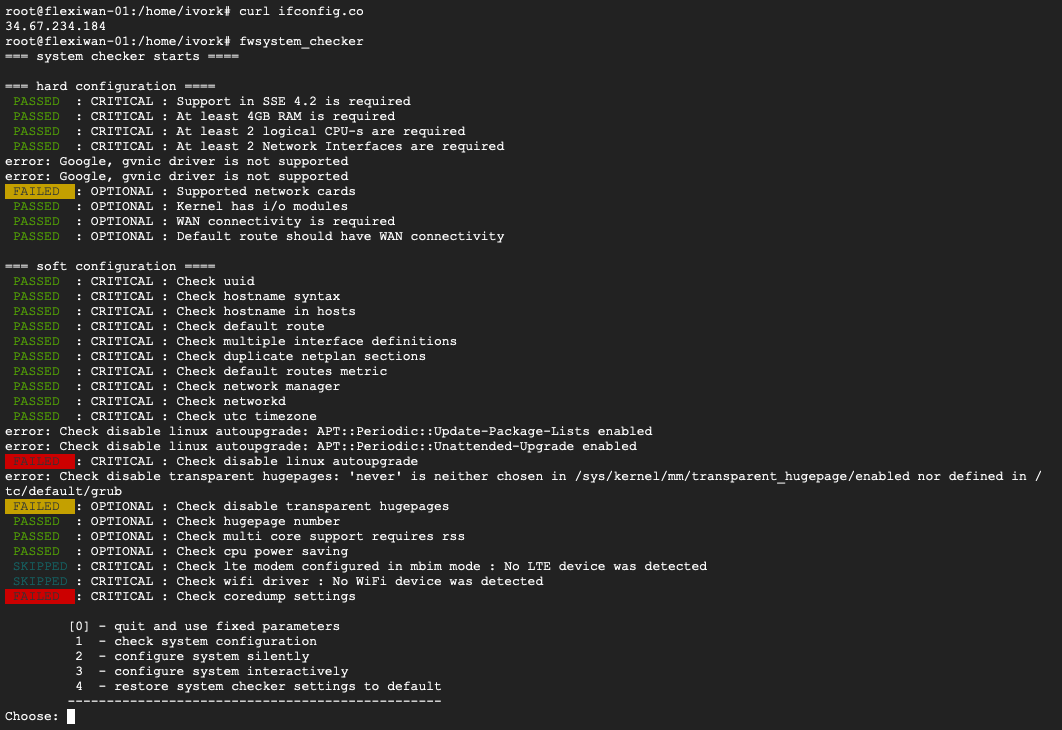
After flexiWAN installation is complete, run fwsystem_checker command to prepare the VM for flexiWAN operation. Select option 2 for quick and silent configuration, exit afterwards with 0. Follow the next section to complete flexiWAN configuration.
Configuring flexiWAN
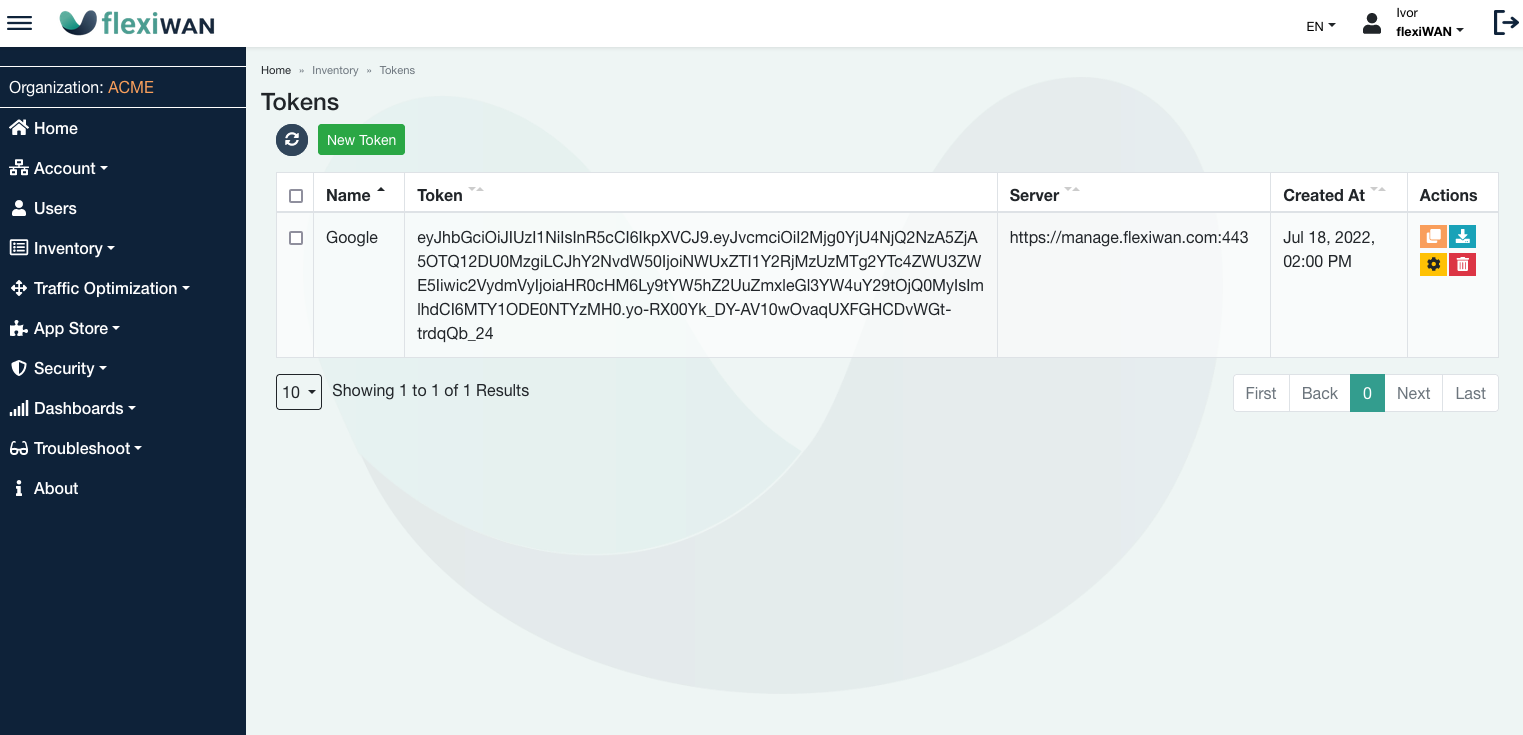
From flexiManage navigate to Inventory > Devices > Token and copy an existing token or create a new one.
From there return to the SSH session and paste the token into /etc/flexiwan/agent/token.txt. For example use the following two steps with nano:
nano /etc/flexiwan/agent/token.txtexit nano with CTRL+X and save the file.
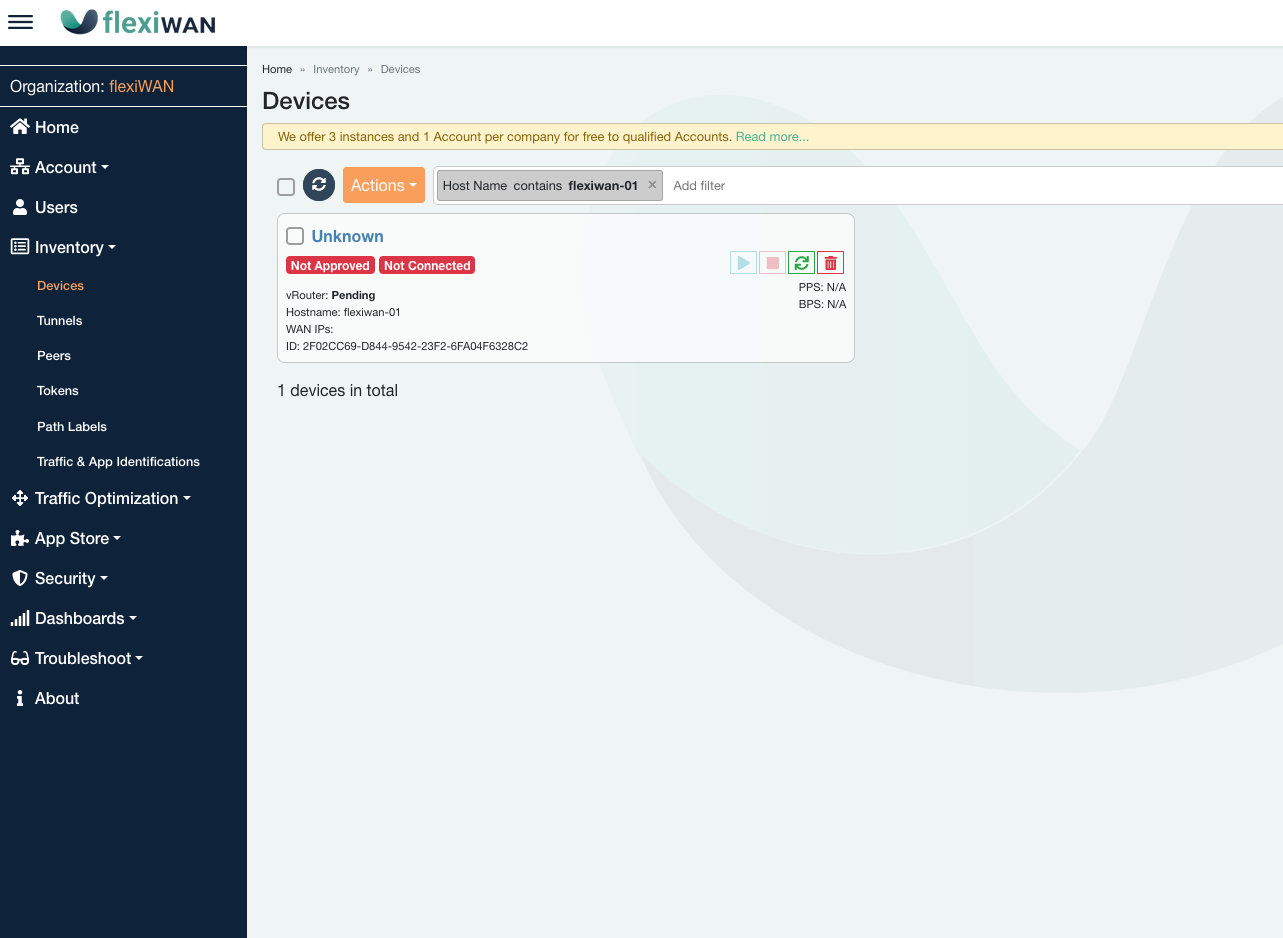
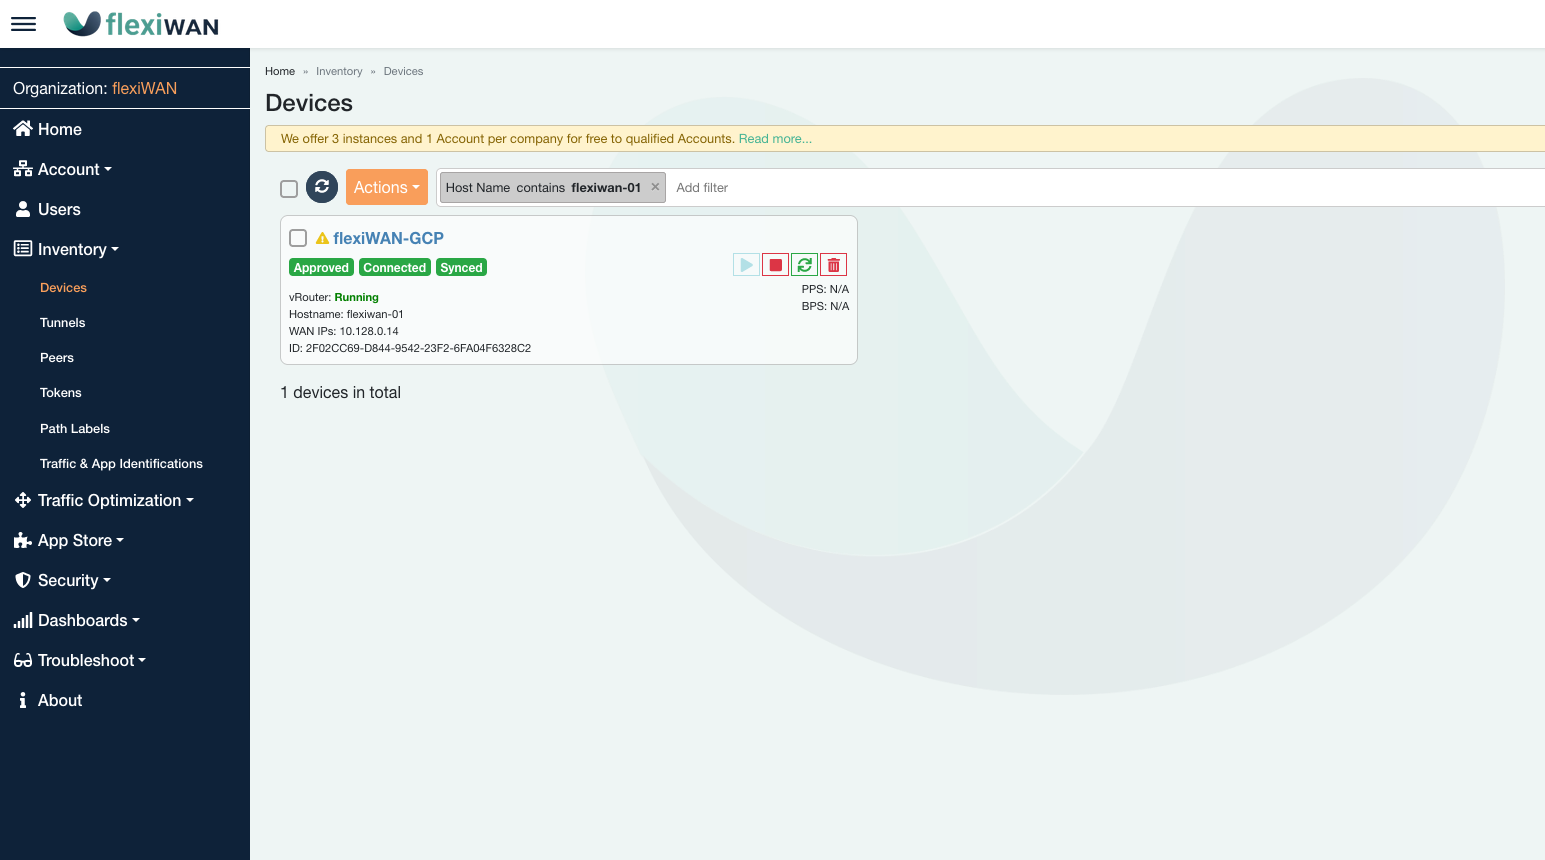
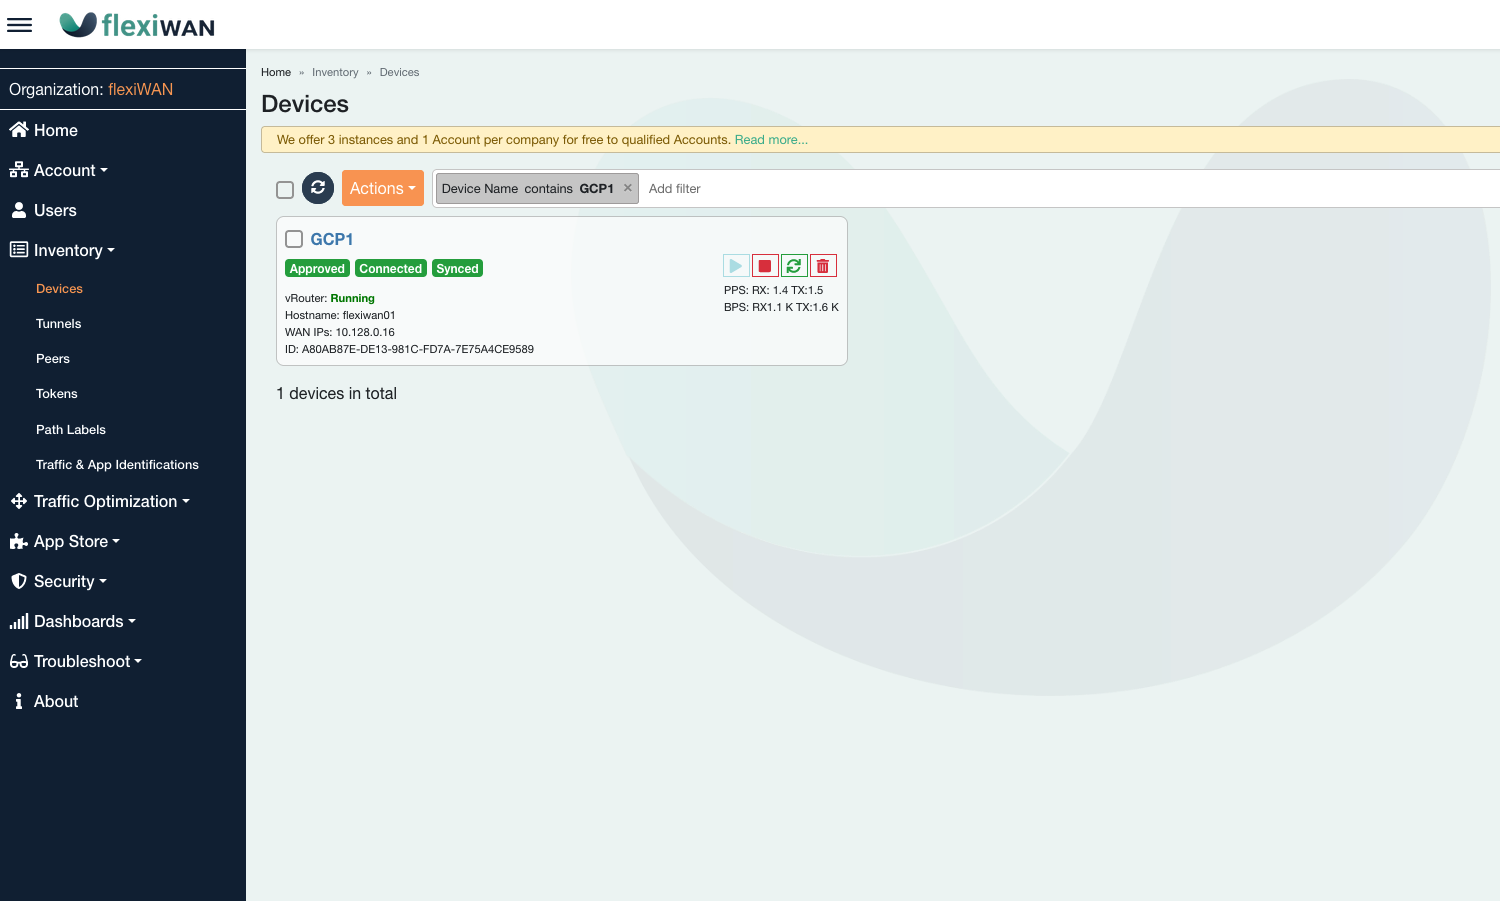
After a few moments device will appear in flexiManage, waiting for approval.
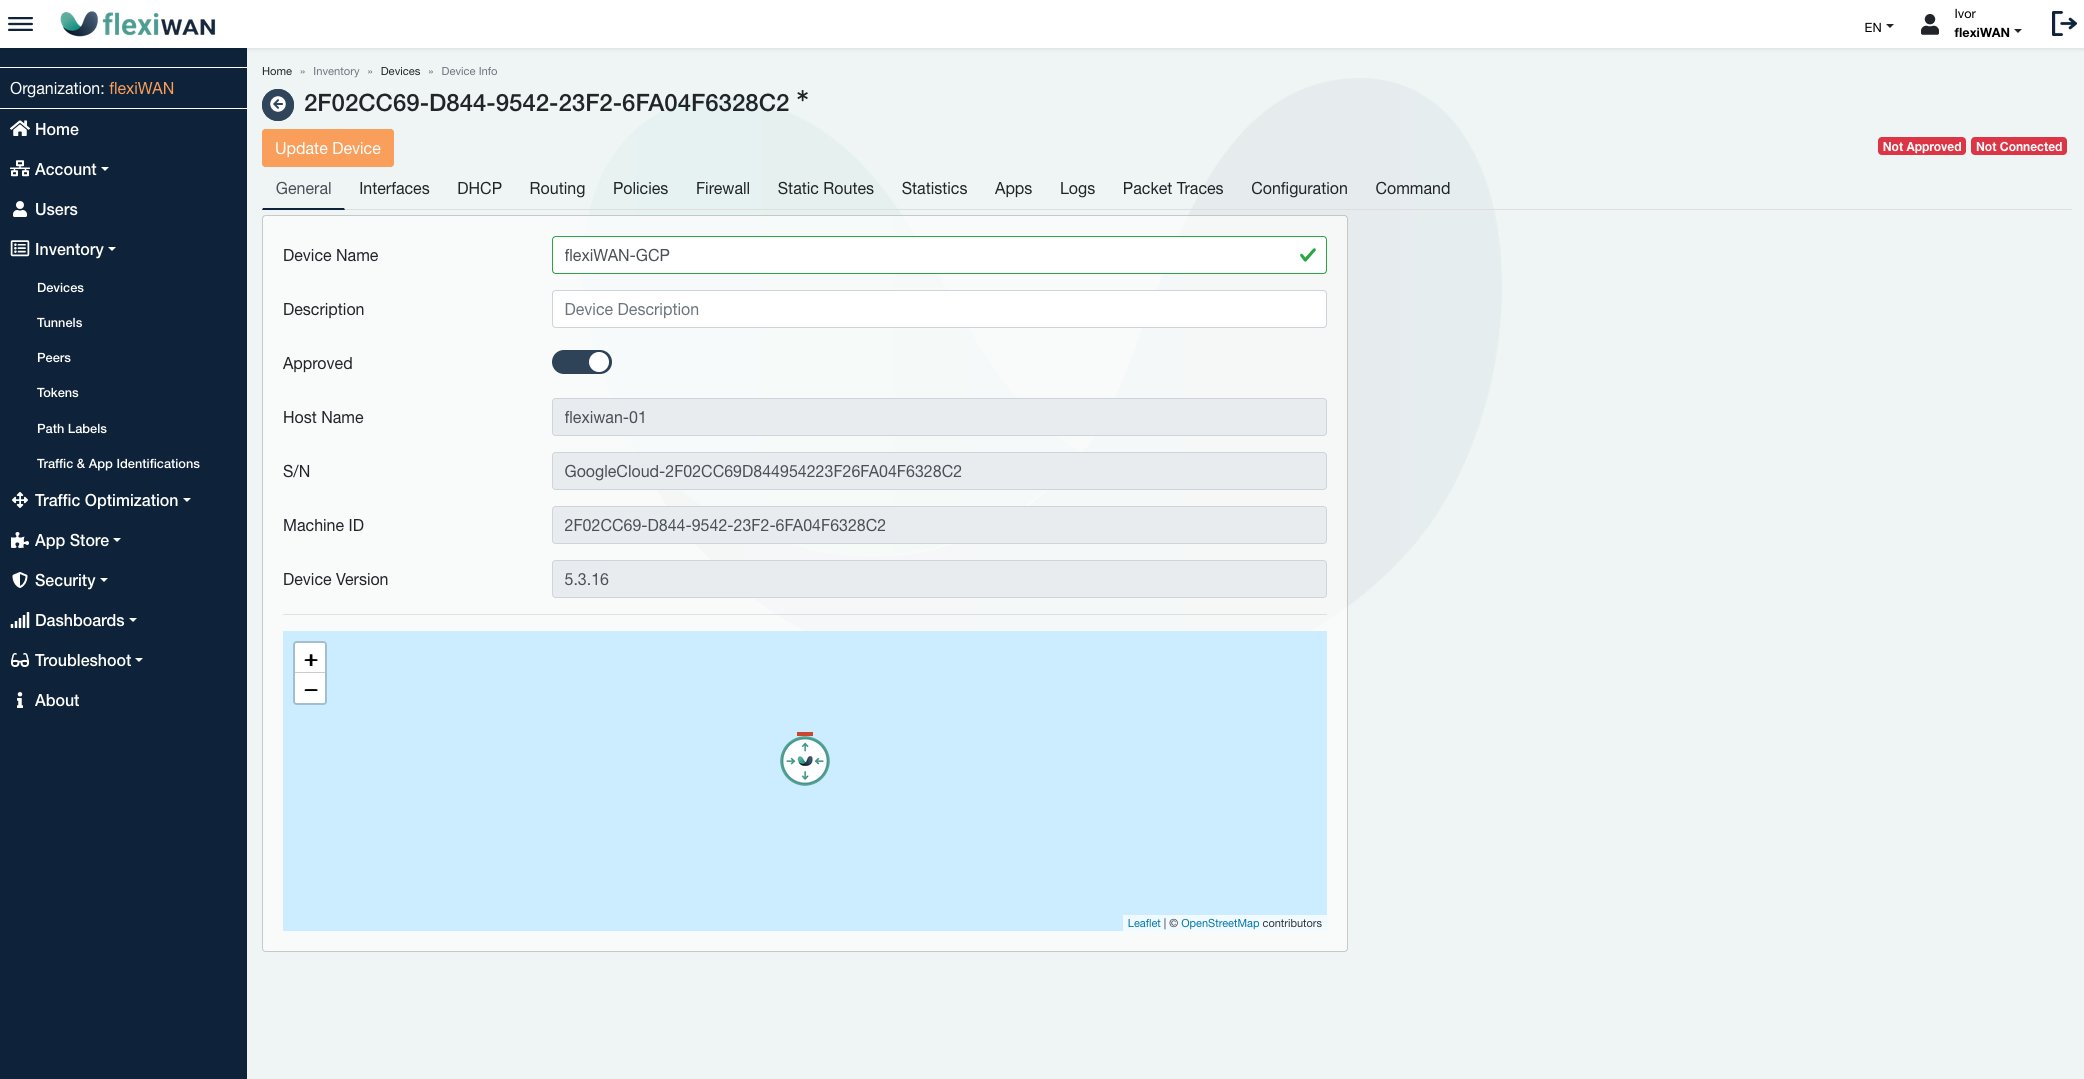
Click on the newly appeared device to enter its name and click on Approved.
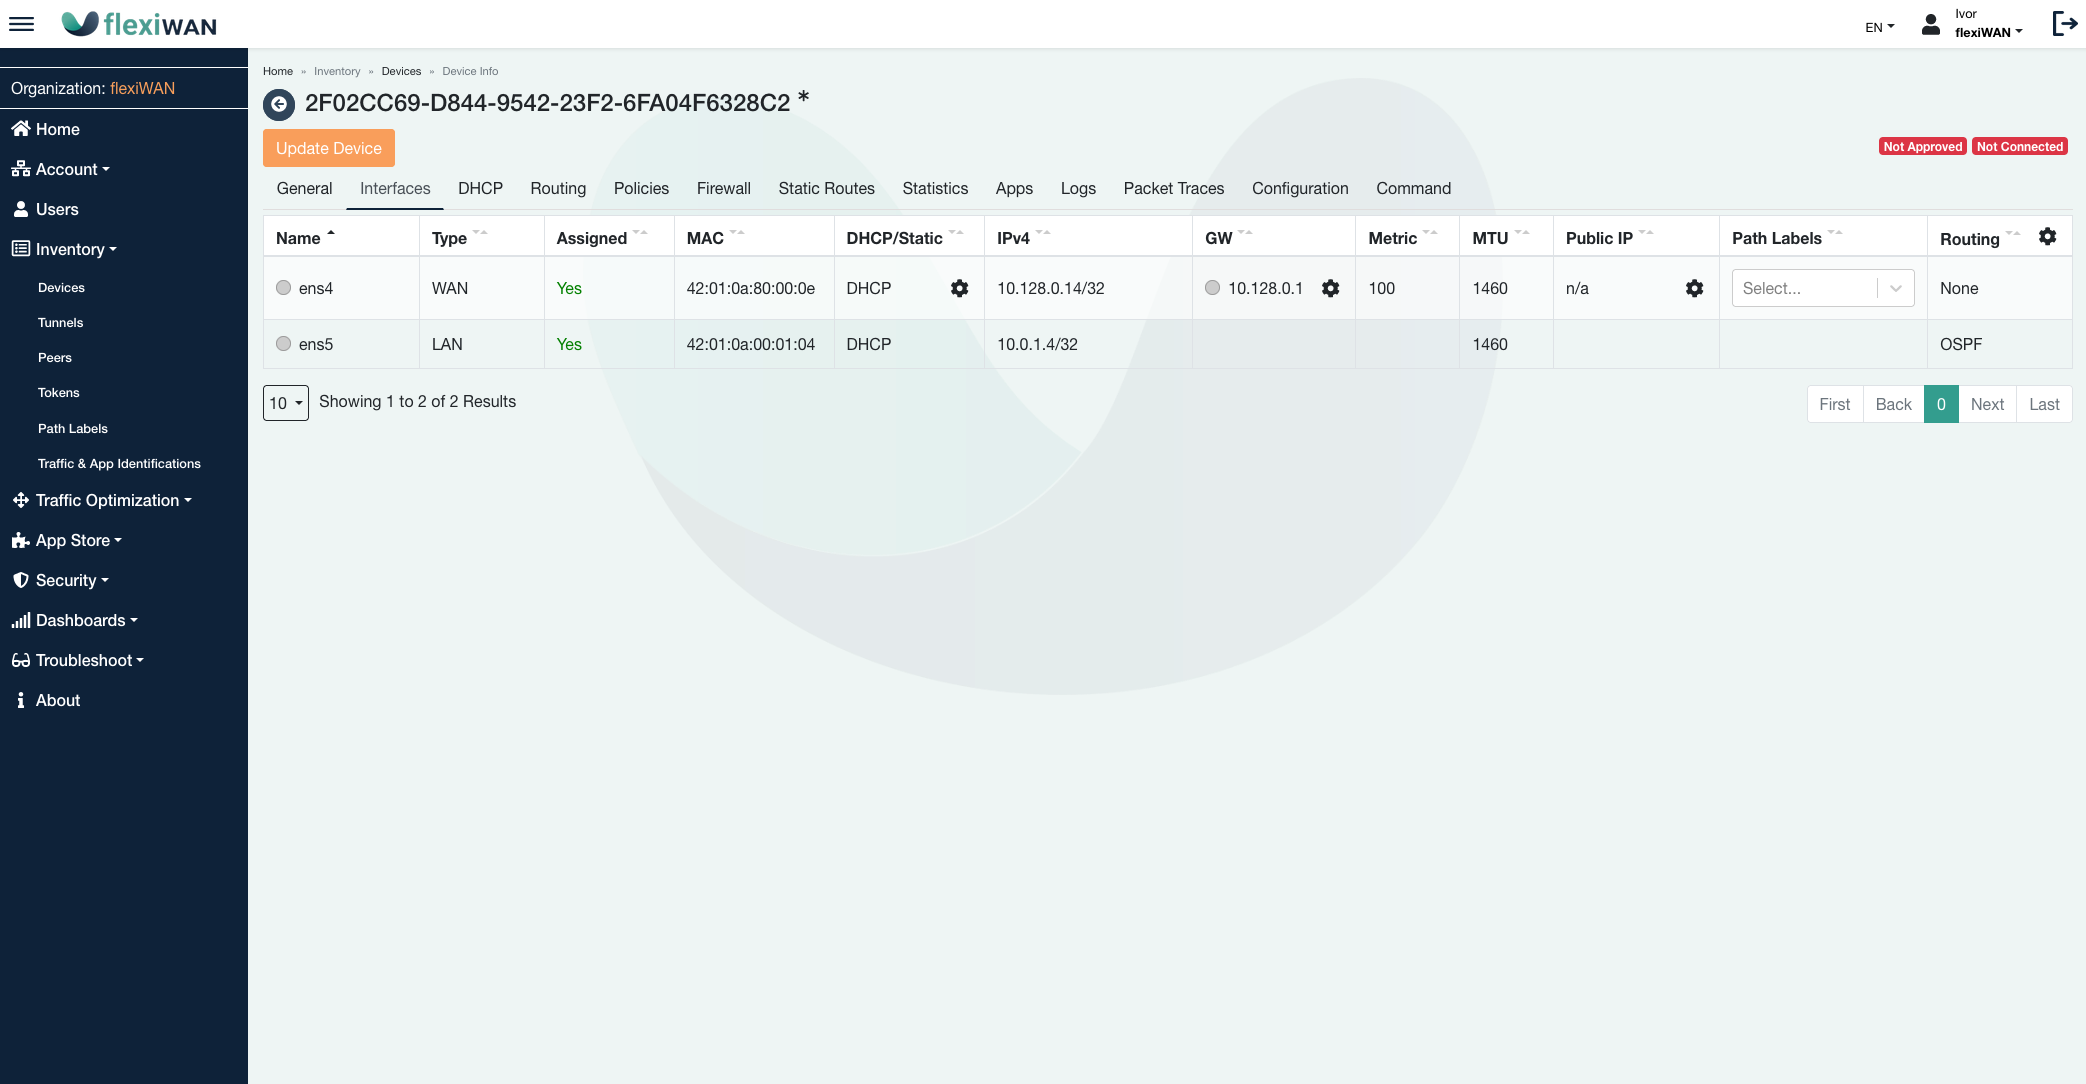
From the Interfaces tab assign the WAN and LAN interfaces. To do that, change the assigned status from no to yes.
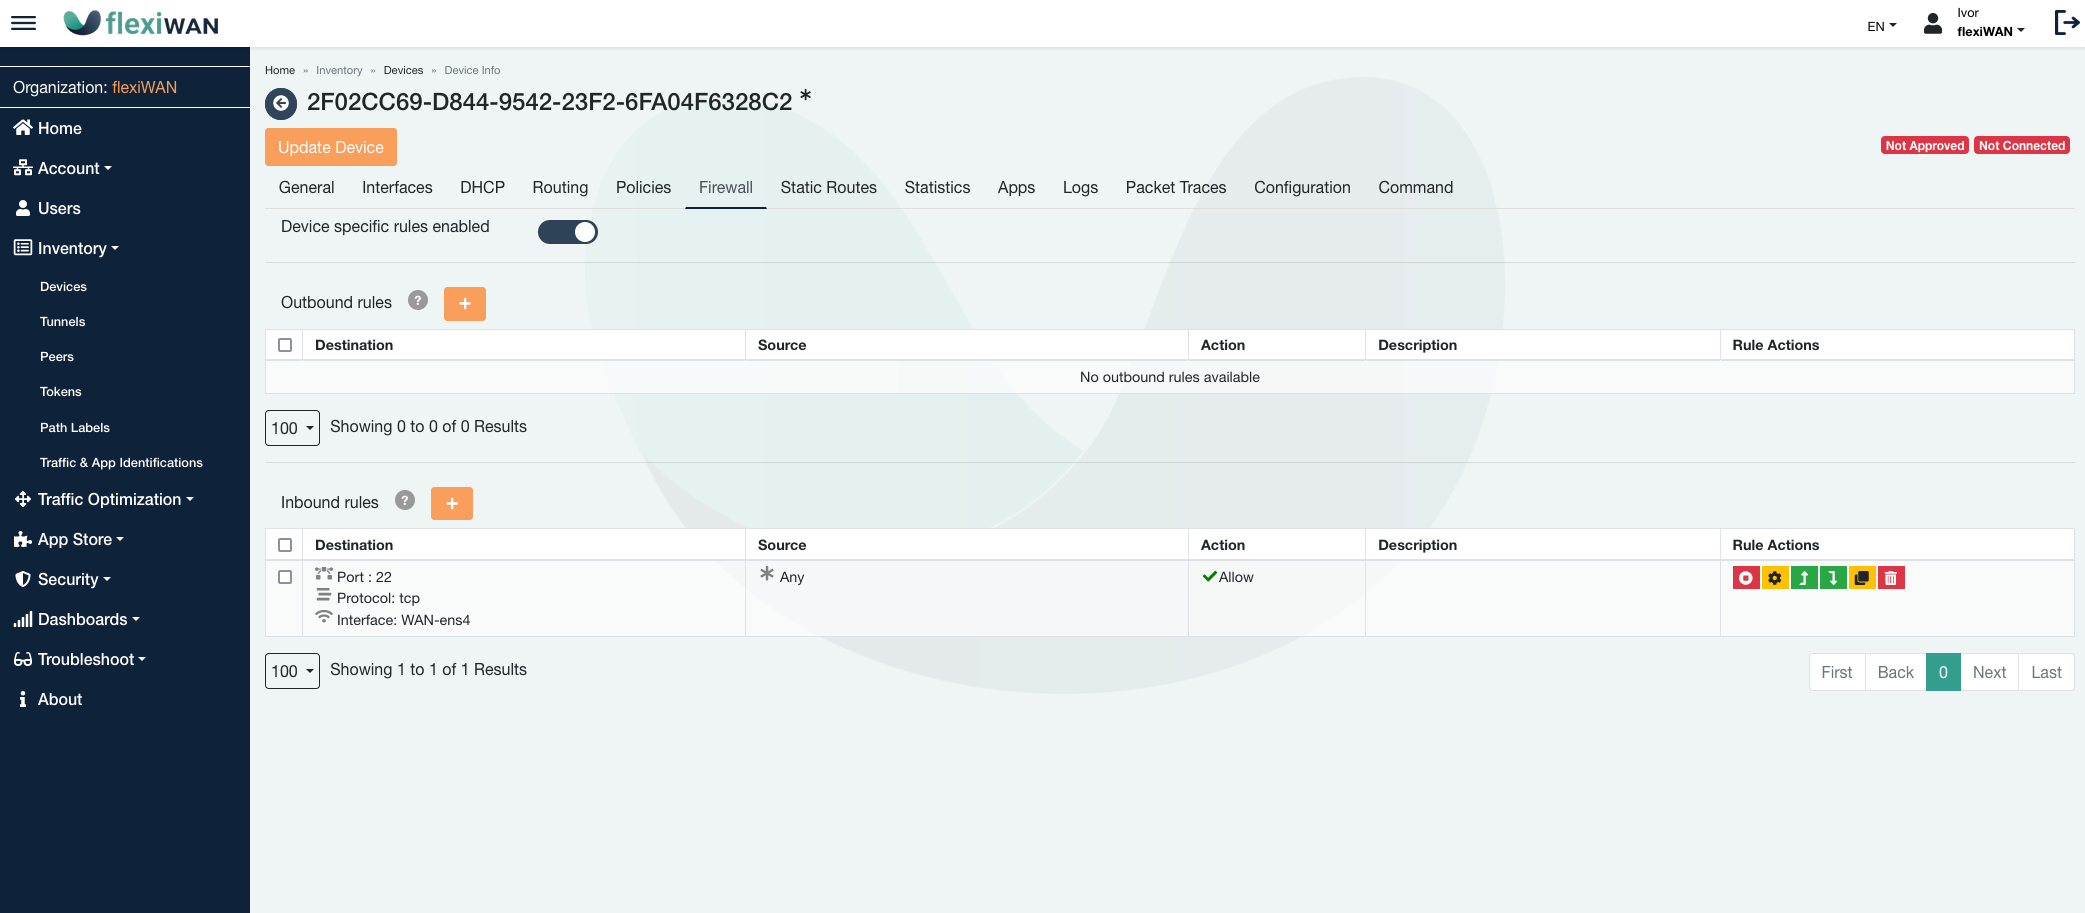
In order for the SSH session to remain active, make sure to add firewall rule allowing SSH port 22 with TCP protocol. Click on Update device to apply the changes.
After a few moments device will be in synced status and ready to start. Finally click on start device to run flexiWAN vRouter..

That’s it, flexiWAN is now runing on GCP!
Warning
There is a known issue when modifying Configuration tab settings. Please make sure to stop vRouter before editing hardware configuration setting such as low power mode.
BGP peering
This section includes the required steps to deploy BGP cloud router in GCP and peer it with flexiWAN. Before continuing make sure to have VM instance with flexiWAN already running as documented in the above section.
Configuring BGP in GCP
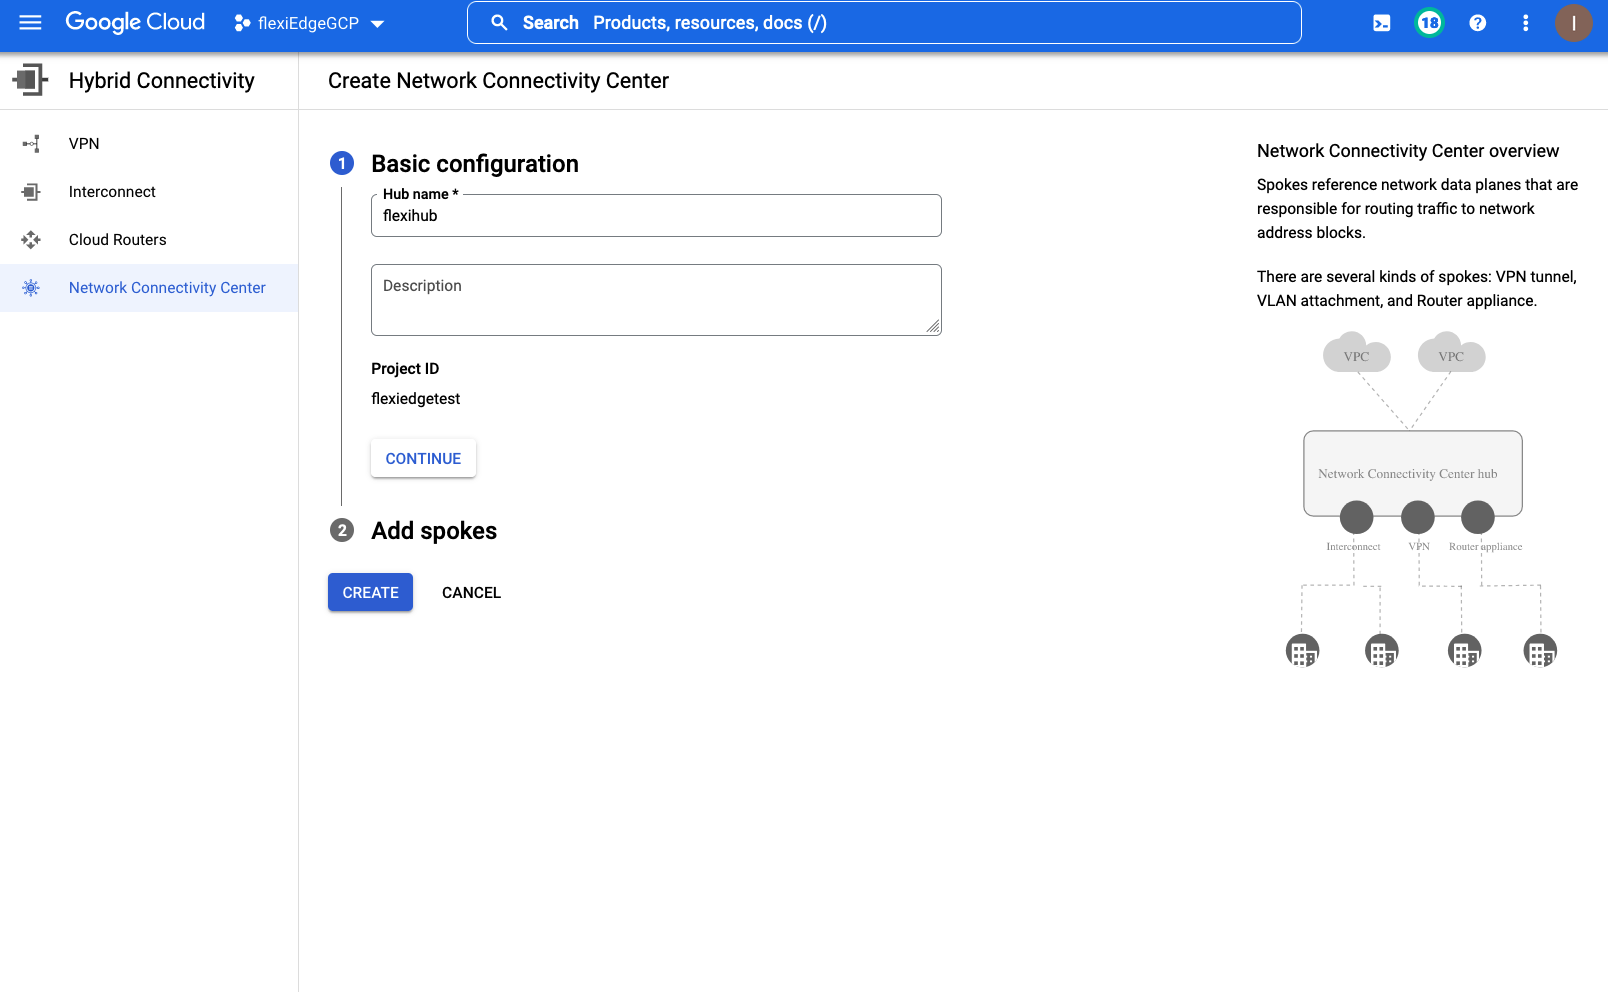
To start, navigate to Network Connectivity Center. Create a new NCC Hub and click on Continue.
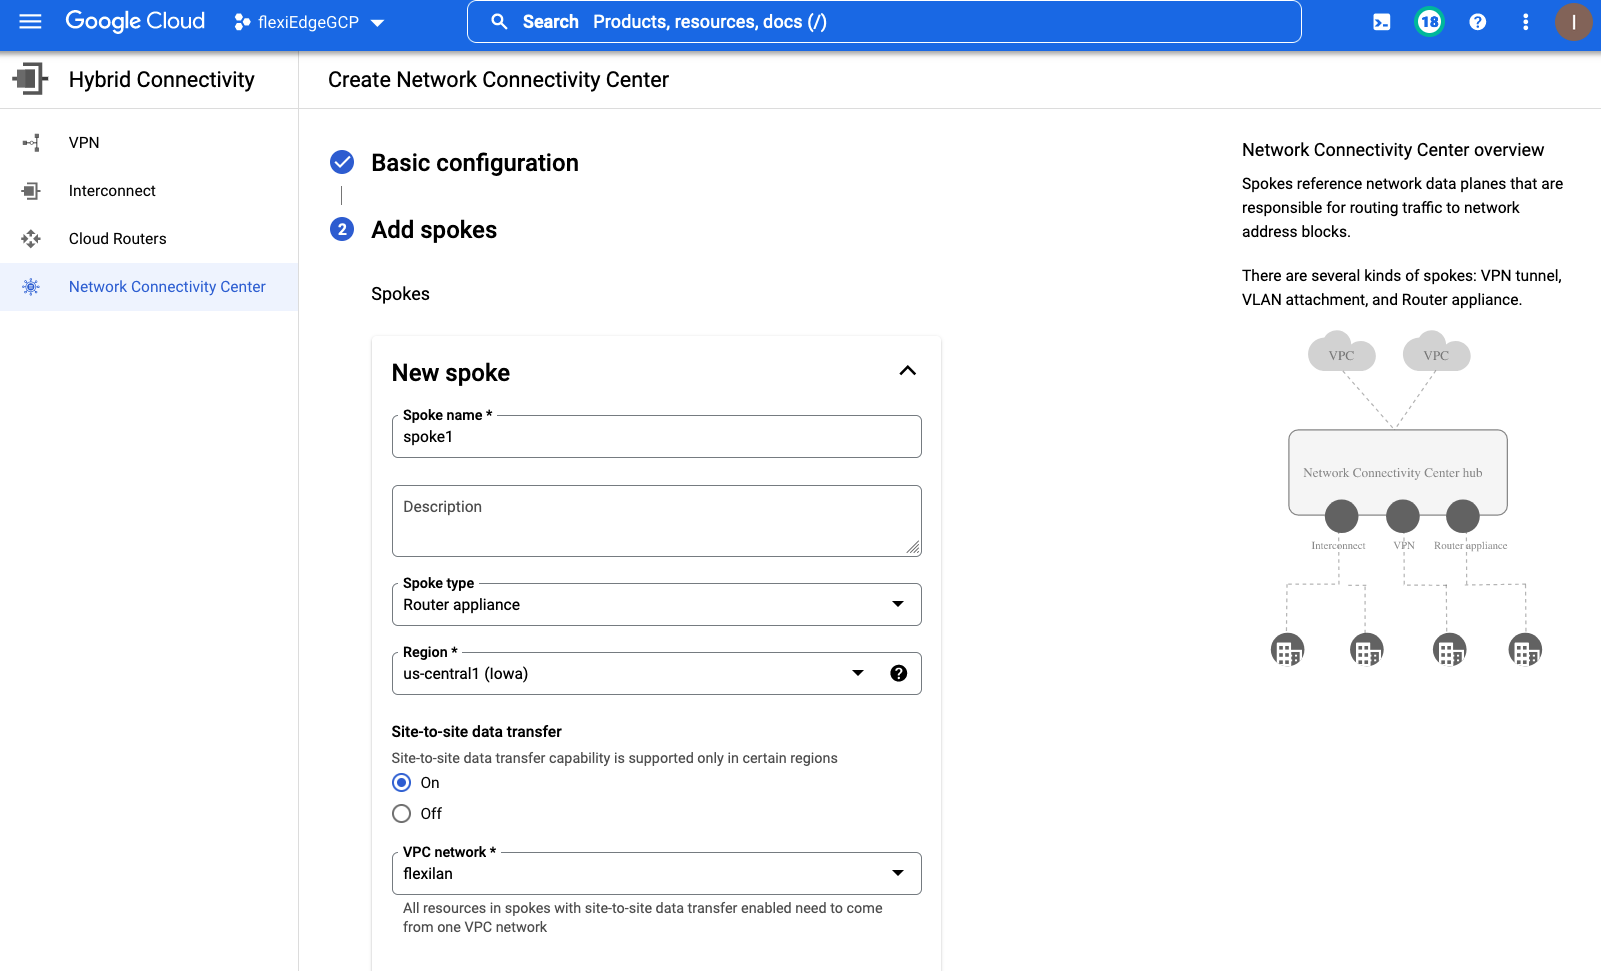
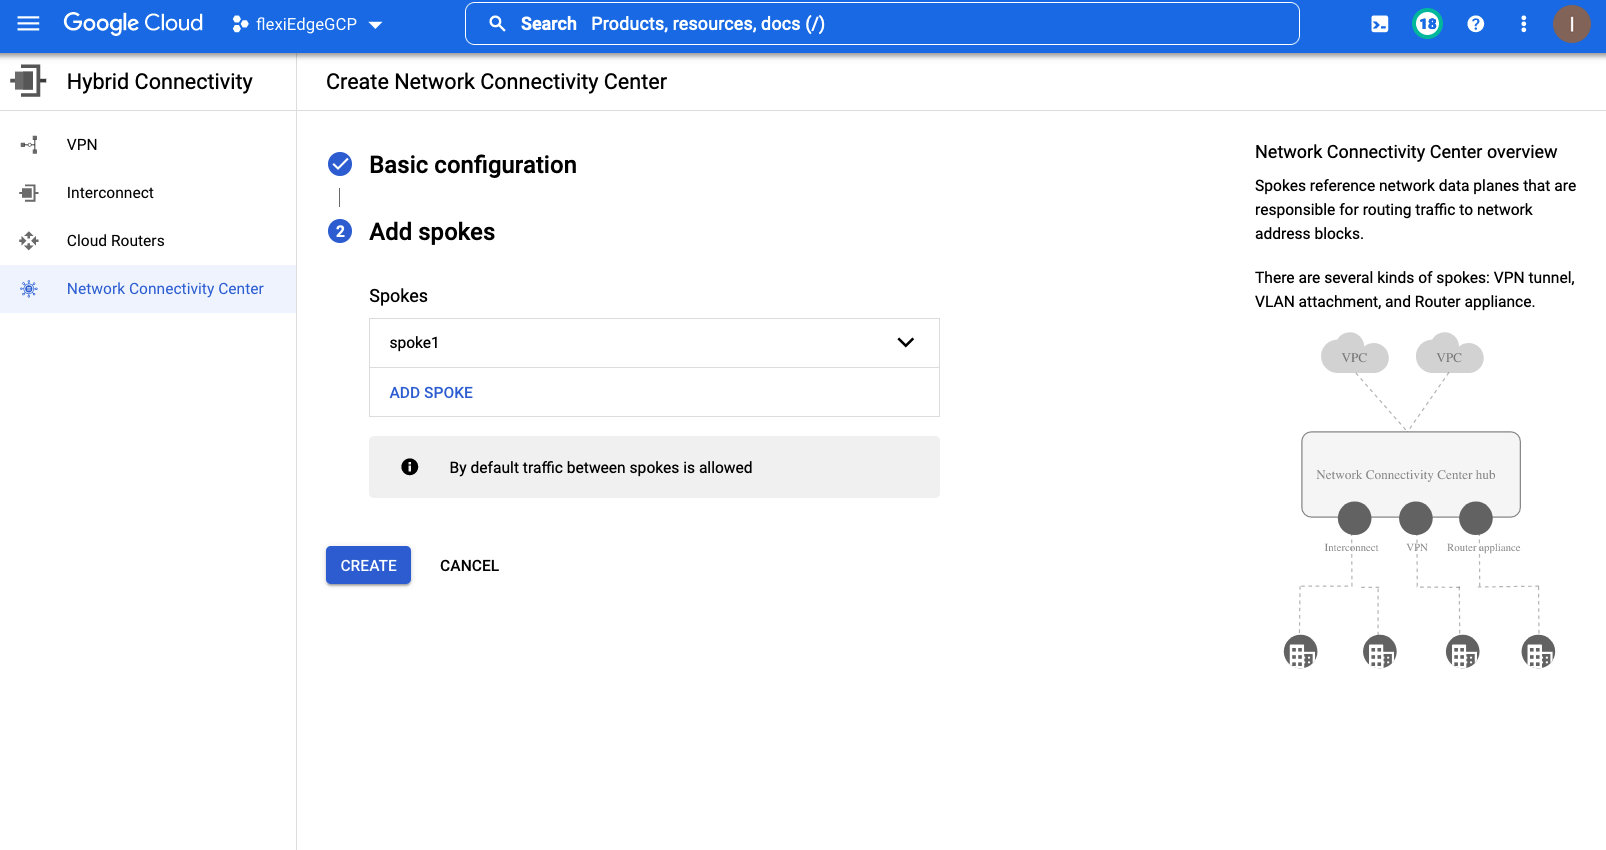
Name and add a new spoke. Under Spoke type pick Router appliance and make sure to set Site-to-site data transfer to On. Finally pick the previously created VPC network of flexiWAN LAN side.
Scroll to the bottom part of the page and add flexiWAN instance to the spoke. Click done afterwards.
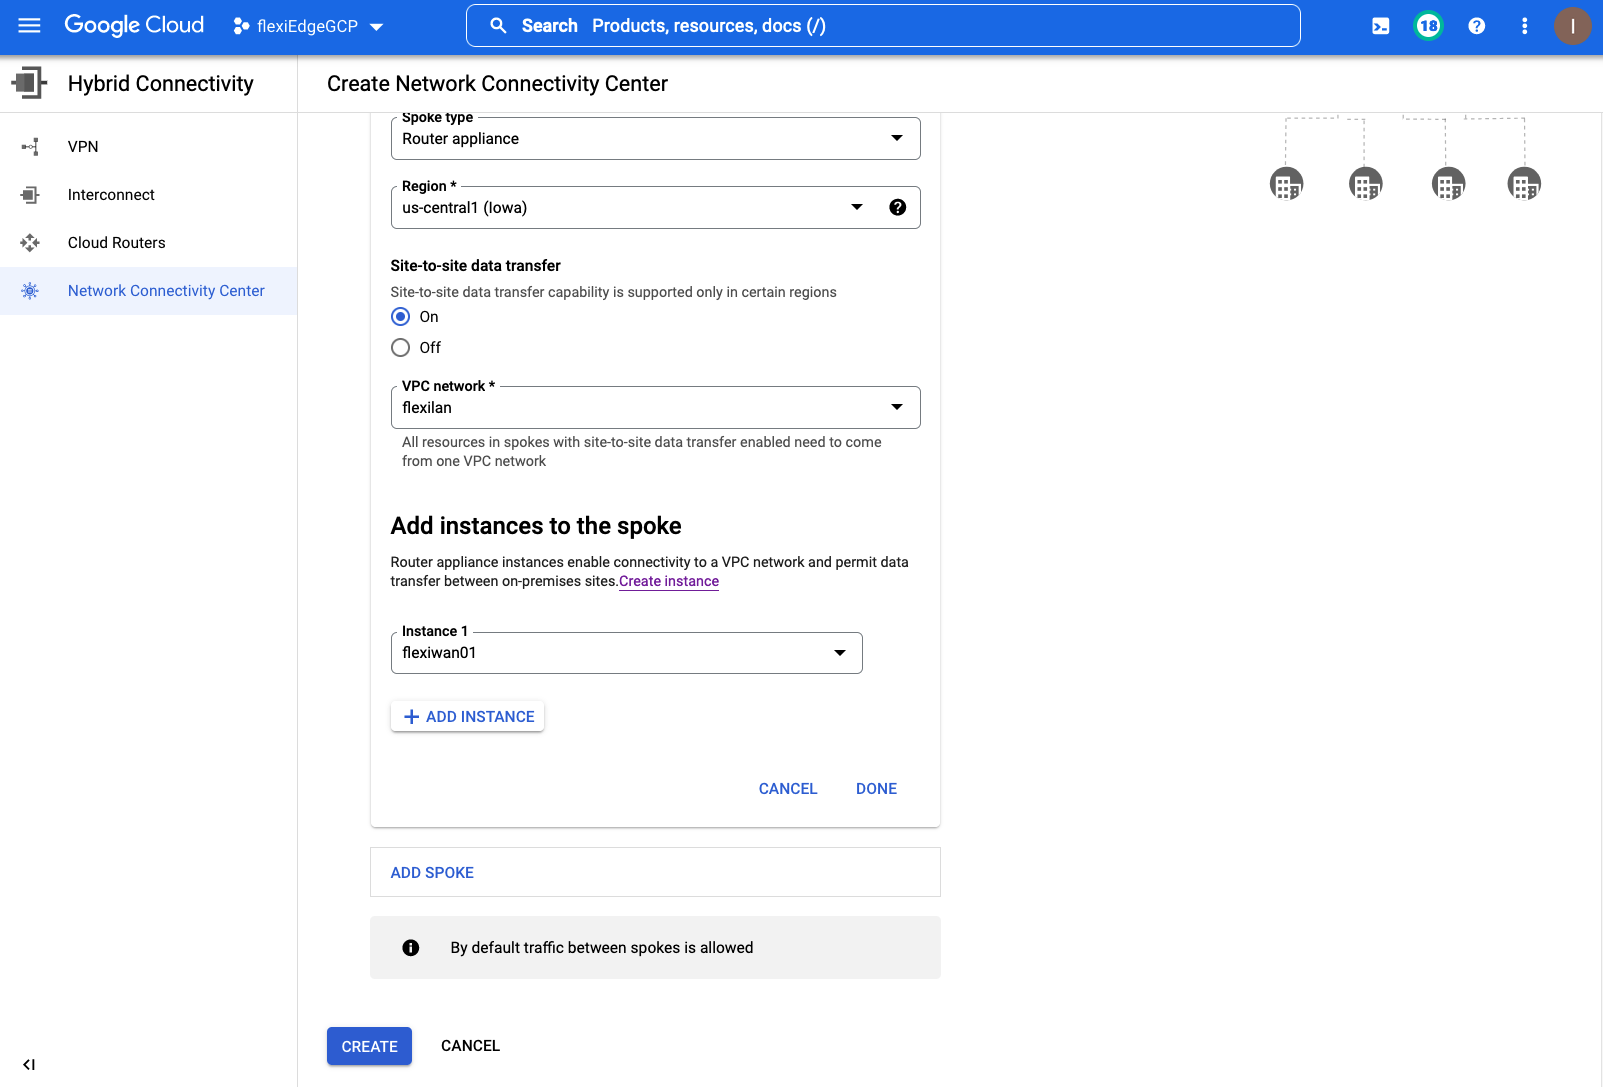
Confirm and click on Create.
After creating the NCC hub and spokes, click on Spokes tab.
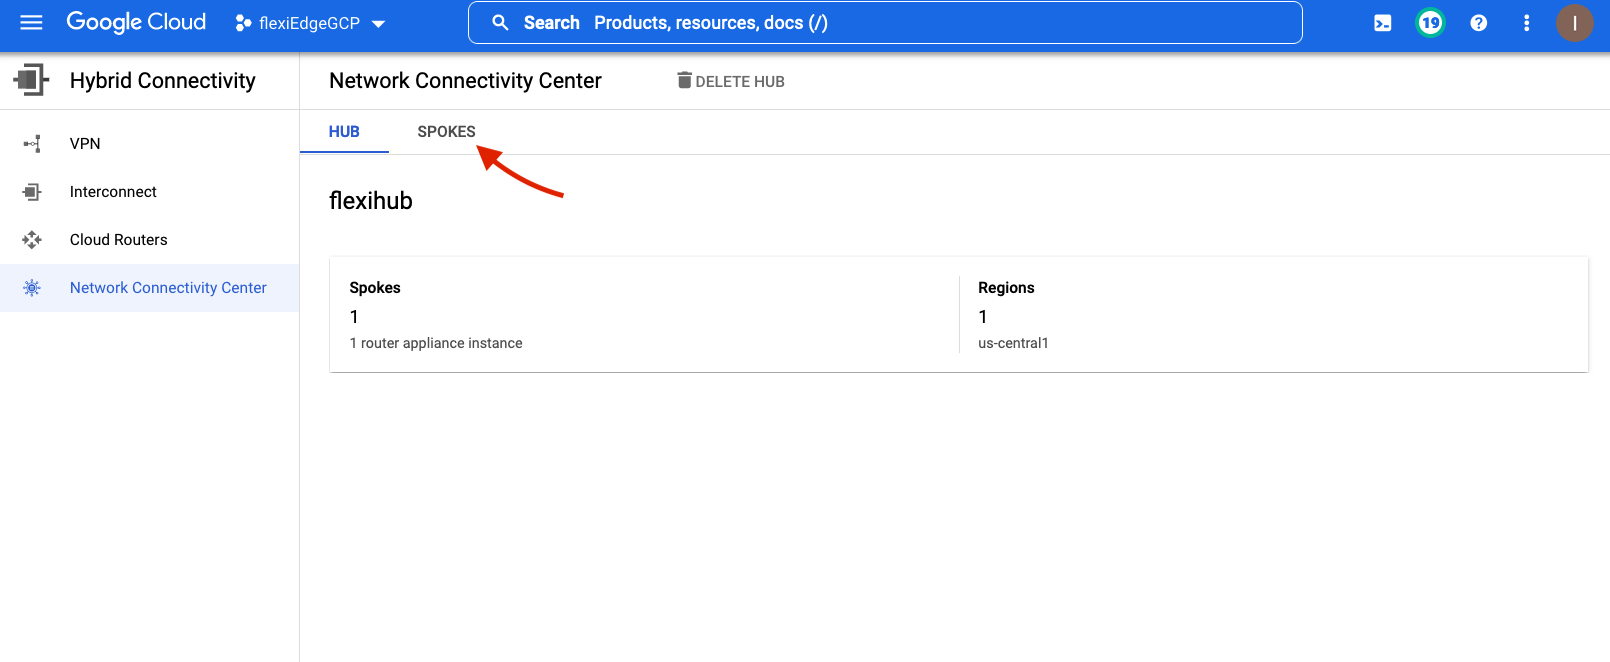
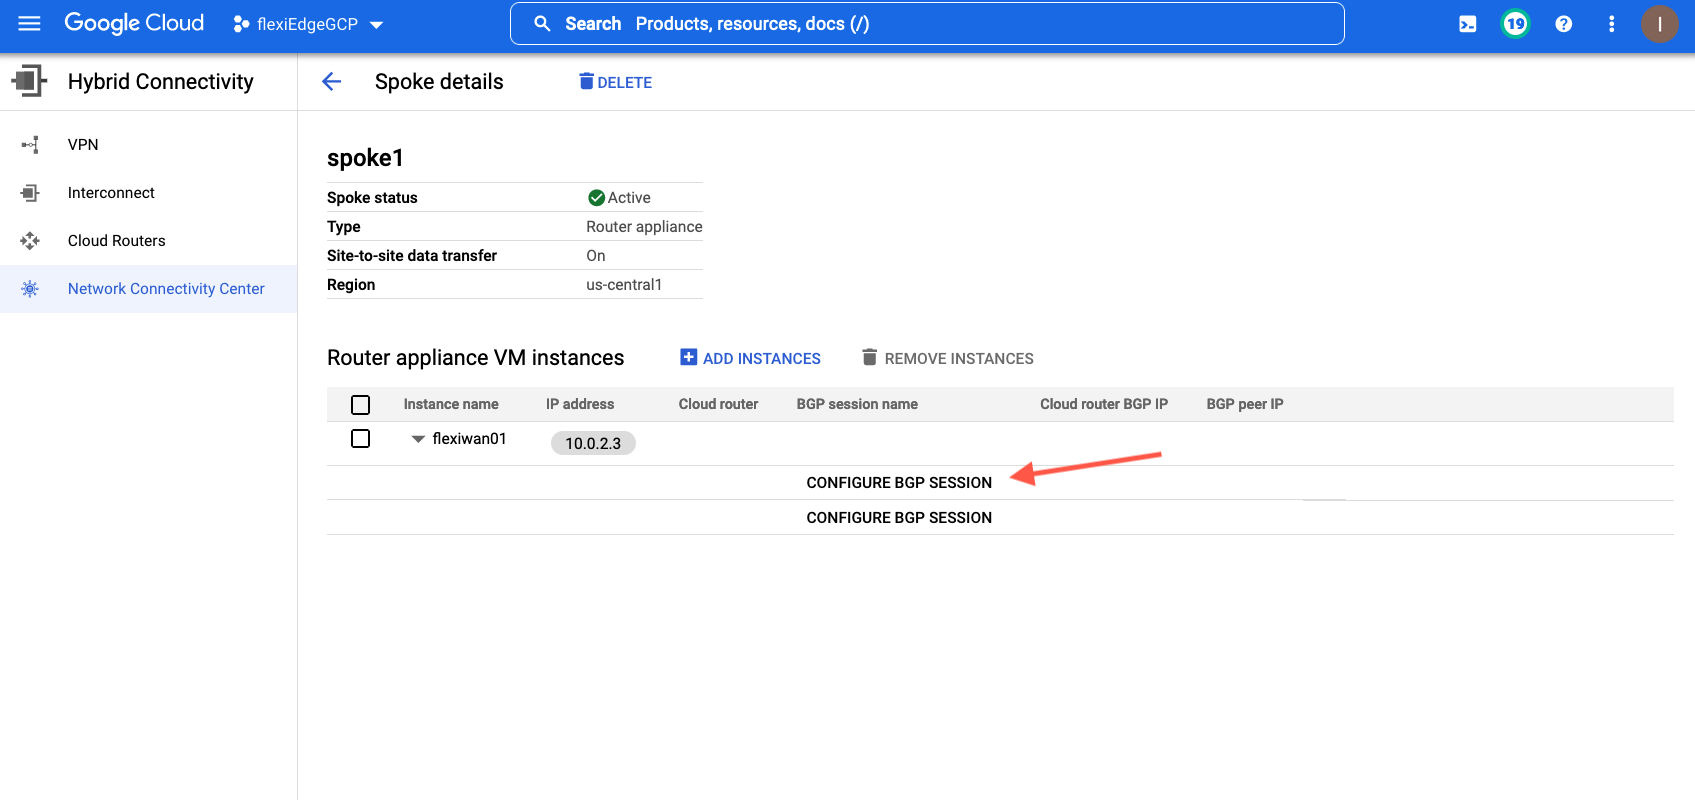
Click on spoke to open its configuration settings.
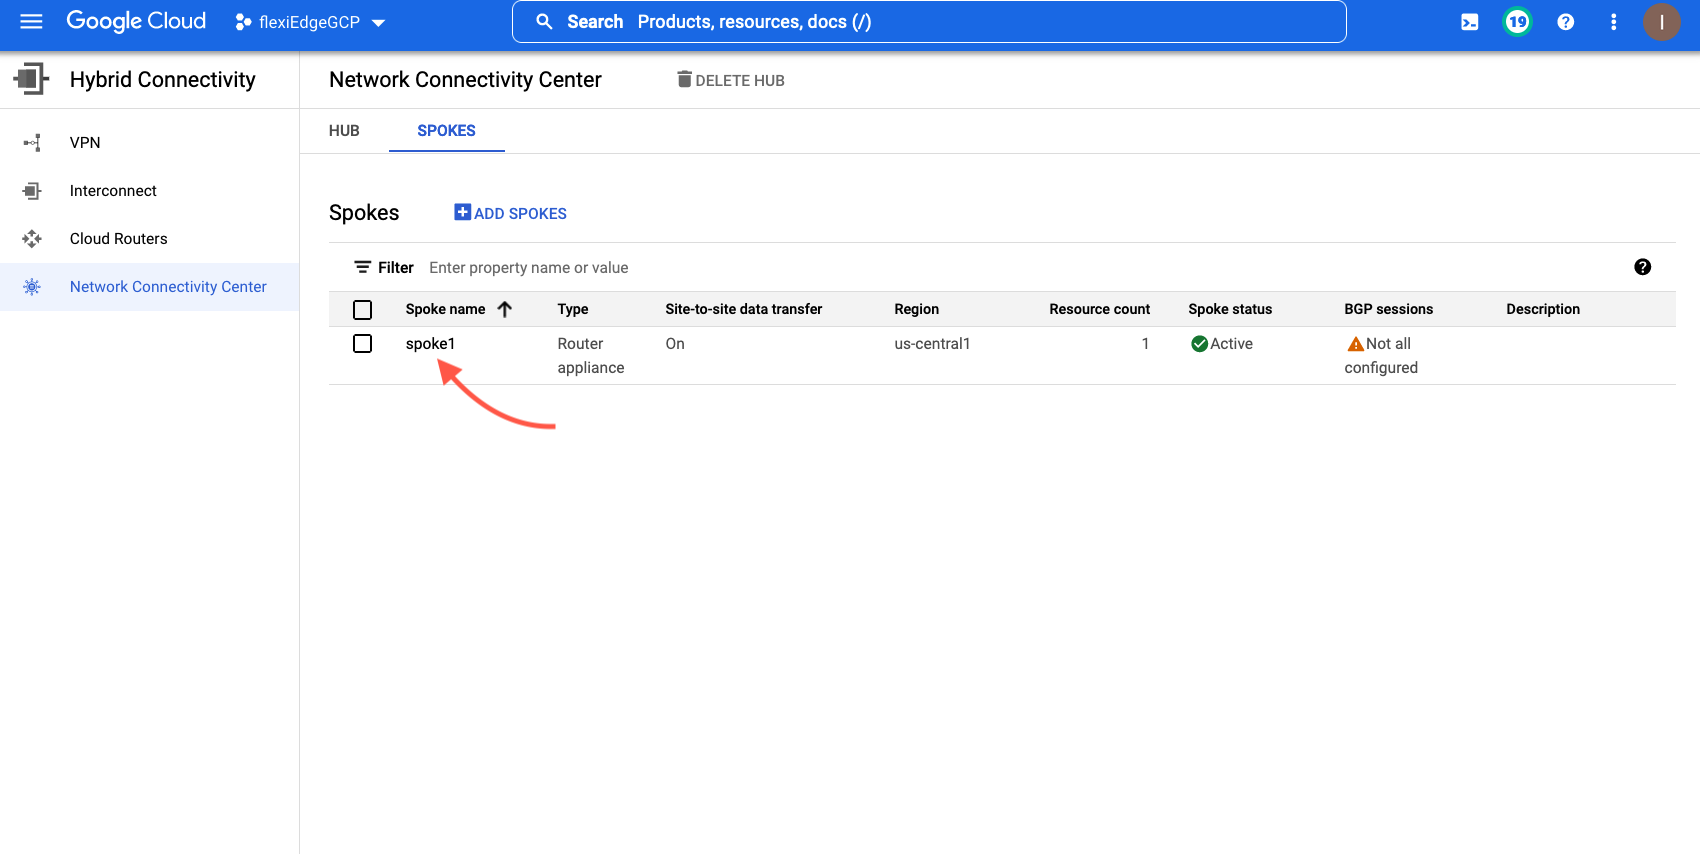
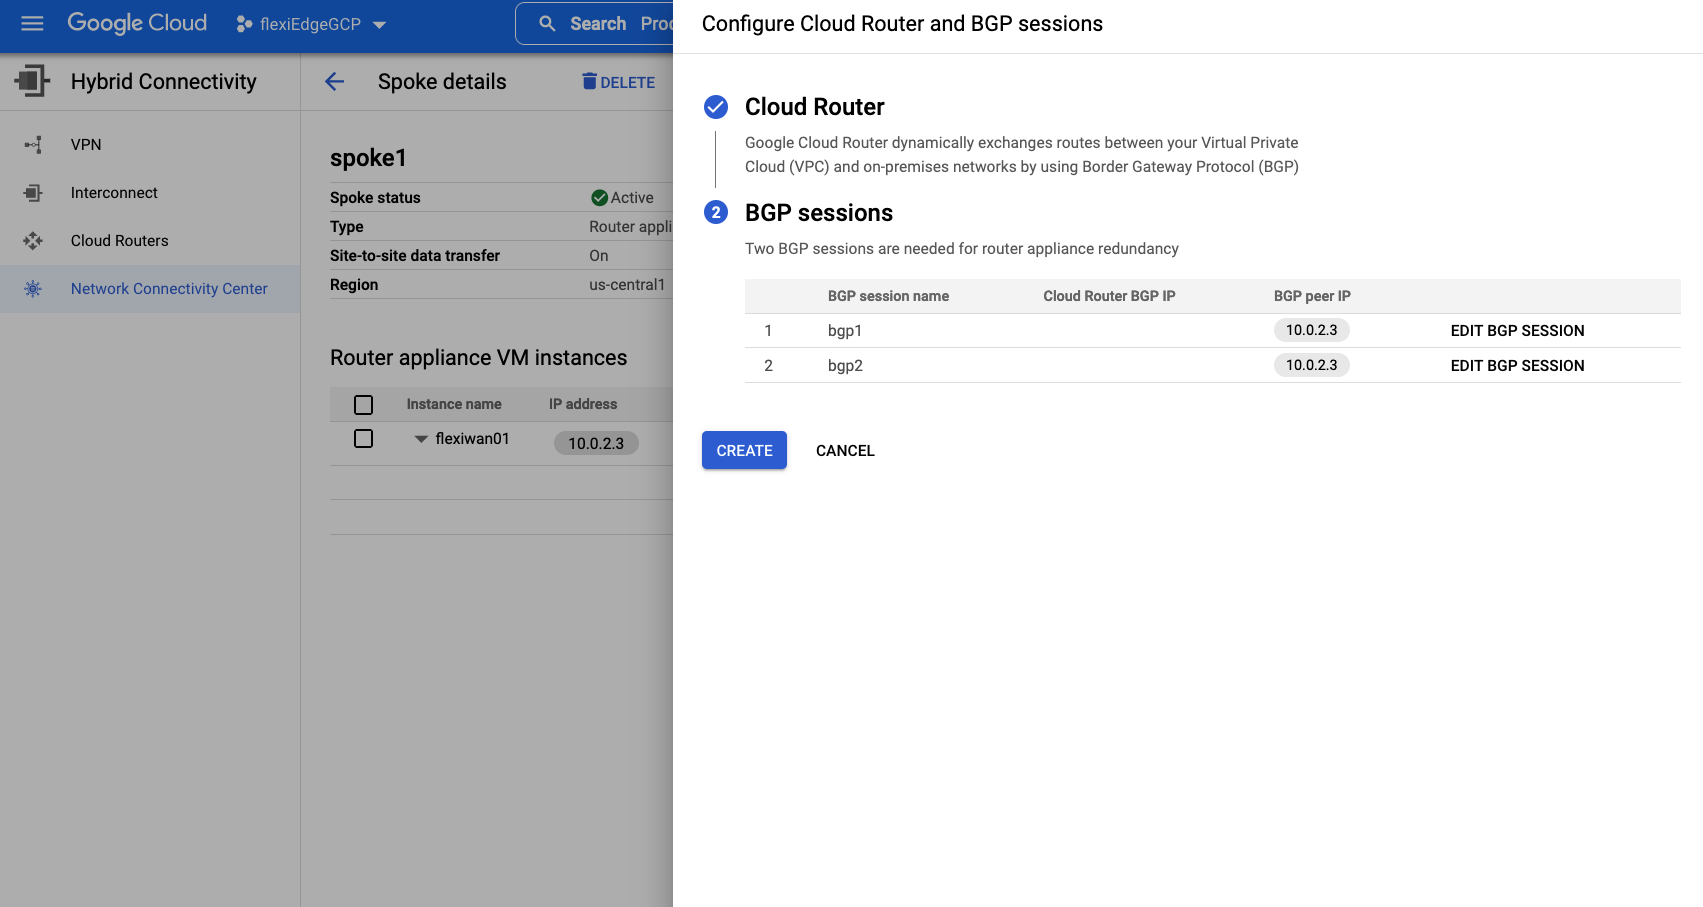
After opening Spoke settings click on first Configure BGP session. GCP requires creating two BGP sessions for redundancy.
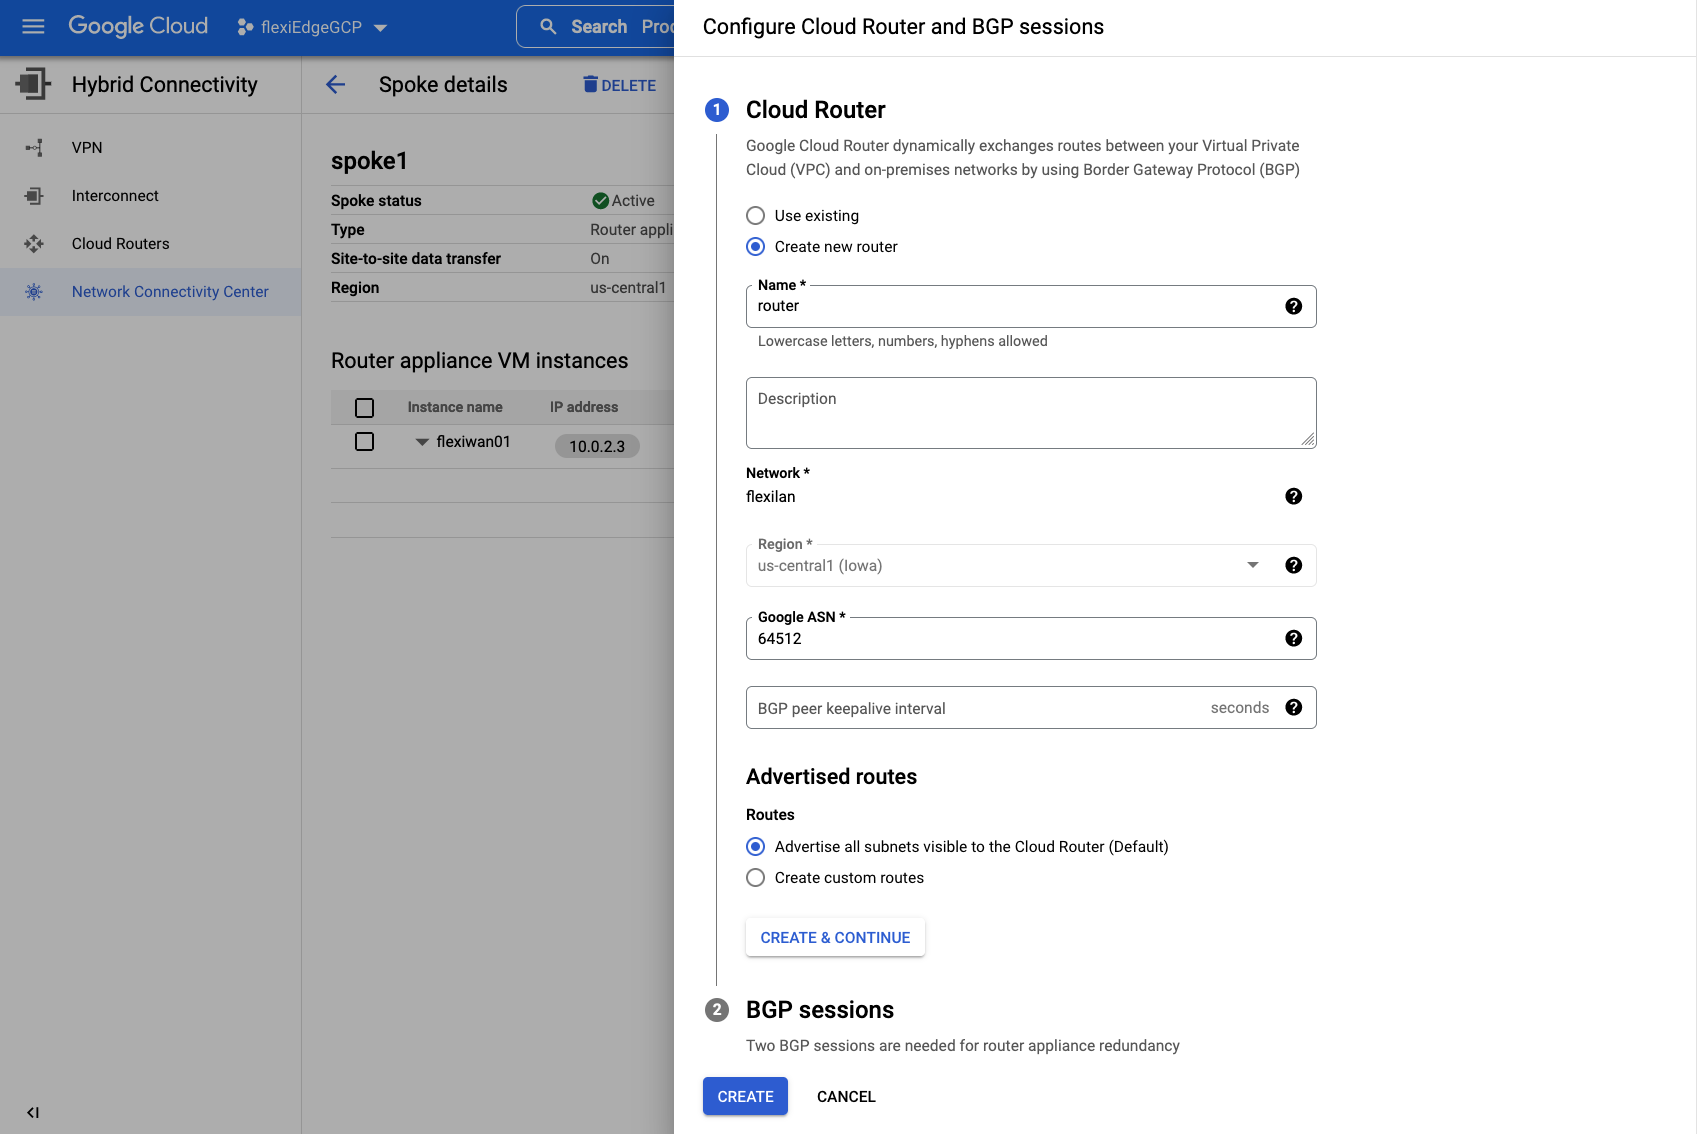
Configure a new Cloud Router, confirm its network is set to flexiWAN LAN network and add a ASN which this router will use. In this case ASN must be local / private. Keep the rest of setting as default. Click on Create & Continue.
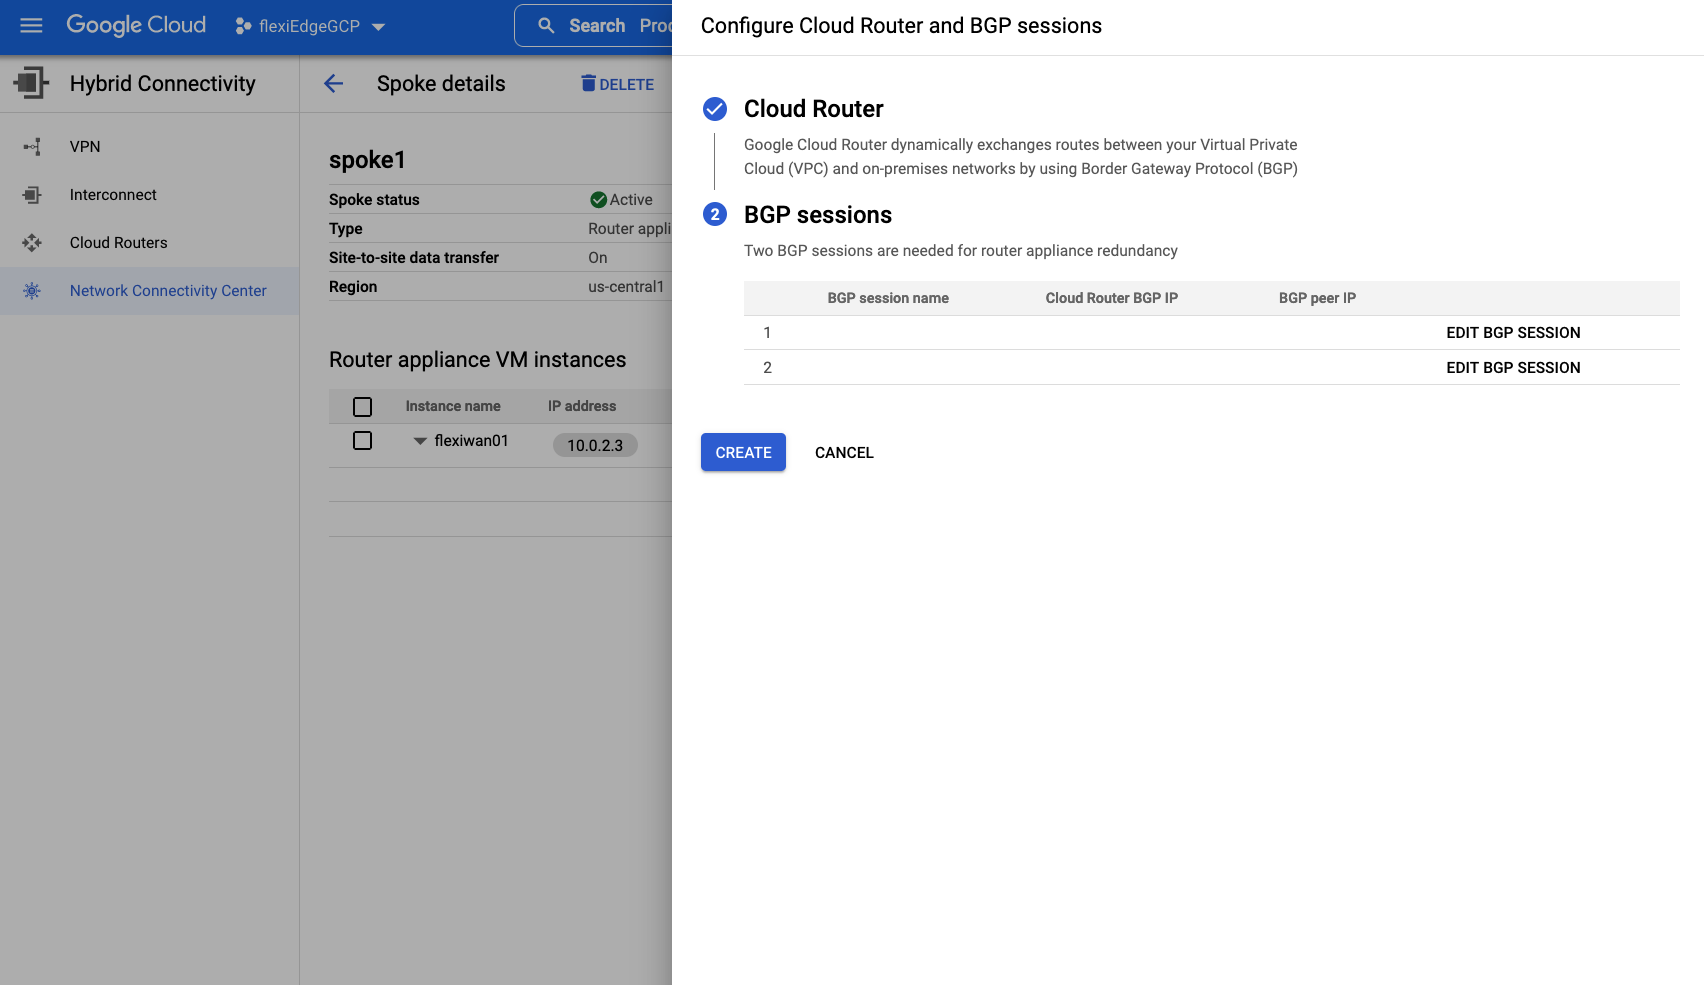
After creating a Cloud router, lets add two BGP sessions. Click on Edit BGP session to configure first session.
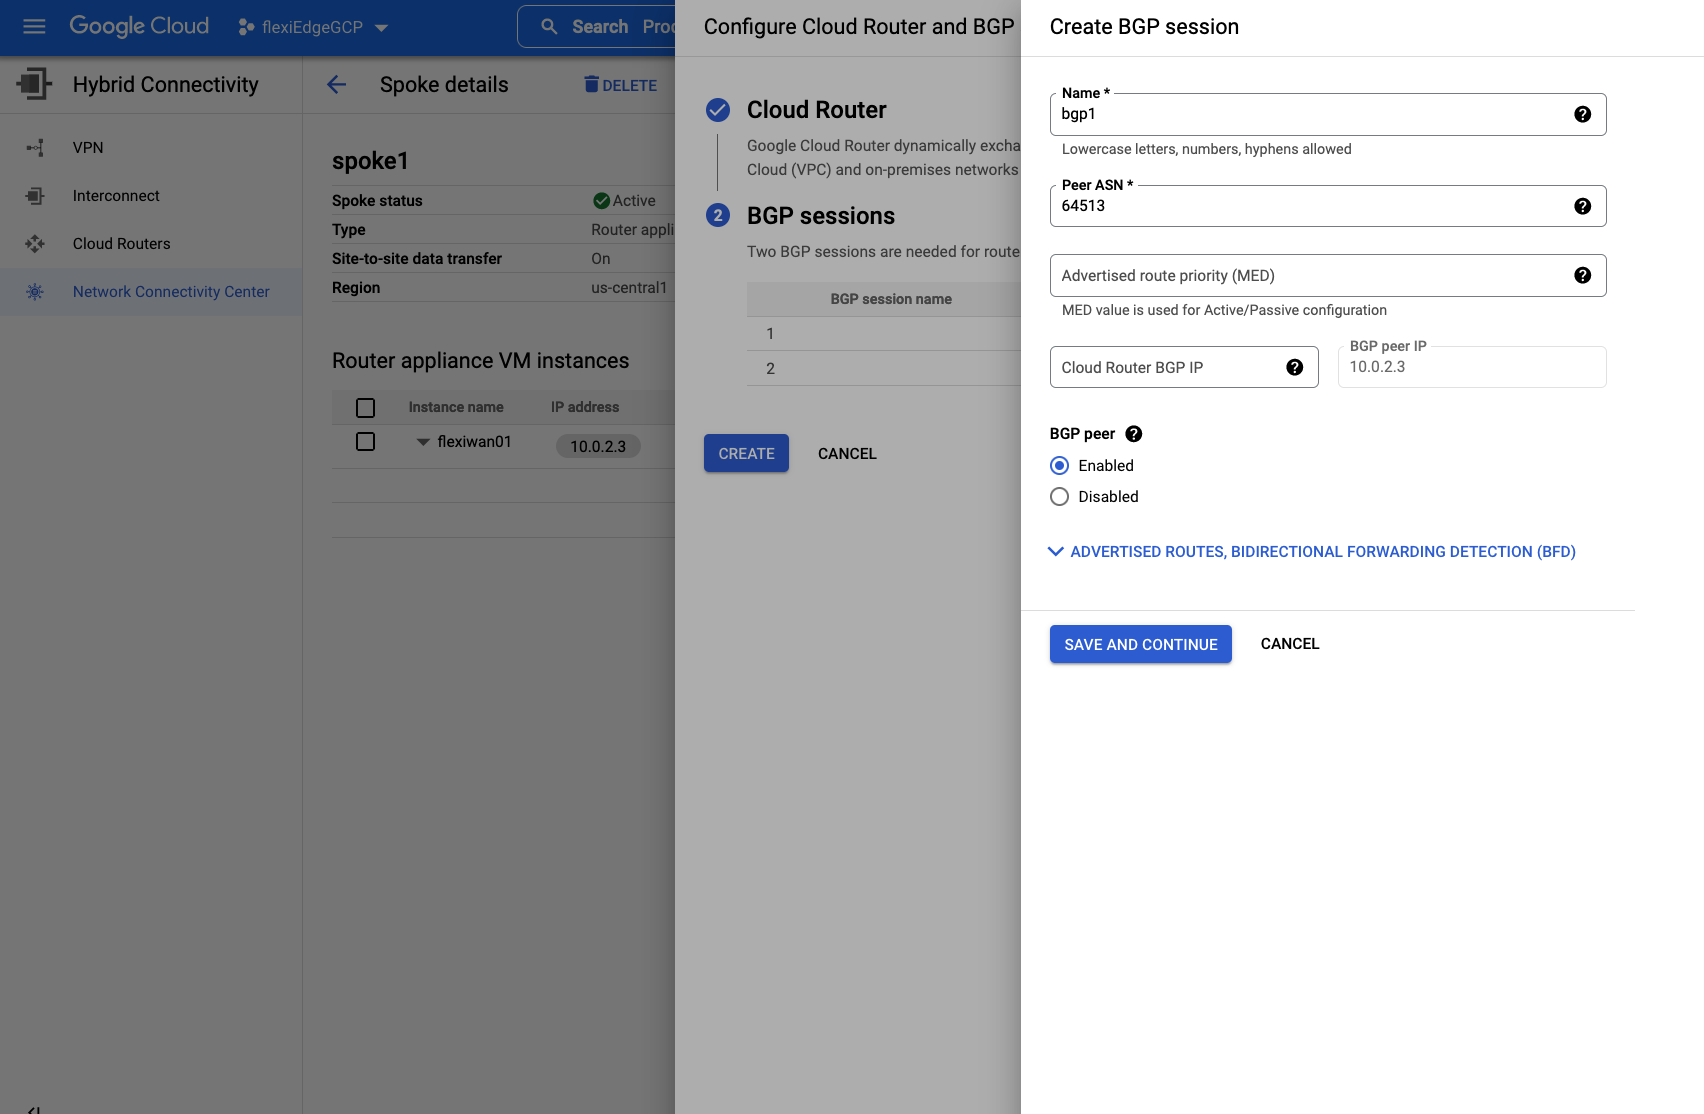
Add a first BGP session name and enter peering ASN from flexiWAN, in this case 64513. Keep the rest of settings as default and click on Save and continue.
Repeat the same for second BGP sessions.

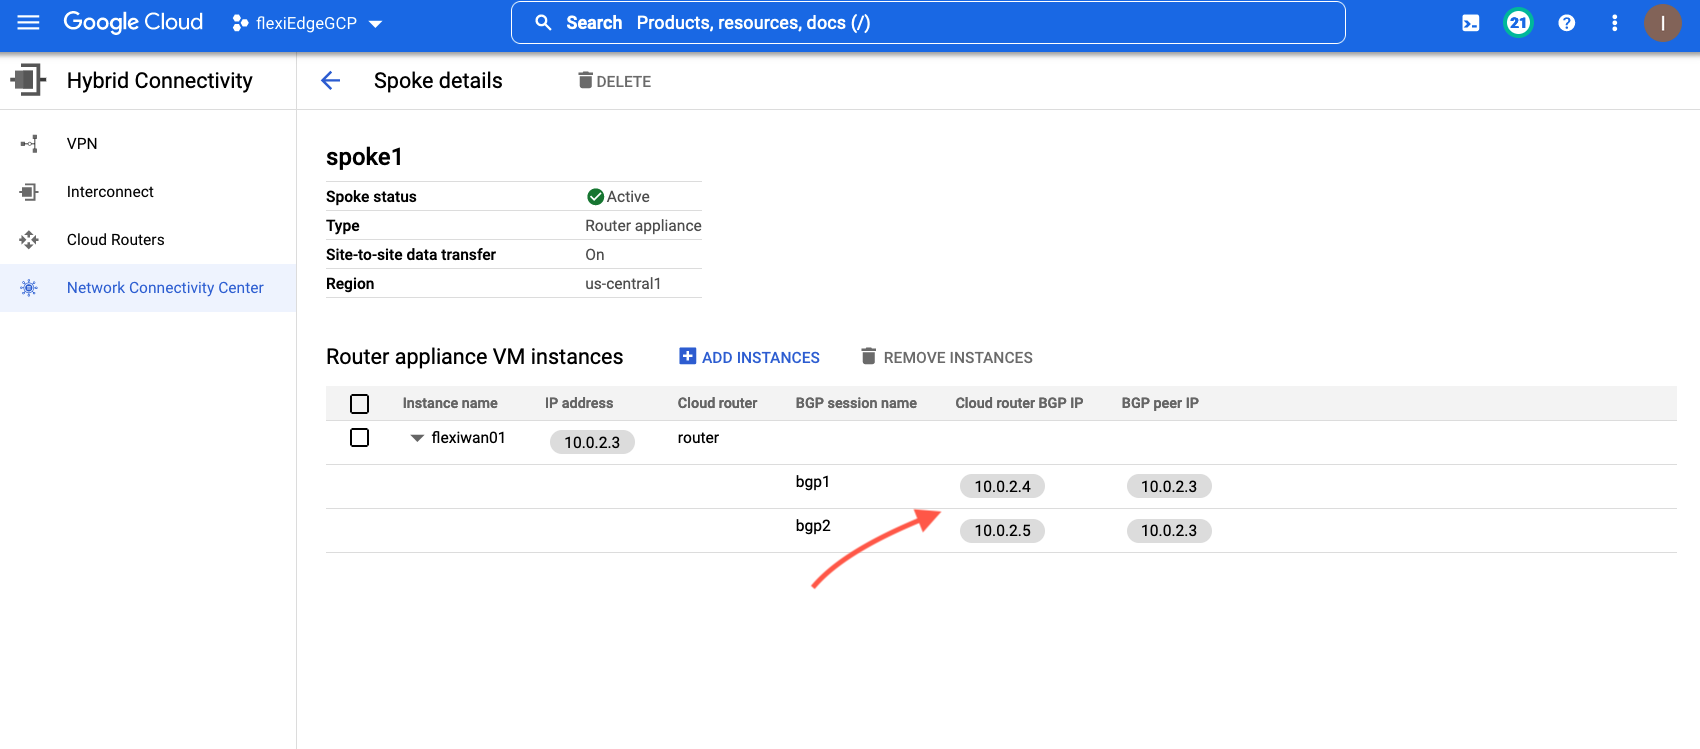
Finally once both BGP sessions are configured, click on Create.
On the next screen, make note of Cloud router BGP IP’s, these will be BGP neighbours which need to be configured within flexiWAN.
Configuring BGP in flexiWAN
Now that BGP is configured and running on GCP, lets configure flexiWAN to peer with GCP. Navigate to flexiWAN instance created in steps above.
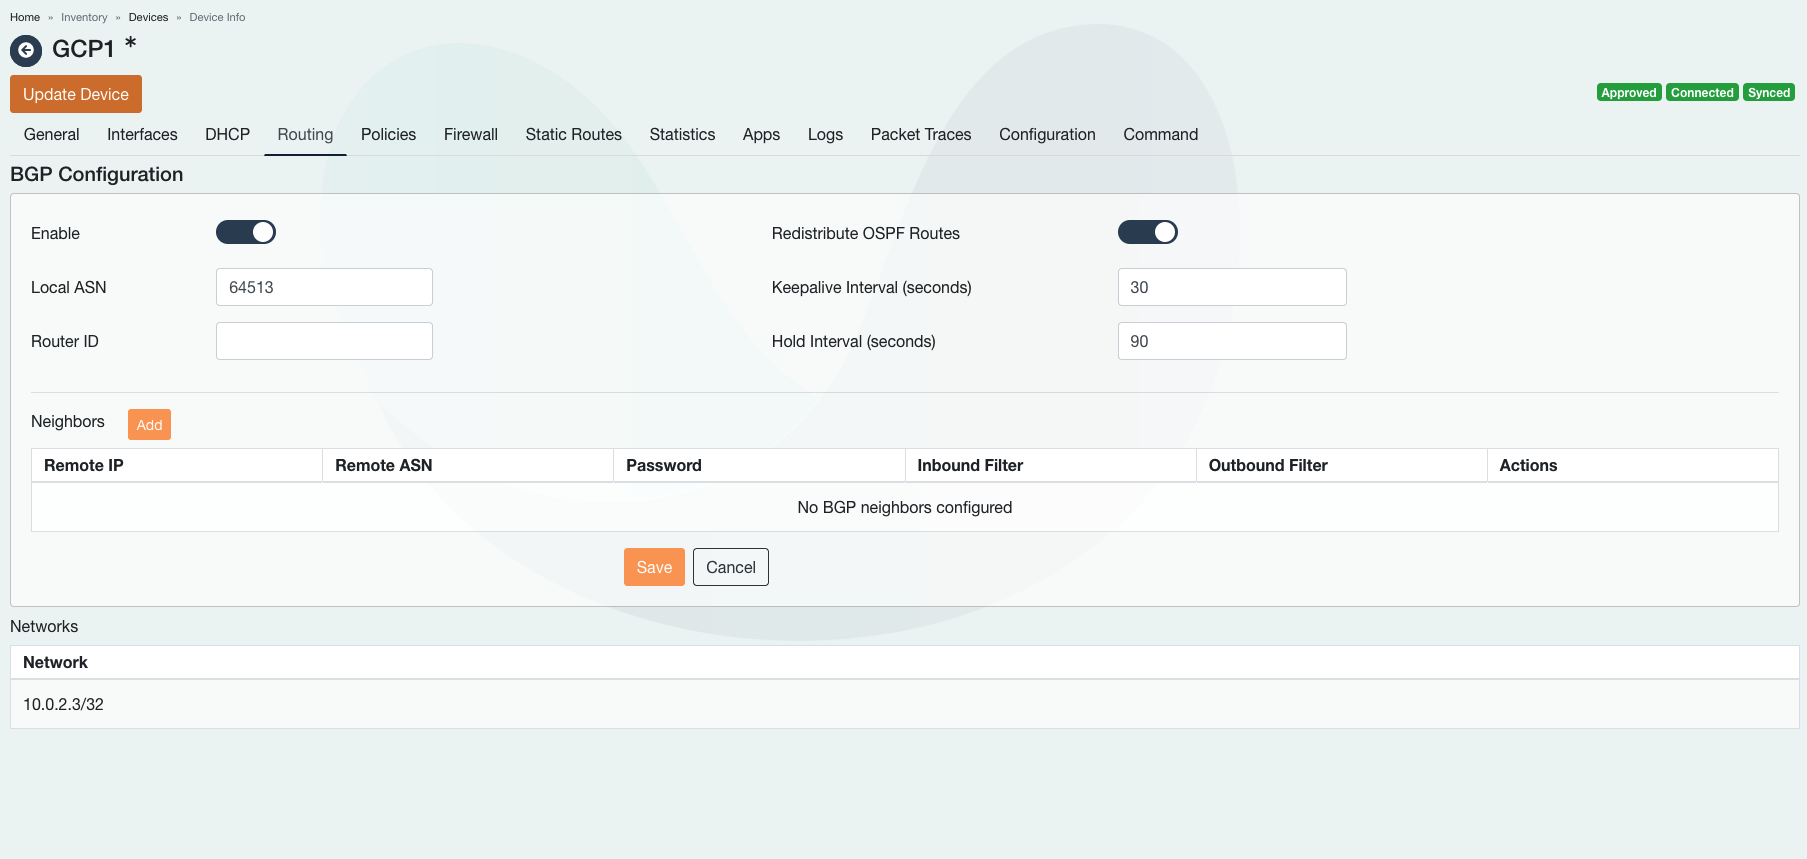
Open its settings and navigate to Routing tab, then click on BGP Configuration.
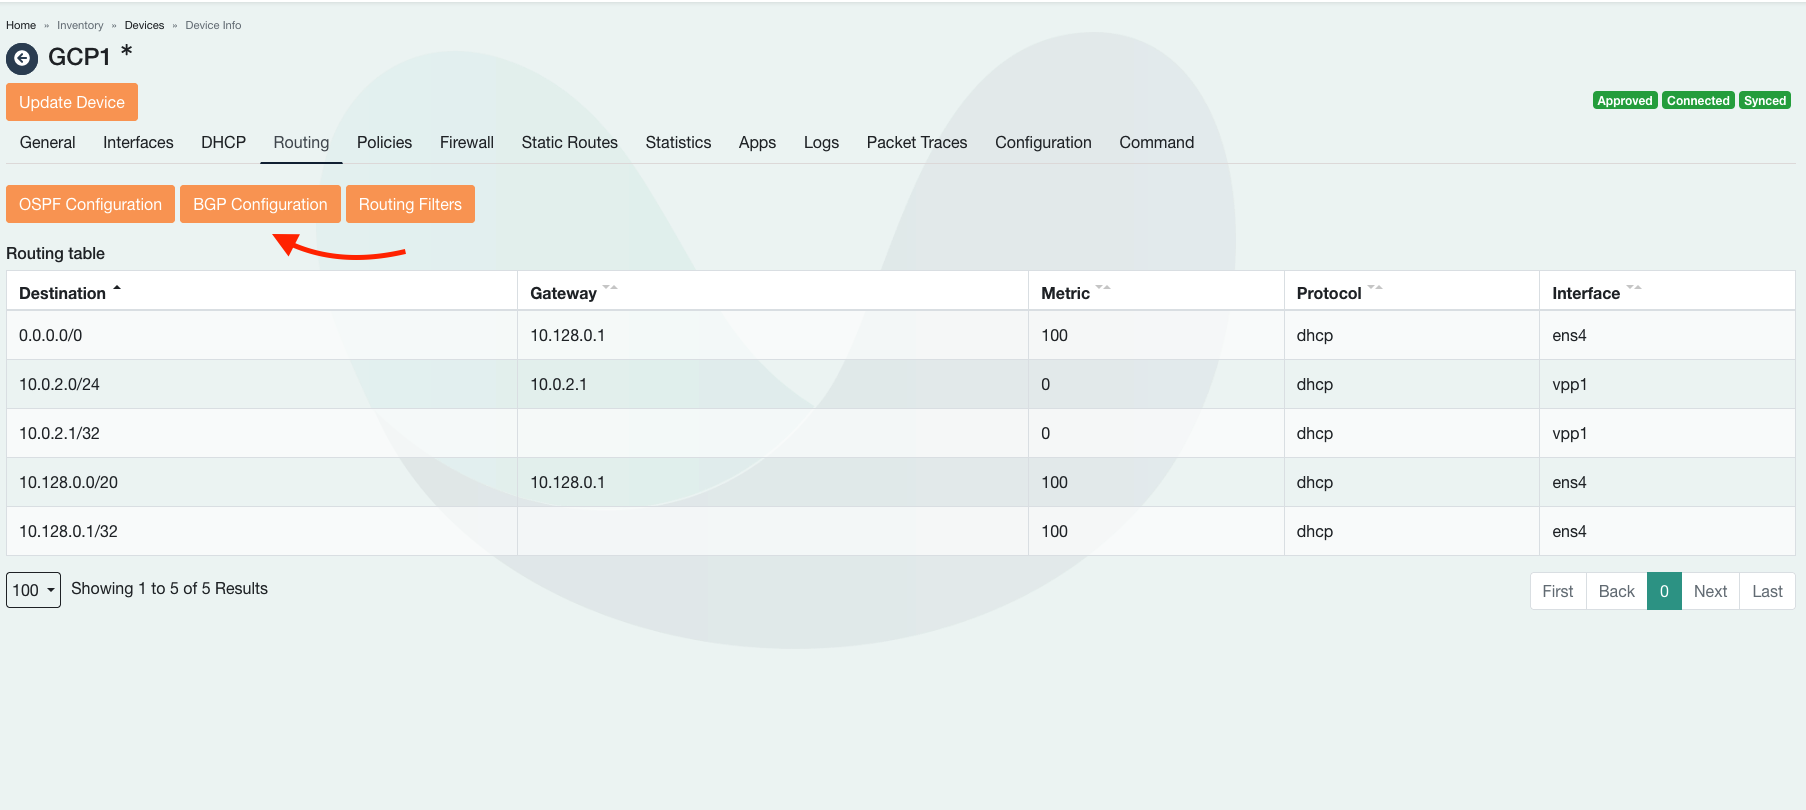
Set BGP to be enabled and enter local ASN. Note, this ASN must match the peer ASN set in GCP, in this case 64513.
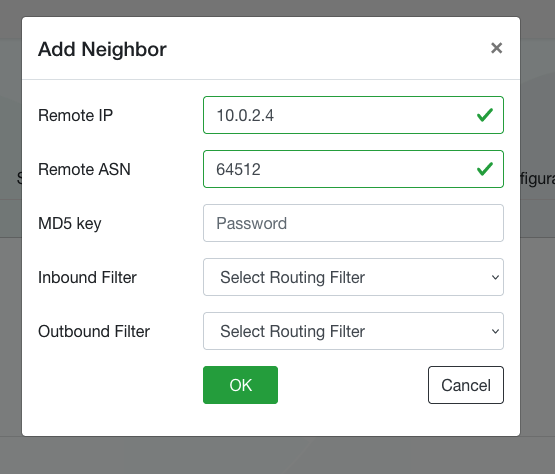
Click on Add in the Neighbors section and add a first GCP BGP peer. For remote IP and remote ASN set the GCP IP’s, which can be found at the last step in previous section. Repeat the process for second one.
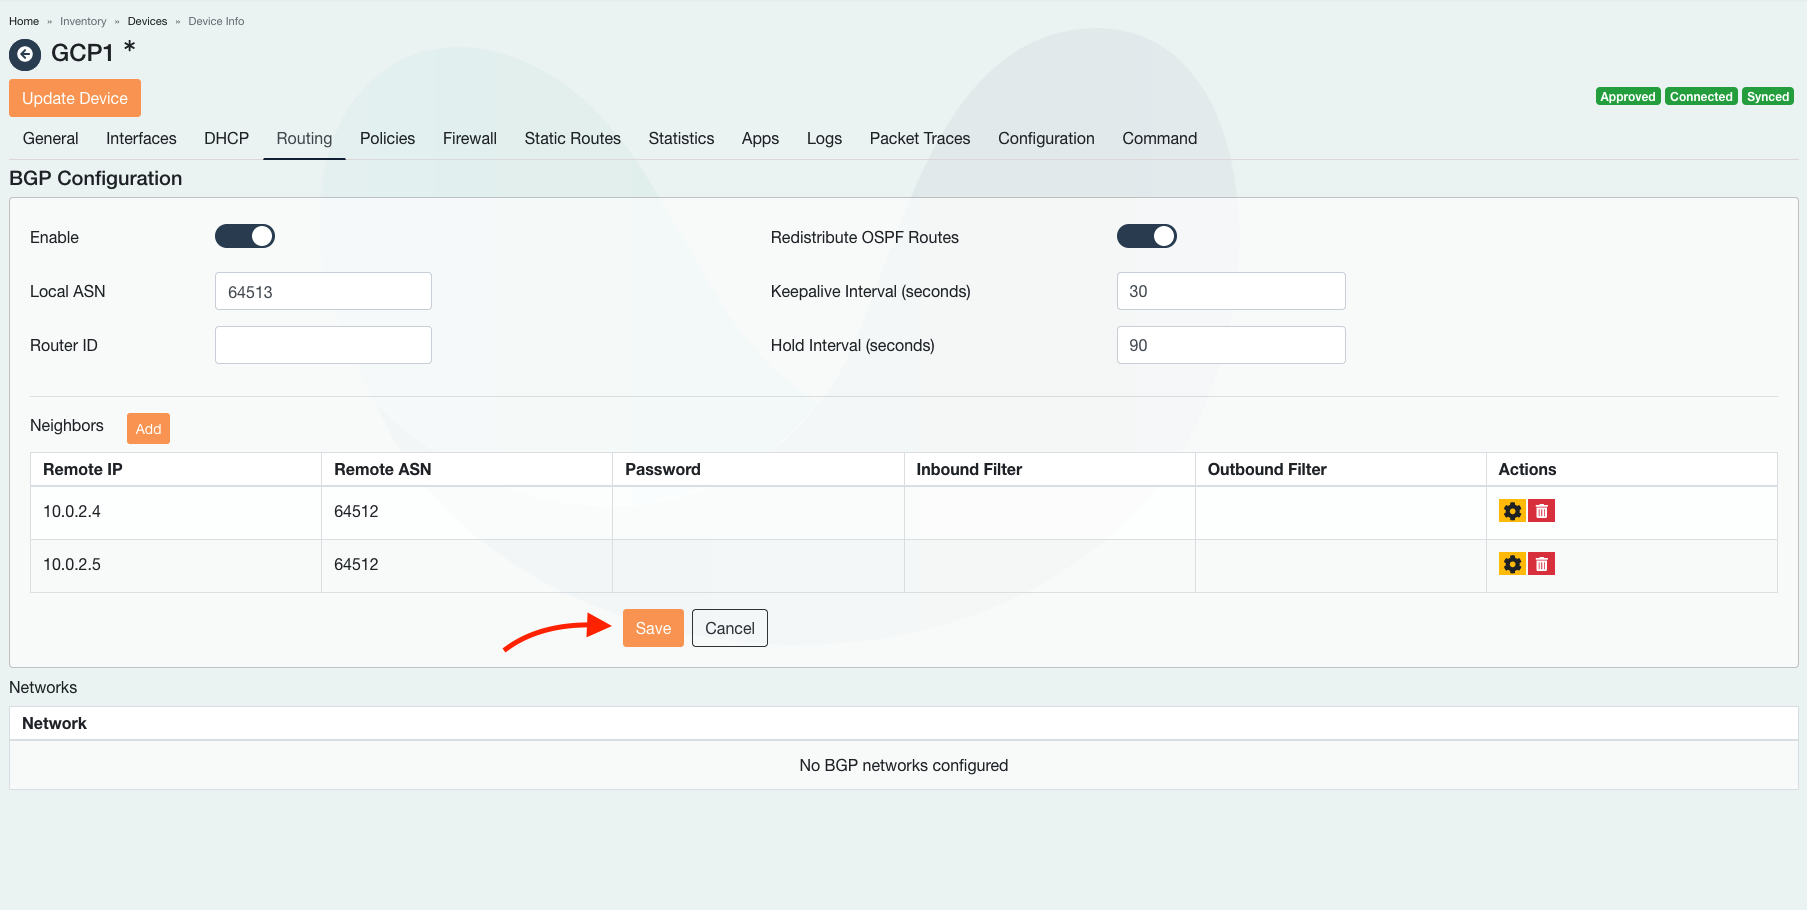
Confirm both remote IP’s under Neighbors match the GCP peers as well as remote ASN. Click Save.
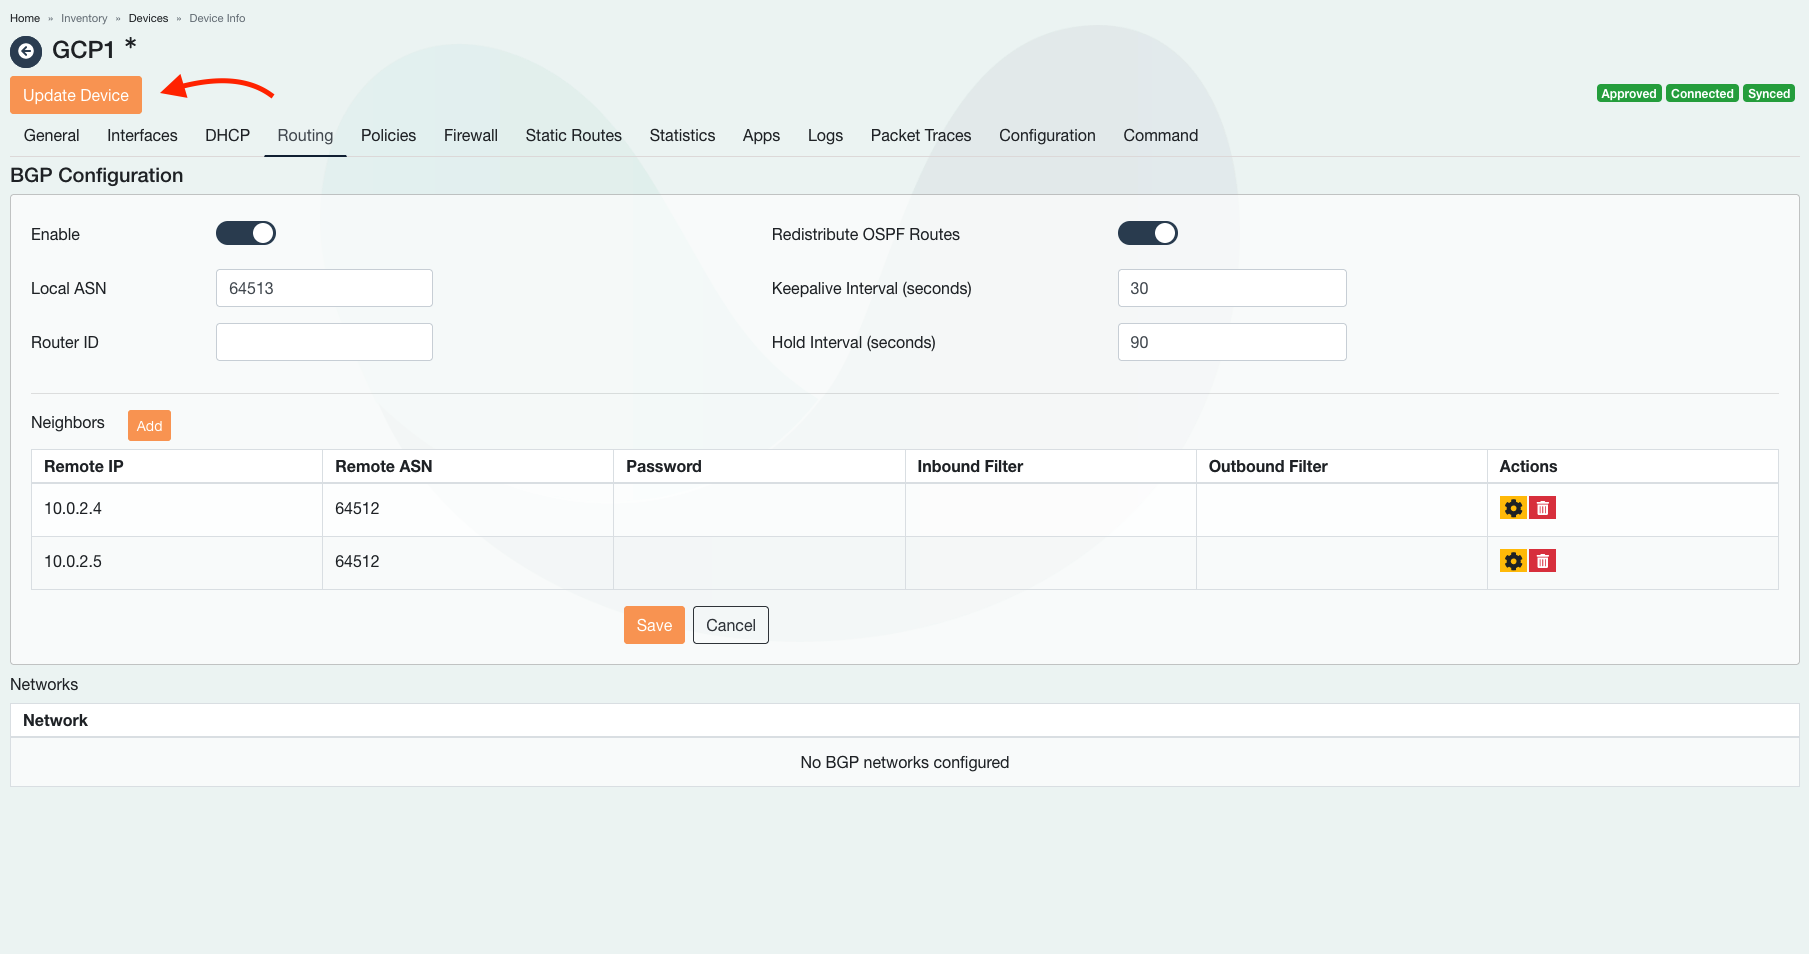
Click on Update device to deploy BGP changes to flexiWAN.
Now that BGP is enabled, navigate to Interfaces tab and under LAN routing change from OSPF to BGP. Make sure to not miss this step as peering will not occur otherwise.
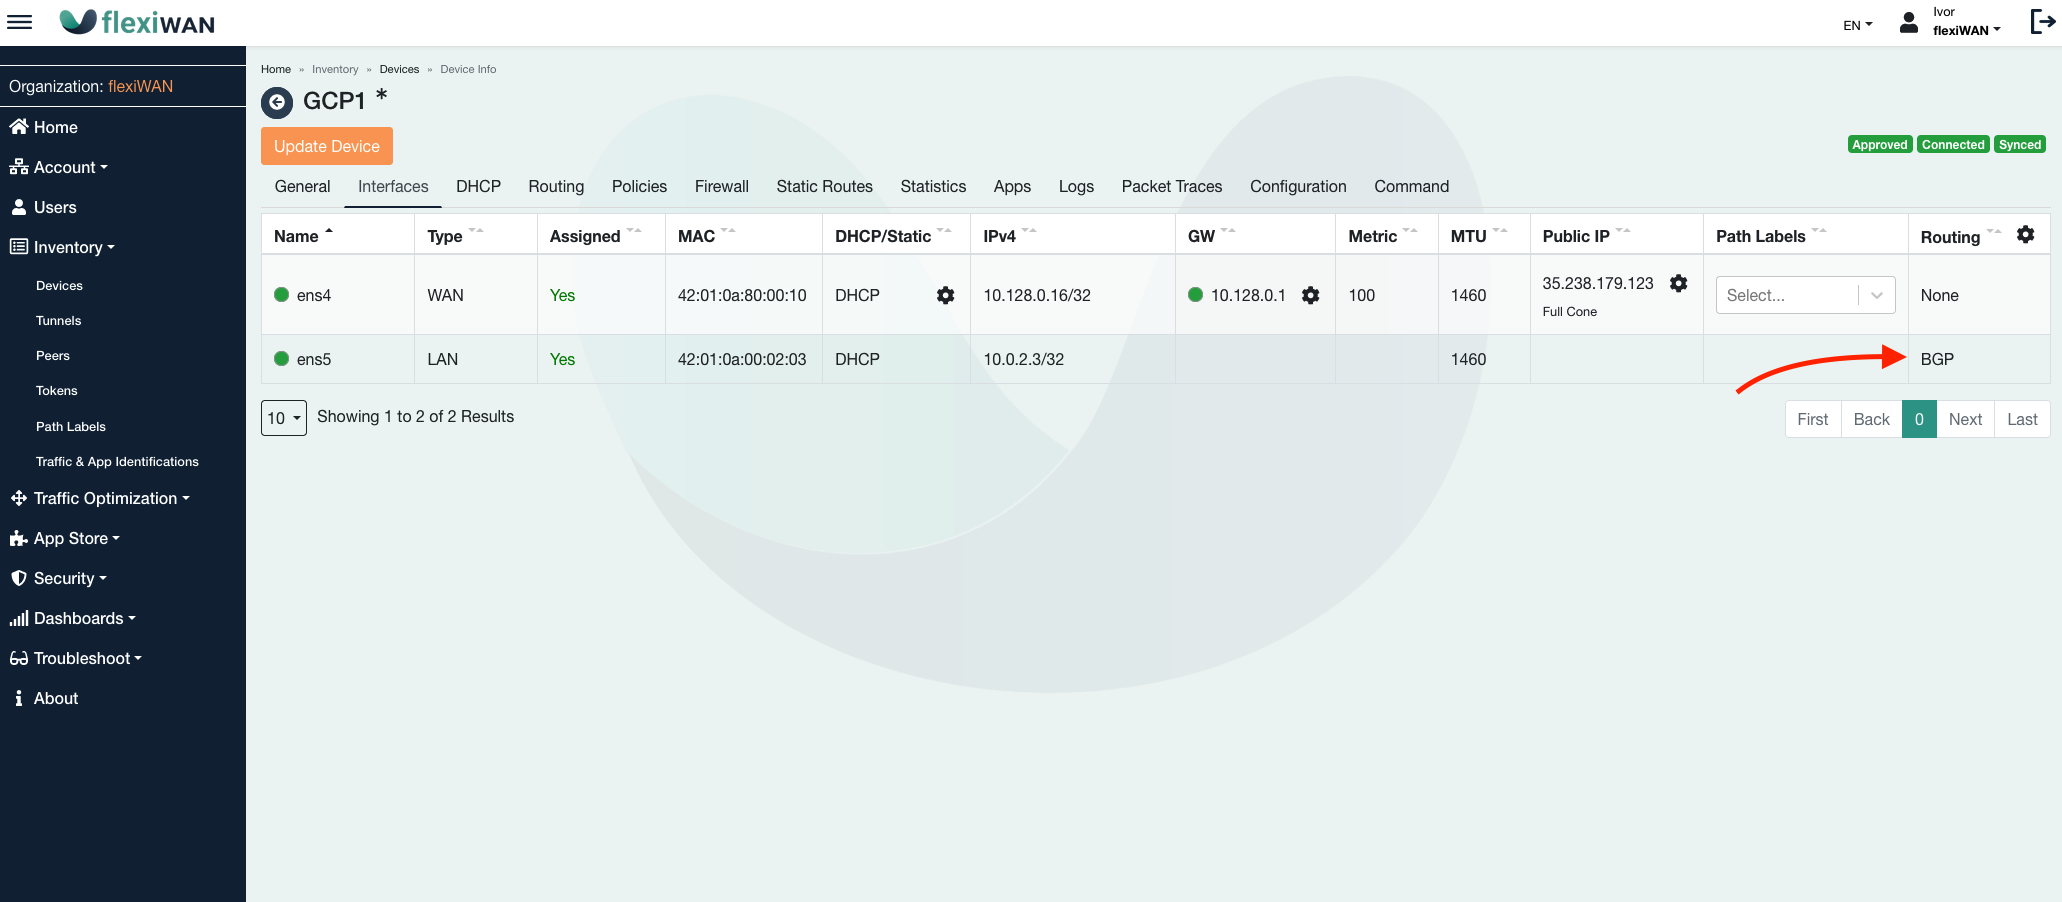
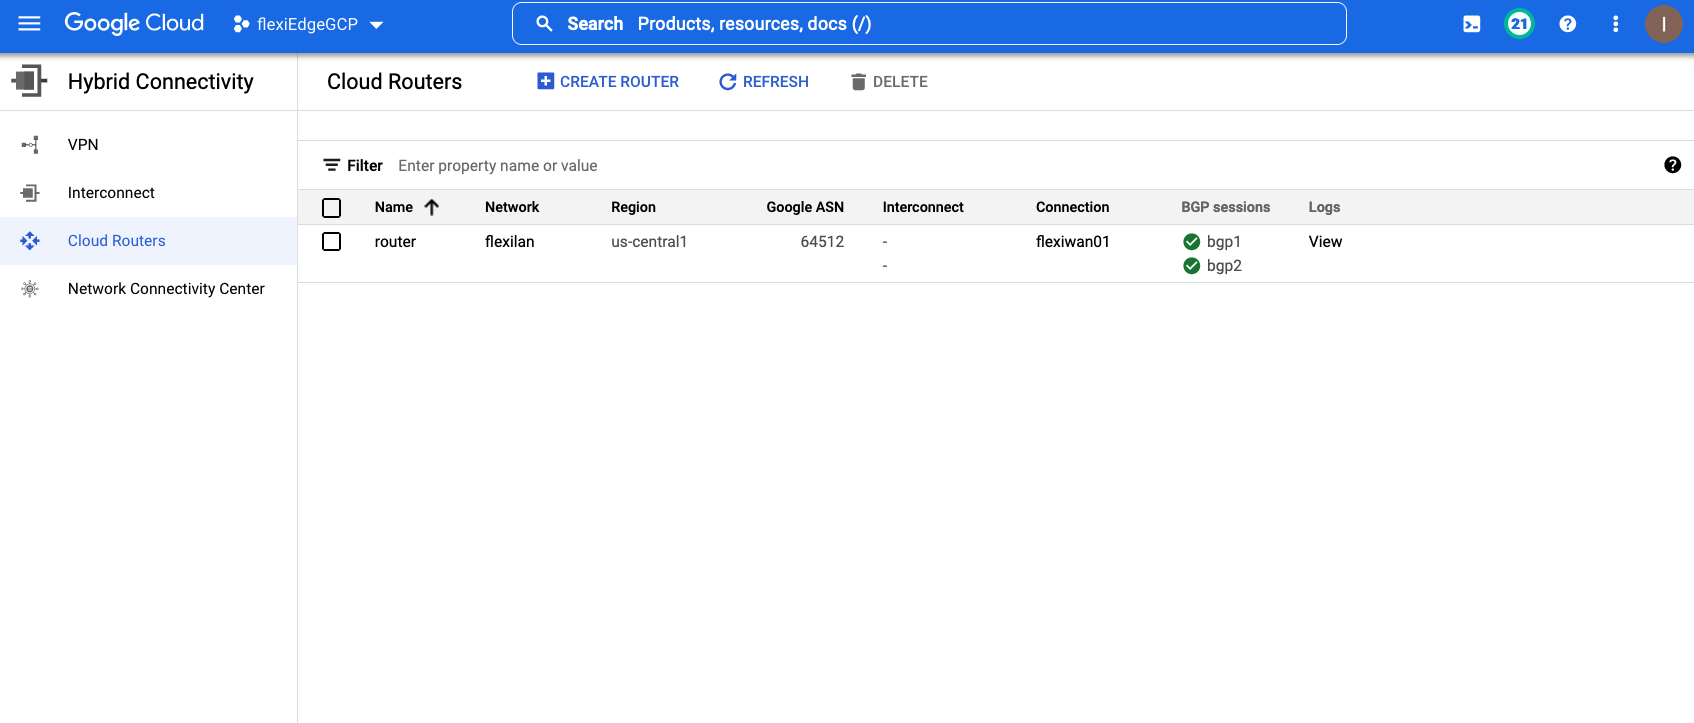
That’s it, BGP should be configured and enabled. Navigate to GCP console and open Cloud routers page. Confirm BGP sessions have green checkbox indicating peering is working.
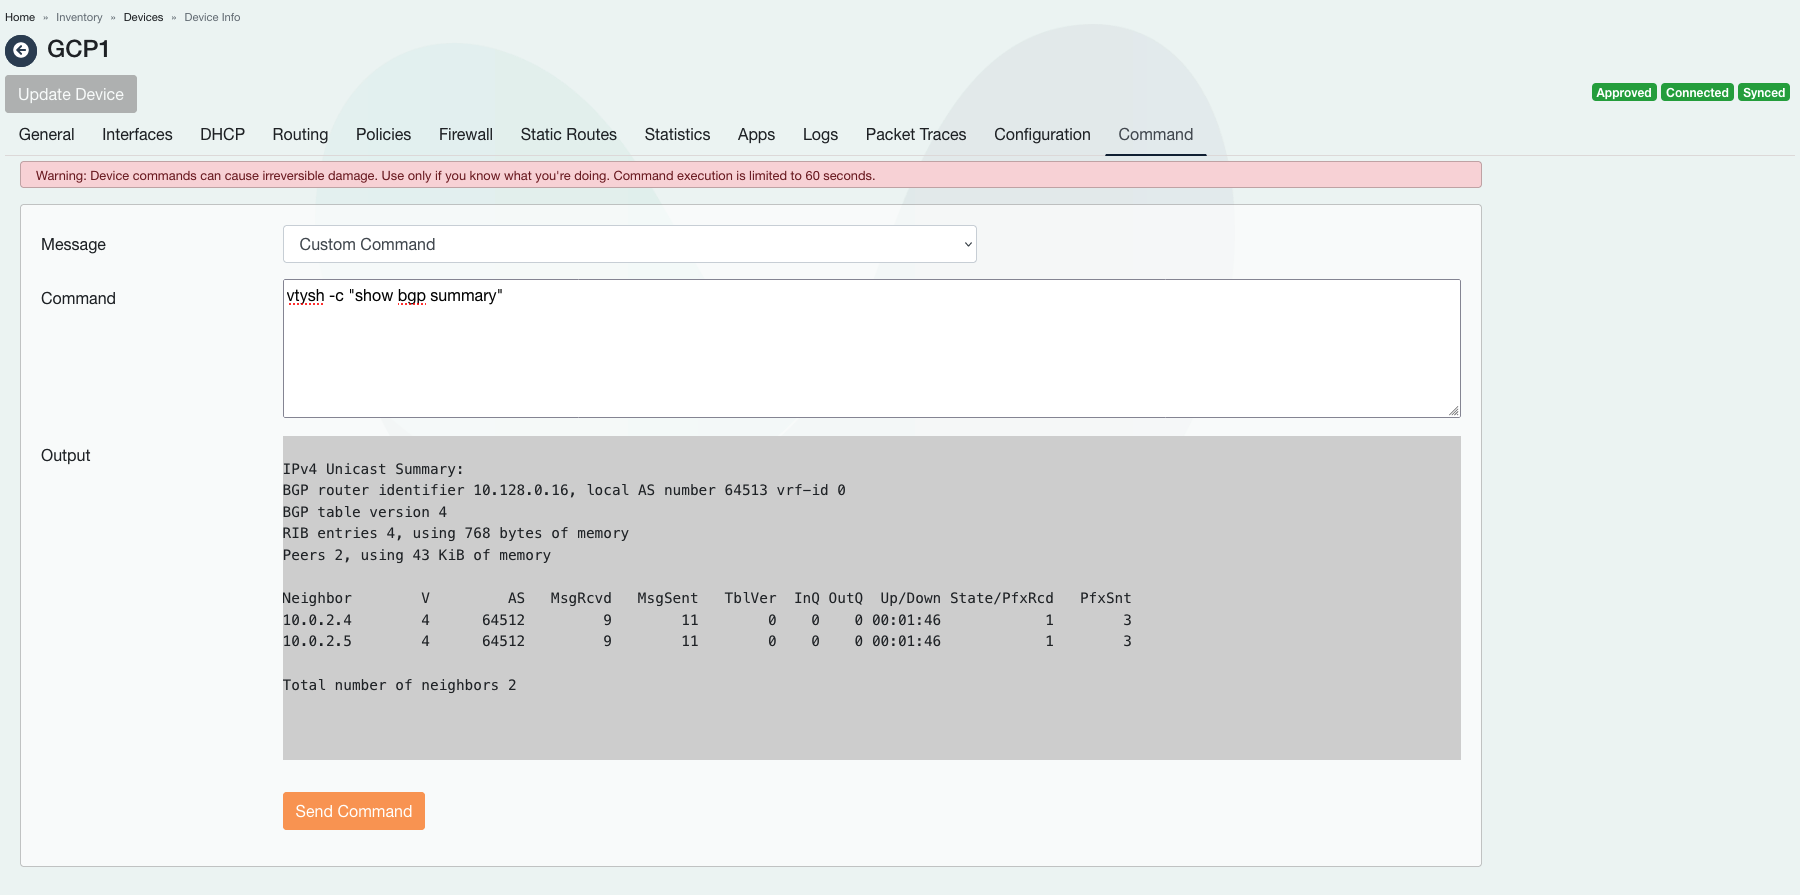
BGP neighbours can be also verified from flexiWAN side, navigate to flexiWAN device settigns and click on Update tab. Enter the following command vtysh -c "show bgp summary".